If you are not living under a rock, you must be familiar with Google Slides. This is a powerful and versatile presentation tool within Google Workspace that comes with great features to create compelling and visually appealing slideshows. These tools include collaborations, online publishing, organizing slides, narration, and animation and transitions.
While the tool is commonly used to show information via text, images, and charts, many users have yet to discover its ability to highlight specific elements within the images. As the name suggests, highlighting is a great way to emphasize key points, draw attention to a particular area of the image, or make complex information easy to understand.
In the post below, we will learn about using this presentation tool for images of highlights, learn some tips and tricks for editing images, and find a few alternative options. So, let’s dive in and explore this tool in detail.
Part 1. Overview of Google Slides
Google Slides is a free, versatile, and cloud-based presentation tool that is a part of Google Workspace along with other services such as Google Docs or Google Sheets. It allows users to create, format, and share presentations both online and offline.
With its intuitive interface, powerful features, and ability to seamlessly integrate with other Google services, it has become the most sought-after tool for creating and sharing dynamic presentations.
So, whether you need a versatile and accessible presentation tool for individual, business, or educational purposes, Google Slides is, without a doubt, the top choice for you.
Features of Google Slides
When it comes to creating, formatting, and sharing presentations, Google Slides offers a comprehensive range of tools designed to cover every aspect of creating presentations. Here is the breakdown of the core features:
- Collaboration:it is one of the most popular and critical features that allows for real-time presentation and spreadsheet sharing with others. With this feature, multiple users sitting at different locations can work together in real time without needing to be present in the same room.
- Add-Ons:With this Google Slides feature, you can integrate the data into your slides using third-party apps or add-ons that will enhance functionality and improve presentations. For example, for data visualization, there are different add-ons to create charts, diagrams, polls, and more.
- Animation and Transitions: Since most people prefer presentations with animations compared to texts, this feature comes in handy. By adding animated elements to your presentation, you can enhance its visual interest and boost engagement. Unlike text-filled slideshows, people pay attention to your presentation.
- Offline Access: Many Google services offer offline services, and Google Slides is no exception. This critical feature allows you to continue working on your presentation even with poor to no internet connectivity. With this feature, you do not have to worry about having a good internet connection, as you can stay productive and finish the presentation.
- Image Editing:Google Slides offers a range of image editing tools, including cropping, resizing, highlighting, rotation & flipping, and masking with shapes. These tools are designed to enhance and customize images directly in the presentation without needing any tools for image editing and design skills.
Limitations and Challenges
While Google Slides is an excellent tool for creating dynamic presentations, it has a few limitations that you must consider.
- Fewer Advance Features:Compared to other popular presentation tools and applications, Google Slides has limited advanced features that may sometimes be inconvenient for users.
- Offline Working: While having offline access is excellent for continuing working, even without an internet connection, you will not be able to collaborate with other team members in real-time.
- Compatibility Issues:When importing or exporting presentations from other tools, Google Slides may run into issues and may not support some formats.
- Security Concerns: Since the tool is free and cloud-based, some people may have data security and privacy concerns when saving important files.
When using Google Slides to create and share your presentations, make sure you know about these features and challenges to ensure you complete your work without any limitations.
Part 2. Using Google Slides Highlighter for Image
Highlighting an image in Google Slides is one of the lesser-known features of Google Slides. Using this feature, you can enhance the visual interest of your images and give your presentation a more professional and sleek look.
Let’s say you want hair highlights images for your presentation; here is a step-by-step guide on how to use Google Slides highlighter for image editing.
Step 1: Open Google Slides
The first step in highlighting images is opening Google Slides.
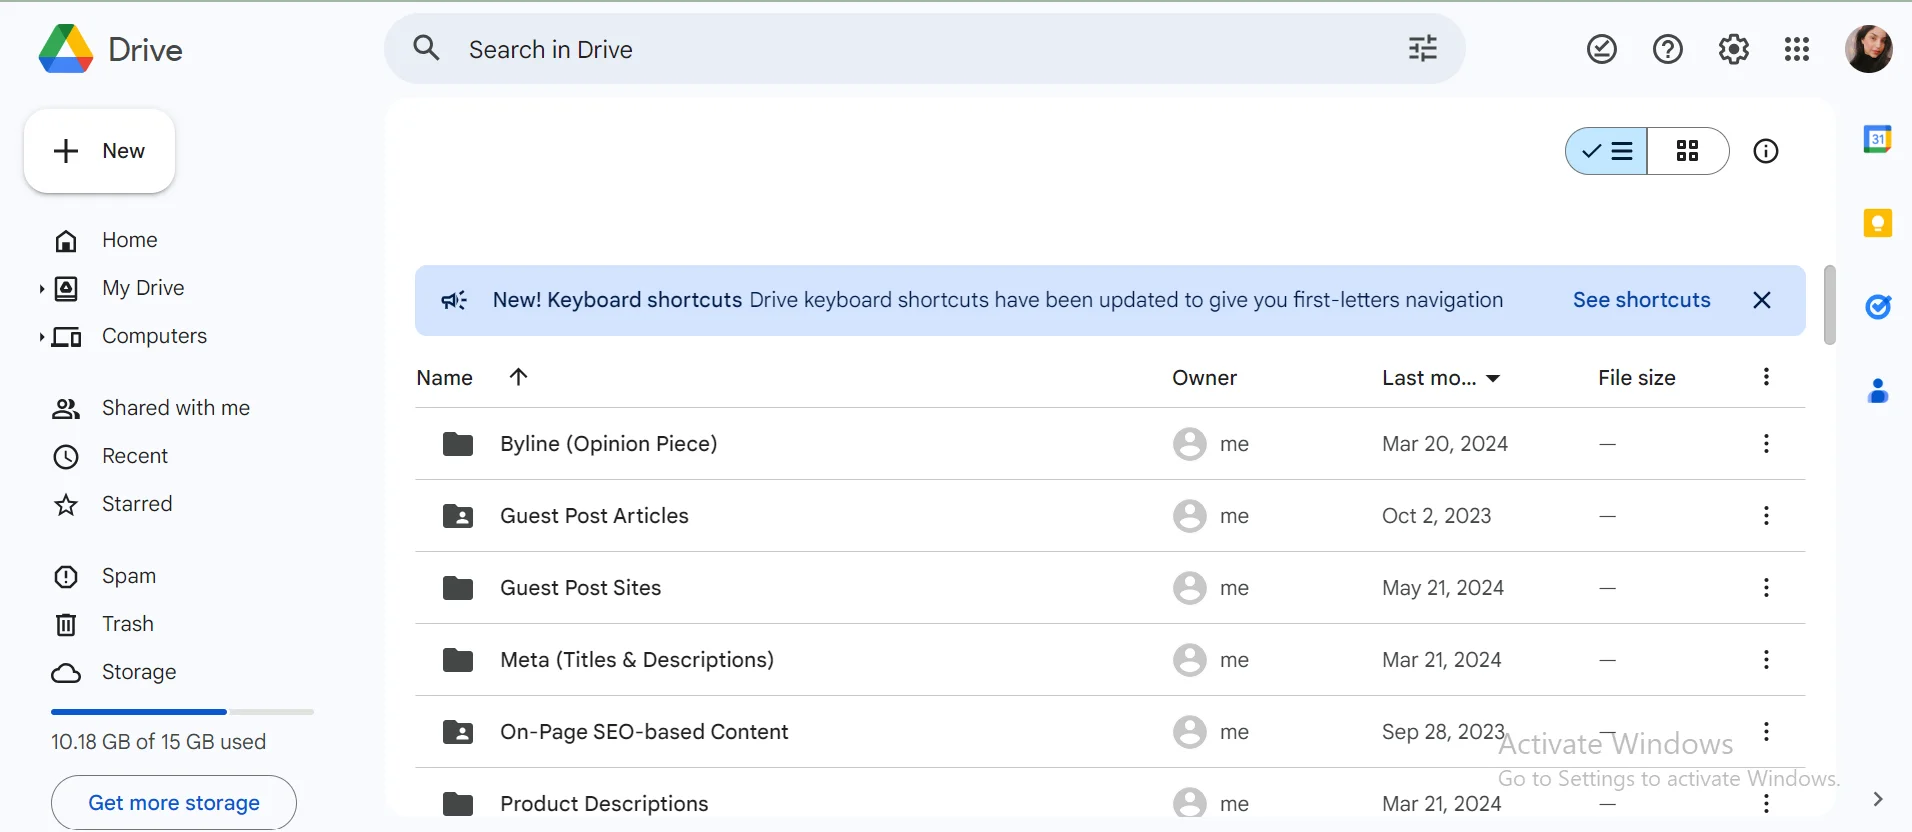
To do so, you need to open your Google Drive and navigate to the left side of the screen.
Here, you will see several options, but you need to click on the “New” button with a “+” icon.
After clicking on the button, a drop-down menu with different options and Google Services will appear in front of you.
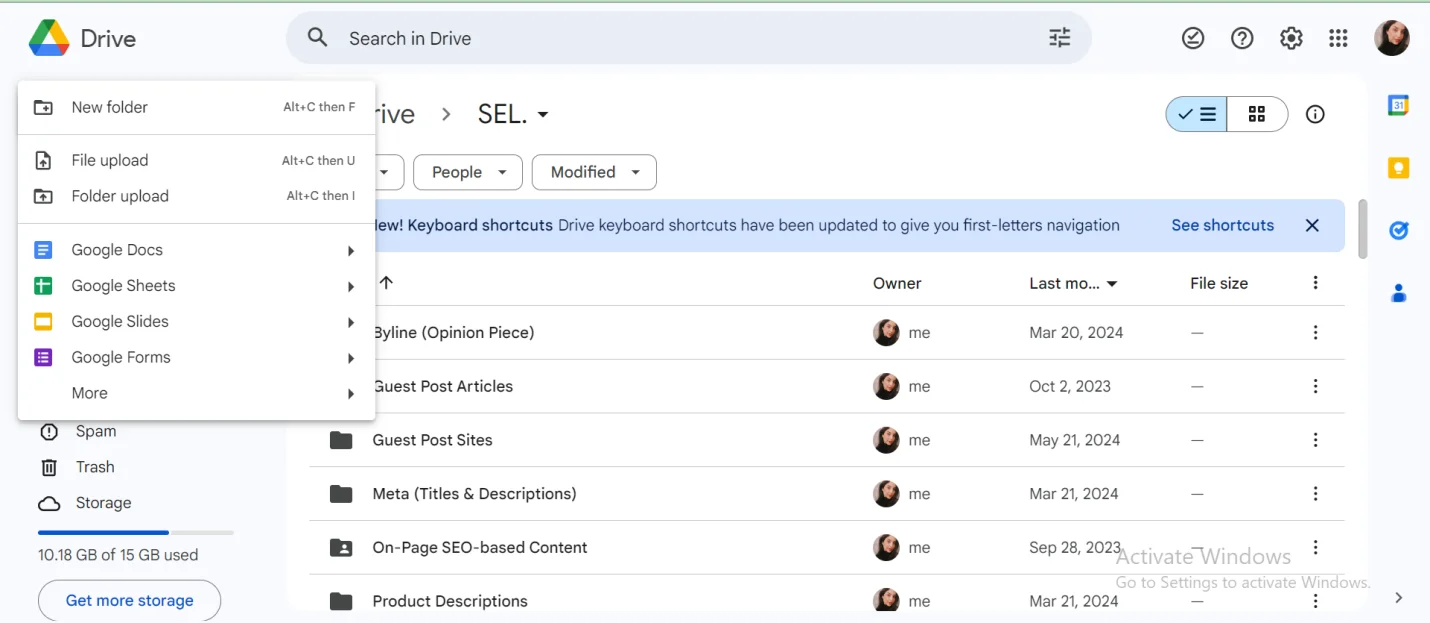
From these options, click on “Google Slides,” and this will lead you to a new window with Google Slides opened and ready for you to start with your latest presentation.
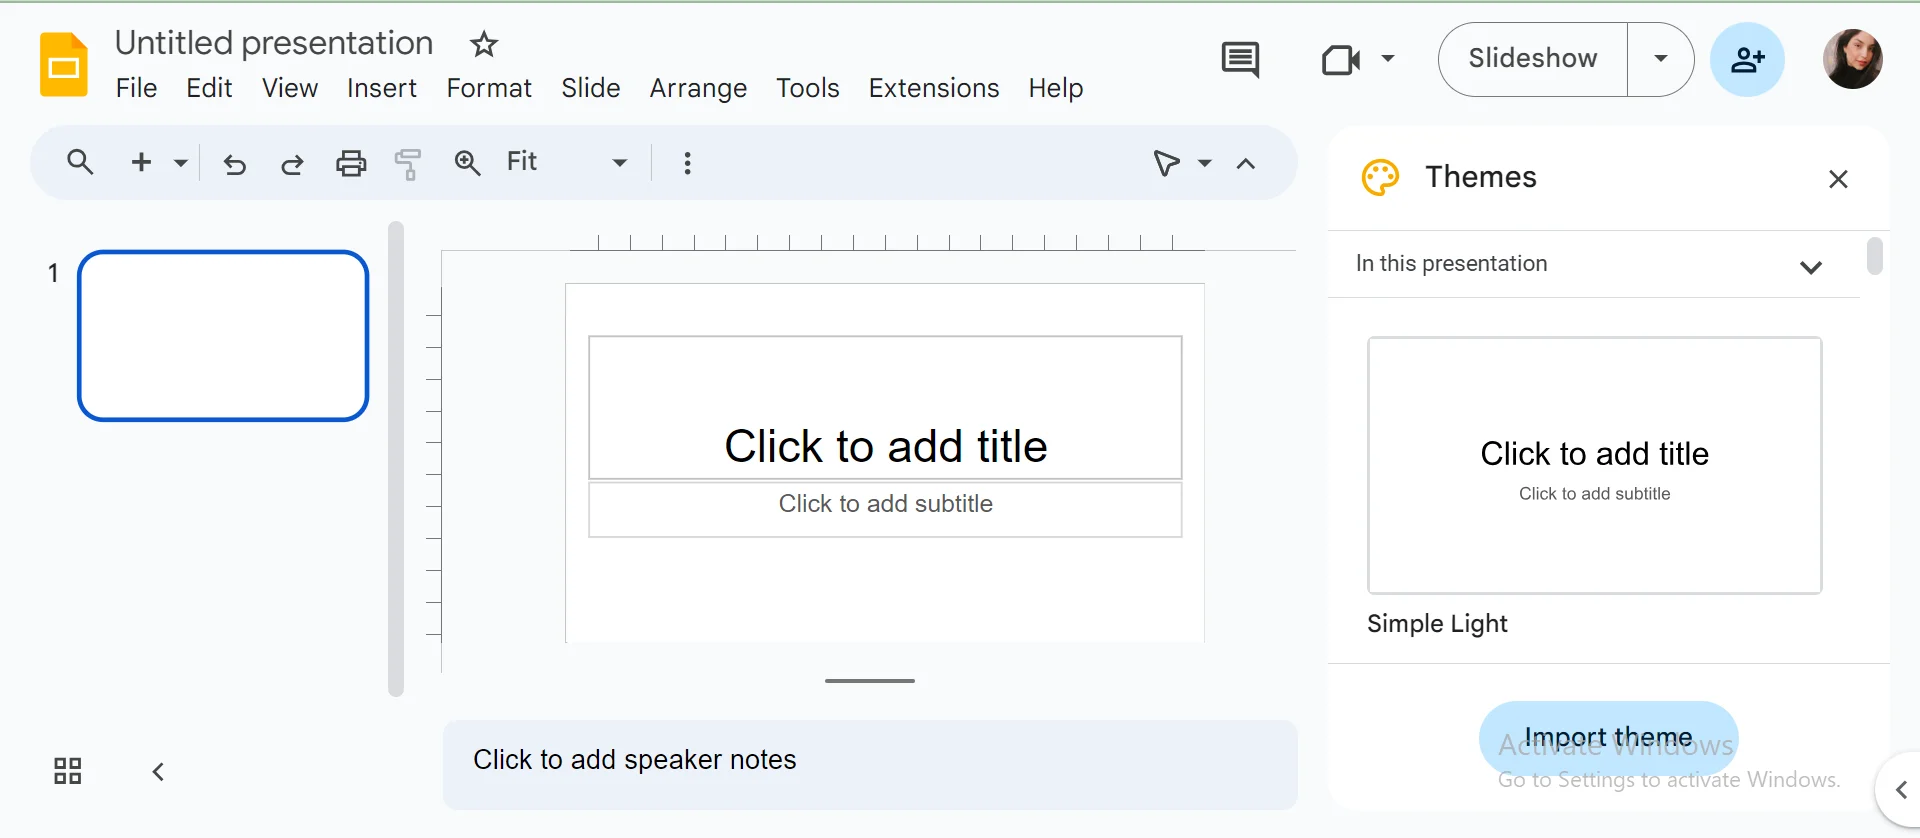
First, go on and name your file so that you know which presentation you are working on. Since we are working with hair highlights images, let’s give the presentation with the same title.
Step 2: Insert an Image
After naming your presentation, add a title and start with the image editing process.
Go to the Slides where you want to insert the image. Next, navigate to the top menu of Slides and click on the “Insert” menu.
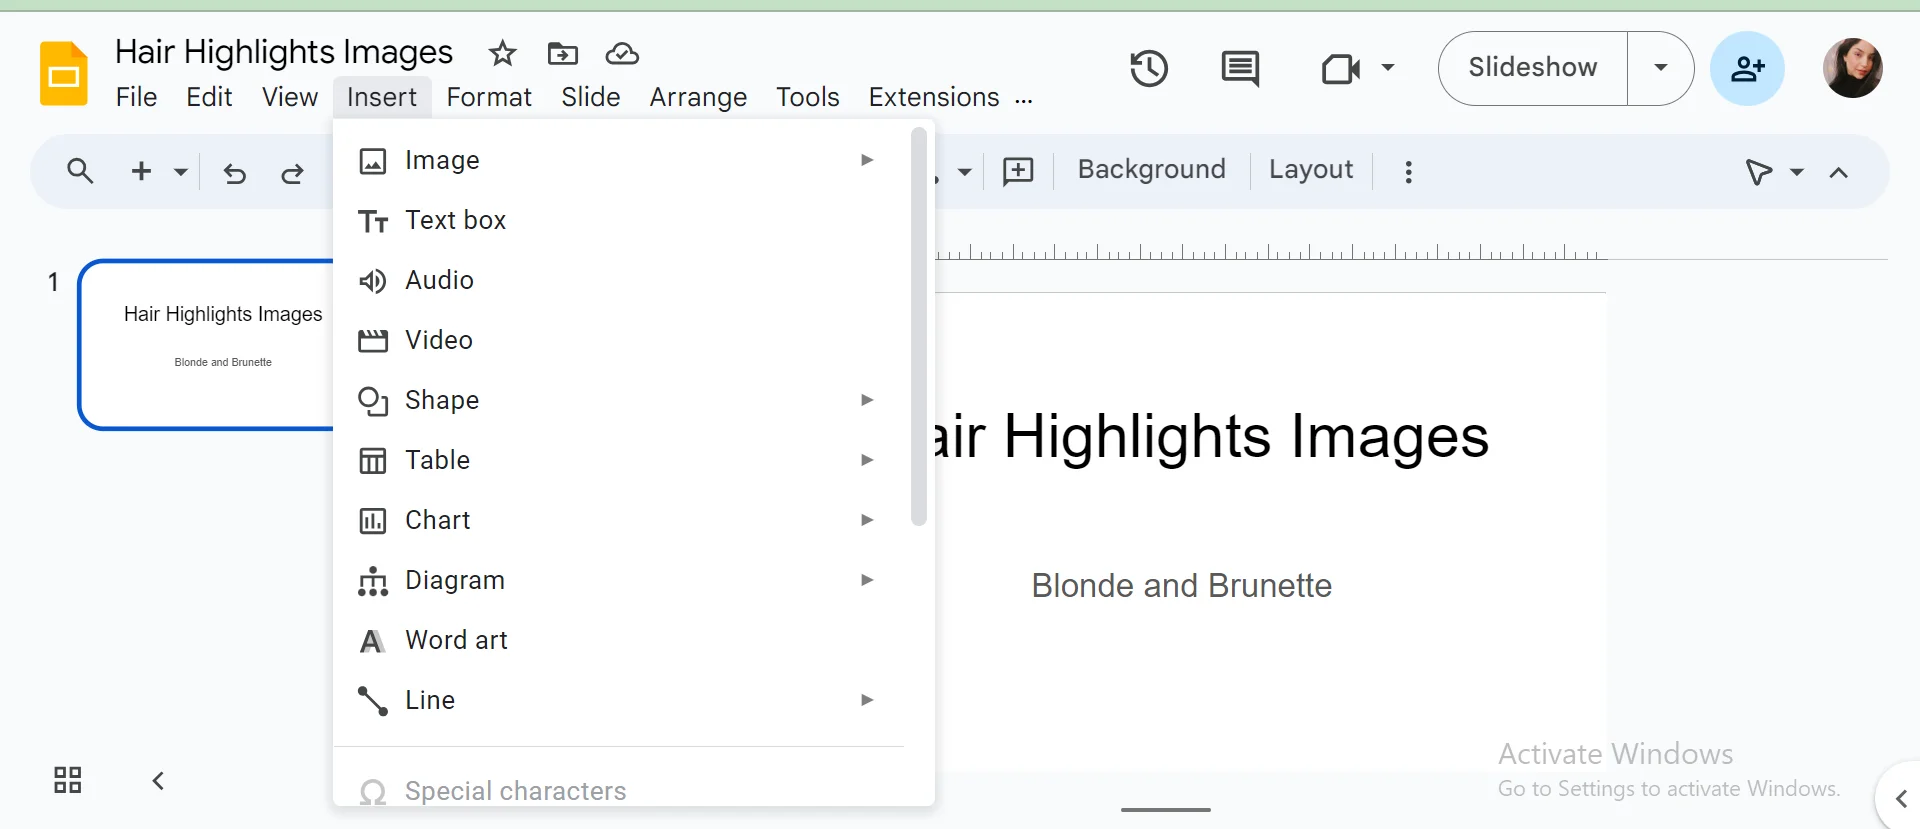
After clicking on Insert, a drop-down menu will appear, and you will need to choose “Image” from the menu.
Now, you will see there are multiple options for inserting images into the Slides. You can upload from your computer, search the web, or upload from Drive.
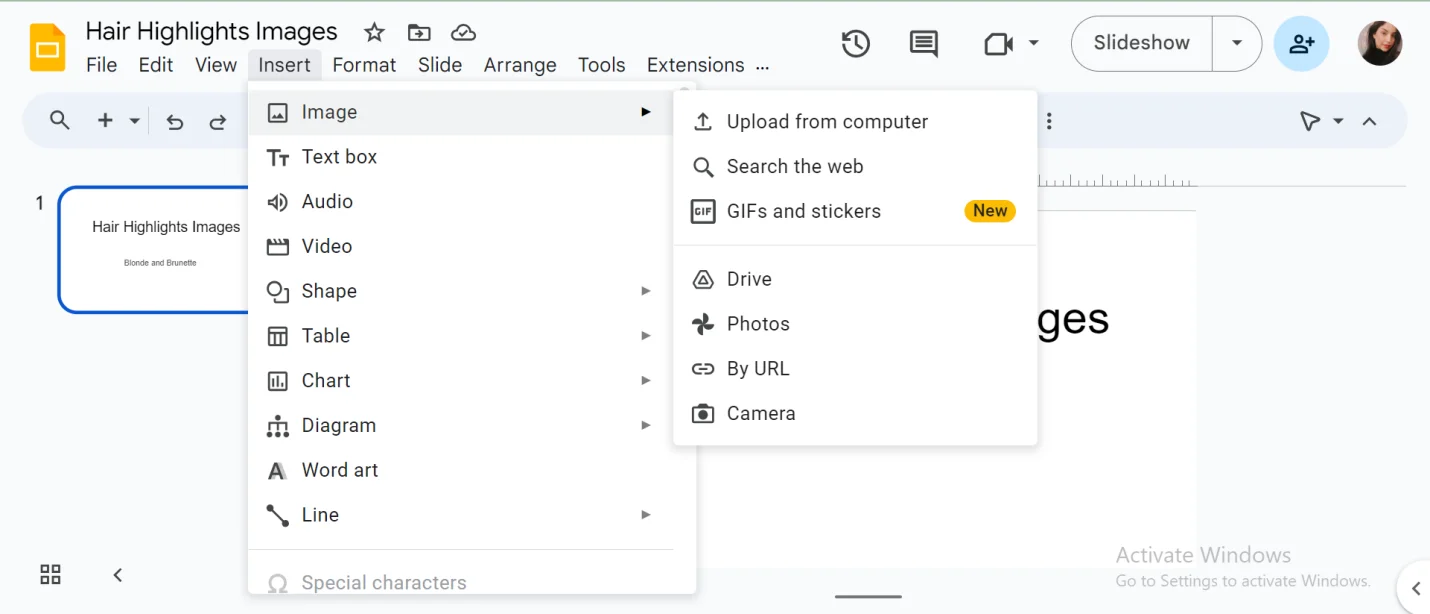
To upload an image from the computer, click on this option and select the image you want to insert from your computer.
However, it is important to know that Google Slides does not support all types of image formats. You can upload JPEG/JPG, PNG, GIF, BMP, and SVG files. If Slides does not support the format, simply search for any free tool online to convert the image into these formats.
Also, the image size must be less than 50 MB and cannot be any more than 25 megapixels. If Slides support the images, there should be no issues uploading them.
Once the image is uploaded, you can crop, resize, adjust, and highlight it based on your requirements.
Step 3: Create a Shape for Highlighting
After inserting an image, click on the “Insert” menu again.
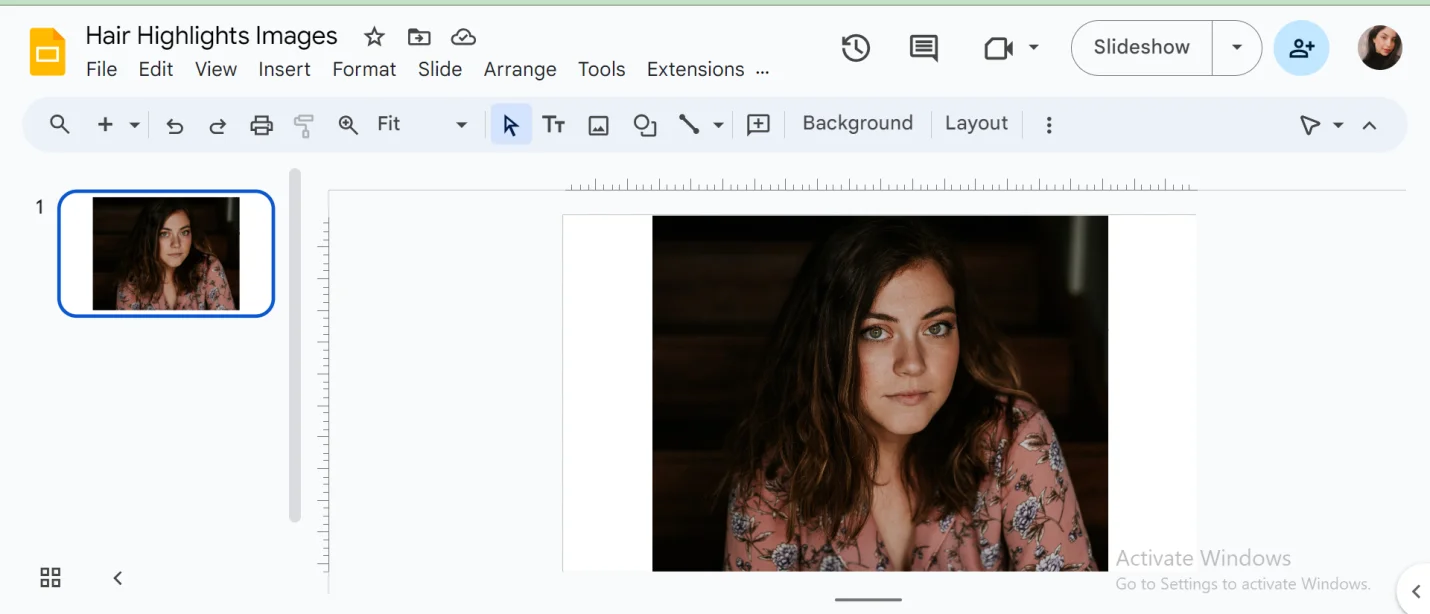
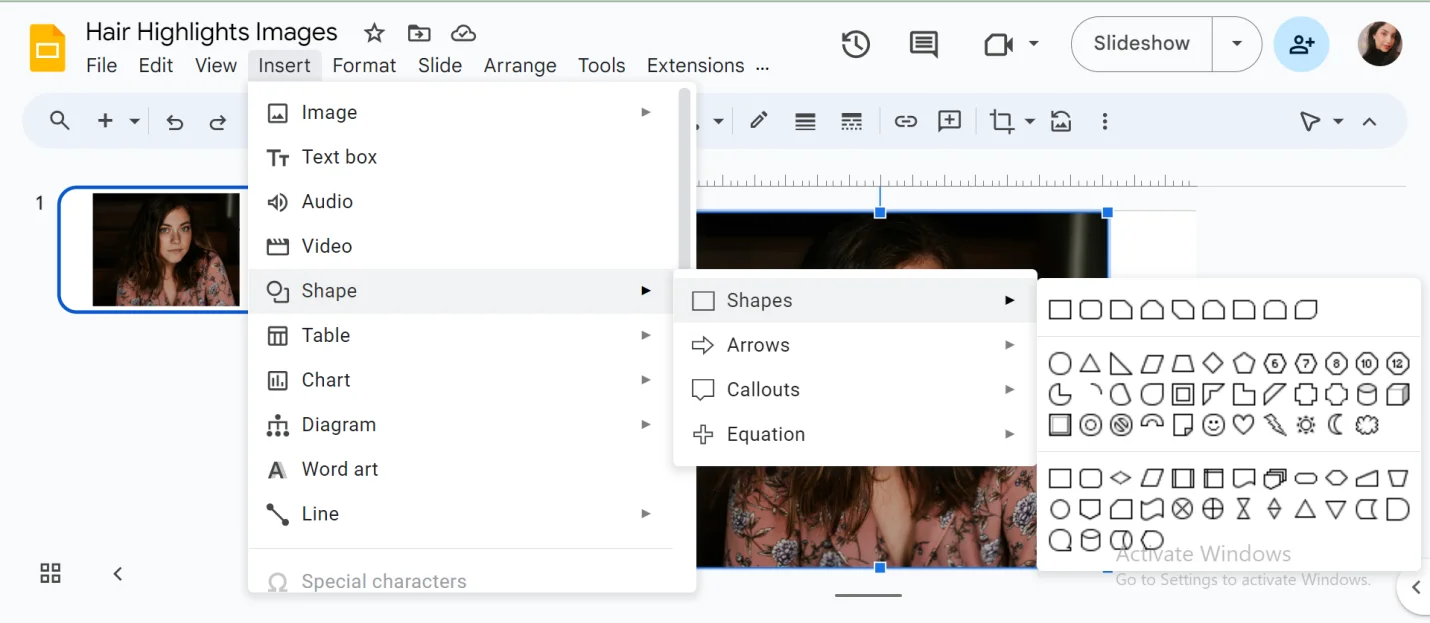
Before adding highlights to your image, you will need to create a shape that you can select from the “Shape” option from the Insert menu, and four more options will appear on the screen.
Again, click on “Shapes” and choose any shape that works for the area you want to highlight. You can choose from rectangles, circles, ovals, and several more shapes.
Next, you want to draw the chosen shape over the part of the image you want to highlight. Of course, using image editing tools, you can crop, resize, or reposition the shape as you like.
Step 4: Adjust the Shape’s Transparency
Next, you want to click on the shape and select it in order to make the changes.
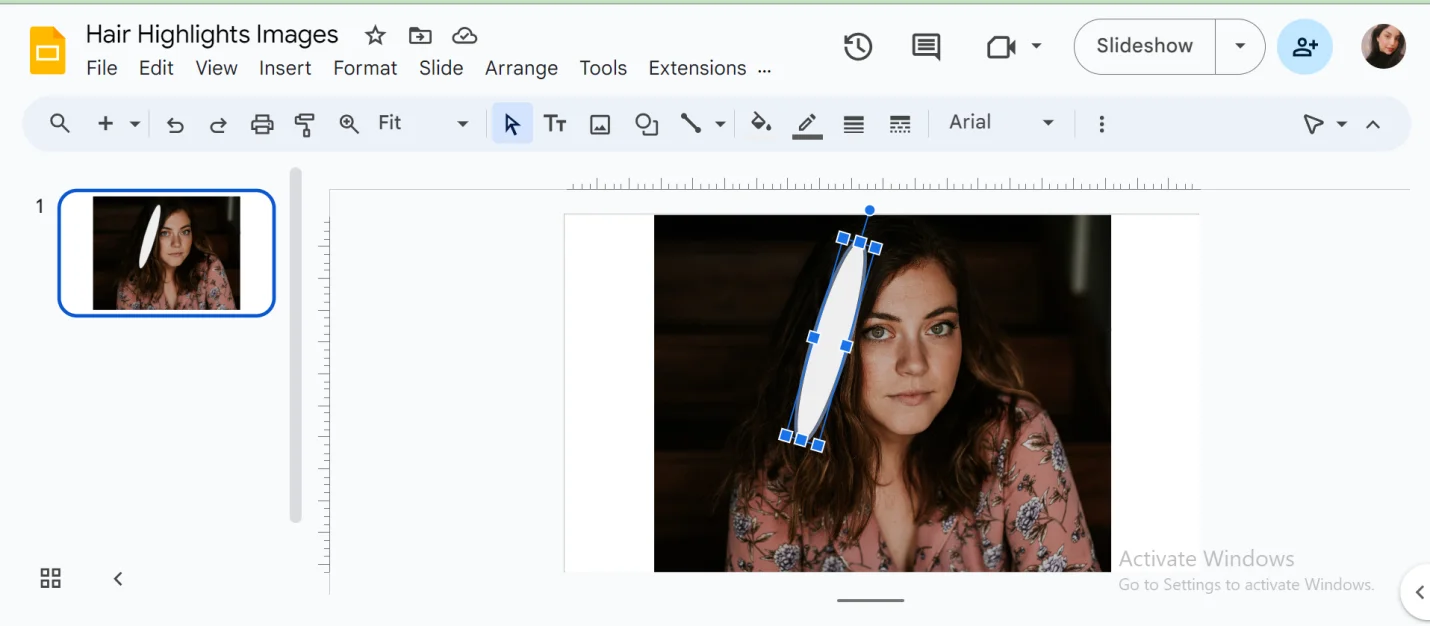
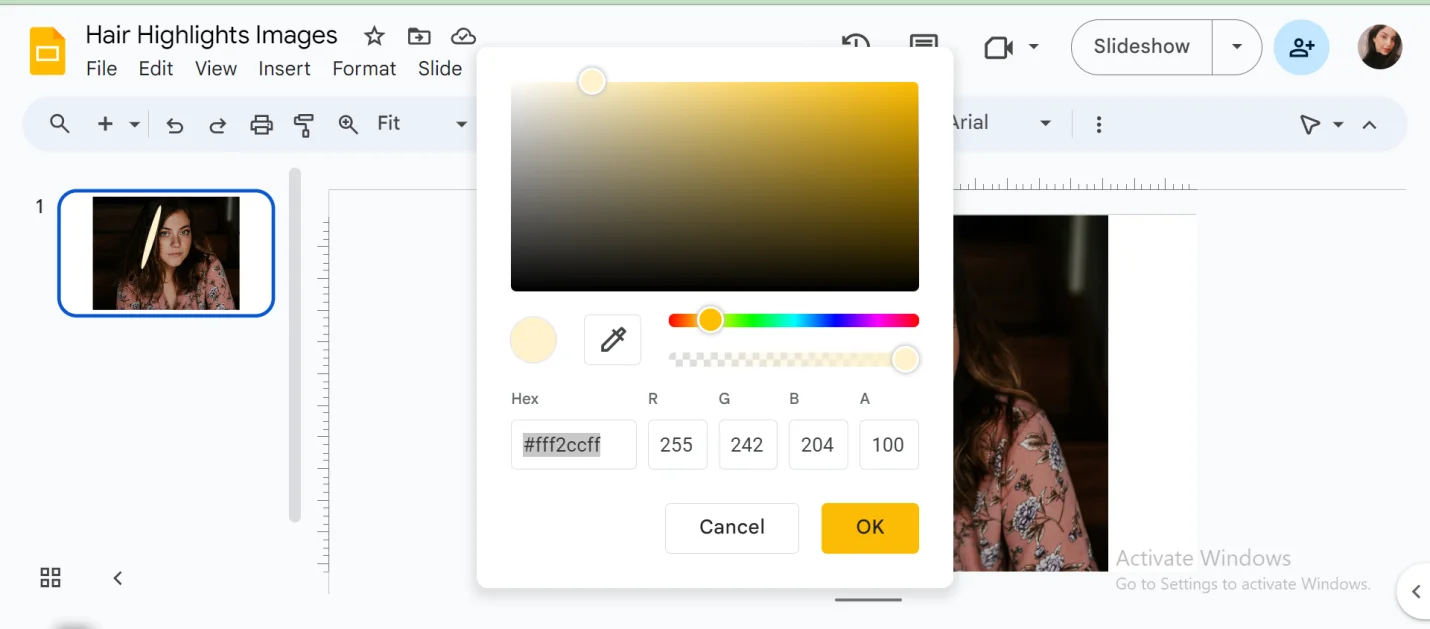
Now, navigate to the toolbar at the top of the screen, click on the “fill the color” option that is represented with a paint bucket icon, and select the color of your highlight.
To adjust the transparency, you can click on “Custom” at the bottom of the solid color palette.
You can use the transparency slider to adjust the shape and highlighter until you get your desired results.
This will allow you to add natural highlights to the image.
Step 5: Fine-Tune Your Image Highlight
If you are not getting the desired results for images of brunette hair with highlights, you can fine-tune your image by adjusting the size, position, and transparency.
The key here is to get the highlight color right so that it does not look awkward and forced.
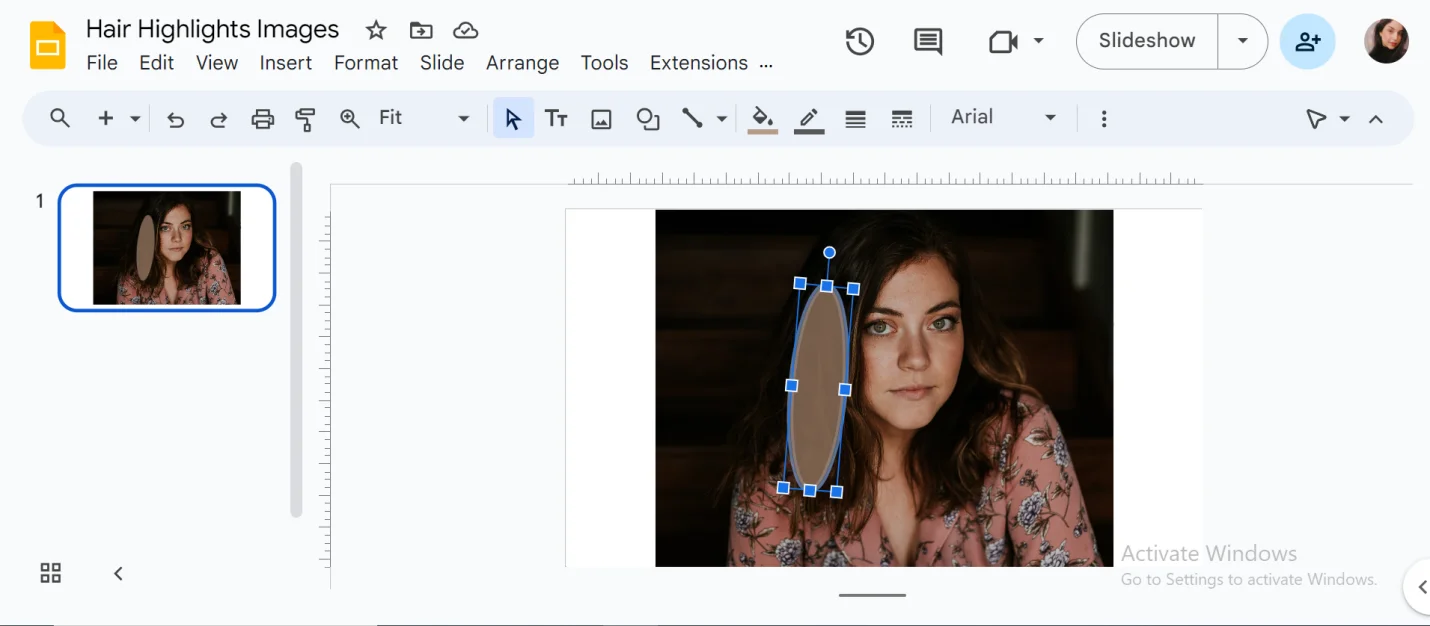
However, the purpose is to draw attention to that part of the image or emphasize on important features.
Step 6: Add Text (Optional)
If you want to add text to your image, you simply need to navigate back to the “Insert” menu from the top toolbar and click on “Text Box” option.
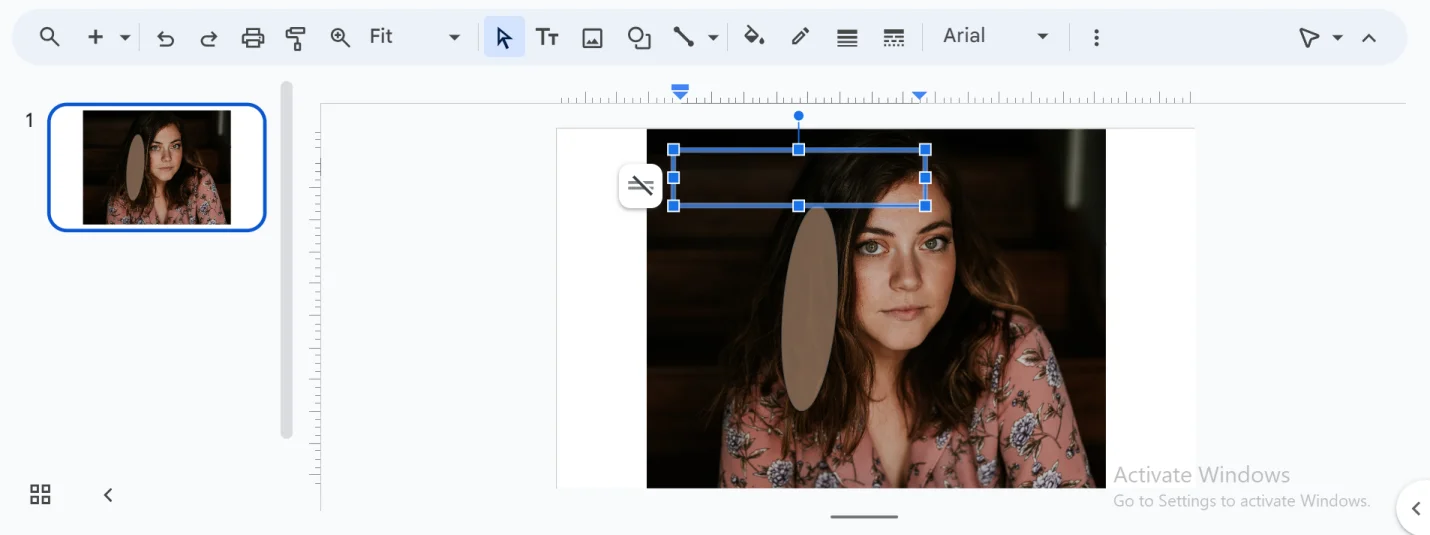
After clicking on the option, you can draw the text box over the highlighted part of the image.
You can also adjust the font size, color, and style of your text according to your requirements.
Step 7: Save the Google Slides Presentation
Finally, you want to review the slide to ensure you have achieved highlights as needed.
Once everything looks as good as intended, you can save your presentation.
By following these simple steps, you can work with images of blonde highlights, hair highlights images, or any other image in Google Slides, enhancing your presentation’s visual appeal.
Part 3. Google Slides Image Editing Hacks
When it comes to editing images within the presentation, Google Slides offers a range of tools. So, in additon to adding highlights to the images, here are other editing hacks that will make your image look sharp and professionally edited.
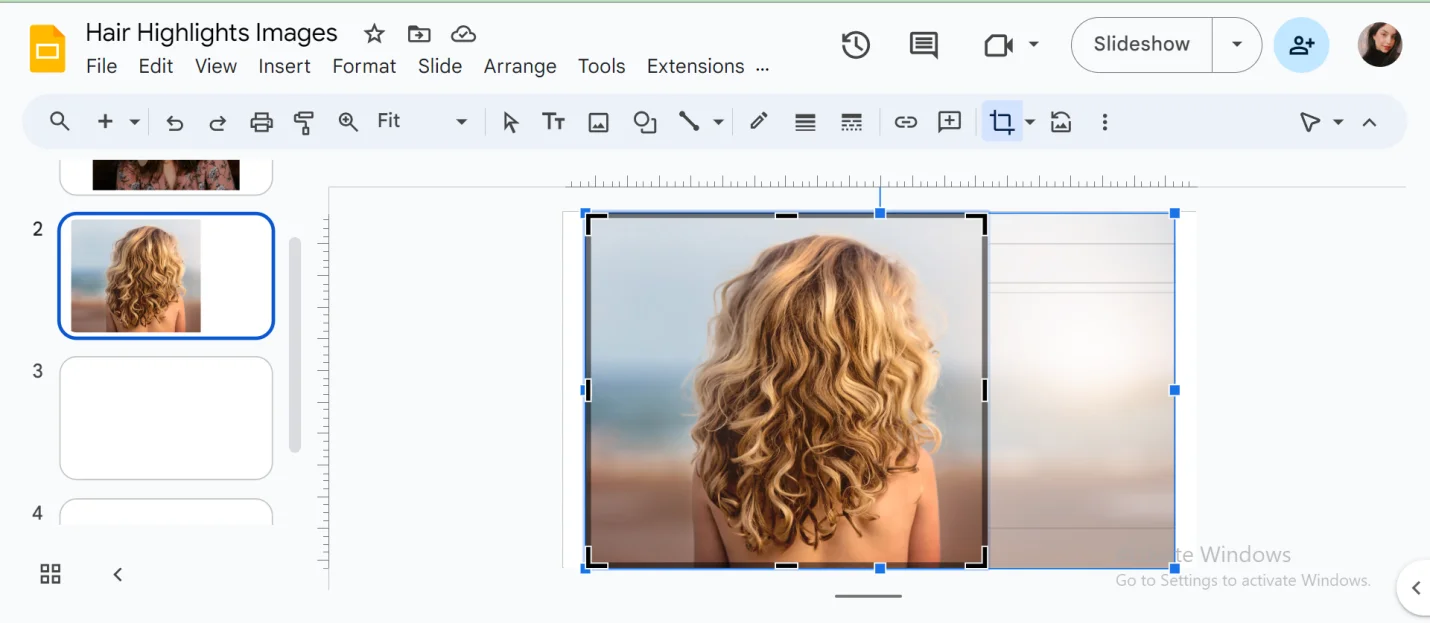
- Cropping and masking:If your image has unwanted edges that you wish to remove, a simple amd efficient crop tool really comes in handy. By cropping the image, you can emphasize the important part of the image, removing extra parts serving no purpose. Similarly, masking is another way to hide unwanted parts of the image by adding shapes on top of it. Both tools will allow you to get rid of extra parts of the picture.
- Add a border: Have you ever wondered why some pictures look unfinished even when you edit them? One reason is that they are missing a border. By adding a simple border around your picture, you can give both your image and presentation a more polished and professional look.
- Image overlay: Sometimes, when you add text over an image, it almost disappears or does not look professional at all. If done well, text over images can look quite effective. With the image overlay feature, you can add a translucent rectangle on top of the picture. It is dark enough for you to read when presenting a slide and clear enough to see the image below at the same time clearly.
Part 4. Alternative Methods for Highlighting Images
In addition to Google Slides, there are other methods that you can use to highlight images. So, if one option does not work for you, there are other options to try as well.
- Afirstsoft PDF Editor:At the top of the list is Afirstsoft PDF, which is a powerful PDF editing tool that allows you to highlight images within a digital document. If you have a presentation in PDF format, this editor is an ideal option to add image highlights or simply edit images. This feature is used to draw attention to the specific part of the image within the PDF or highlight important parts.
- Web Highlights: Another best way to highlight images is using Web Highlights. Using this Chrome or Microsoft extension, you can not only highlight images on the web but you can also easily save them in the sidebar and find them in the web app. You can also export the highlighted images in various formats, including Markdown, PDF, or HTML. Plus, you can access your images anywhere with the help of offline or cloud-sync modes.
Part 5. Final Words
Image highlighting is a great way to draw attention to the important part of the image within the presentations. While many tools do not offer these features, Google Slides really comes in handy when it comes to working on images both online and offline. All you need to do is follow the steps mentioned above and enhance your presentation’s appeal with image highlights. However, if you need something else, alternatives like Afirstsoft PDF Editor are just one free download away from saving the day.

