Do you want to annotate your PDF on iPad but don't know how? Want to know how to annotate PDF with Apple Pencil? If yes then you are at the right place.
The Apple Pencil is a versatile and robust tool used for drawing , sketching and marking up documents on an iPad. With the precision and fluidity of the Apple Pencil, you can transform your iPad into a digital canvas and unlock new possibilities for note-taking, collaboration and creativity.

Get Apple Pencil today to revolutionize the way you annotate your PDFs on your iPad and enjoy a seamless experience.
Read this article to gain explicit knowledge of annotate PDF iPad Apple Pencil. You will discover how to transform your iPad into a productivity powerhouse with the help of Apple Pencil. Let's move forward!
Part 1. Unlock the Power of Annotation on Your iPad

In the era of digital transformation, annotating PDFs has become an indispensable skill for students, professionals, and creatives alike. The ability to add notes, highlights, and marks to digital documents has revolutionized the way we interact with information.
And with the iPad and Apple Pencil, this process has become more intuitive and natural than ever. This dynamic duo revolutionizes the way you work, collaborate, and learn.
The Apple Pencil is a precise and intuitive stylus designed for the iPad. With its sleek design and progressive technology, it provides a natural and responsive drawing and writing experience. It is an ideal choice for creative tasks and note-taking and combined for PDF annotation.
It is the right time to say goodbye to tedious workflows and hello to streamlined efficiency and enhanced creativity. Whether you are a student, professional or educator, annotating PDFs with the Apple Pencil will transform the way you interact with digital content.
Part 2. Getting Started with PDF Annotation on iPad
Annotating PDFs on iPad has become an easy and enjoyable job now. After gaining knowledge of Apple Pencil, it is now necessary to have the know-how for the complete annotation process.
So, do you want to know how to get started with PDF annotation with the help of Apple Pencil on an iPad? To annotate PDF on iPad with Apple Pencil is a complete process, and this process comprises many steps. Let's study them in sequence:
2.1 Download a PDF Annotation App
Downloading a suitable and dedicated app to annotate PDFs on iPad is the first and foremost step and be careful in choosing that app because it acts as a paper for Apple Pencil.
So, to unlock the full potential of Apple Pencil for PDF annotation, download a dedicated app.
Top choices include GoodNotes, Notability, and PDF Expert. Consider the features that matter most to you, such as a robust markup toolkit, seamless cloud sync, and intuitive document organization.
These apps offer a range of annotation tools from highlighting and underlining to handwriting recognition and audio notes. With cloud sync, access your annotated PDFs across all your devices.
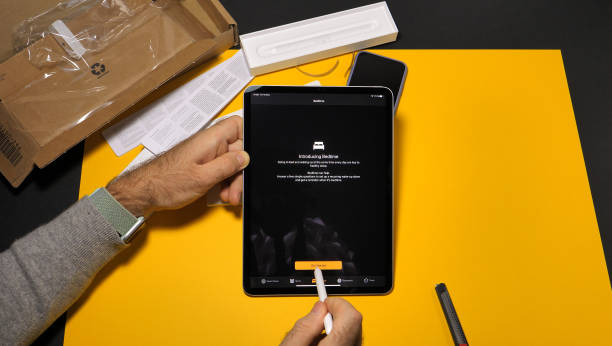
2.2 Connect Your Apple Pencil
After downloading a PDF annotation app, you must connect your Apple pencil. To connect your Apple Pencil, pair it with your iPad by following given steps:
- In the first step, make sure that your iPad is compatible with the Apple Pencil.
- Then remove the cap from the Apple Pencil and after that plug it into the Lightning port on your iPad.
- After that, wait for the pairing process to complete (you'll see a confirmation message on your iPad).
- You must customize your Apple Pencil settings for optimal performance:
- You can adjust the sensitivity and tilt settings according to your own choice.
- You can turn palm rejection on or off.
- You can also choose whether to use the Apple Pencil for markup or drawing.
- You can also set up double-tap gestures for shortcuts.
2.3 Open a PDF in the Annotation App
After connecting to Apple Pencil, the next step is to open the desired or specific PDF in your annotation app. You can open a PDF by importing it from various sources:
- Cloud storage:iCloud, Google Drive, Dropbox, or OneDrive
- Email:Attachments or email links
- Other Sources:Websites, files apps, or scanned documents
Once you have imported the PDF then navigate through the document using intuitive gestures:
- Scroll: You can swipe up or down to move through pages.
- Zoom: You can also Pinch to zoom in or out.
- Page turn: You also have the option of Tapping the edge of the screen or using a swipe gesture to turn the page.
- Jump to page: You can also jump to another page by tapping the thumbnail view of the page.
After this your annotation app will show the PDF which is ready for markup and annotation by using Apple Pencil. You can also take advantage of the app's features such as search and organization tools to enhance your PDF annotation experience.
Part 3. Essential PDF Annotation Tools
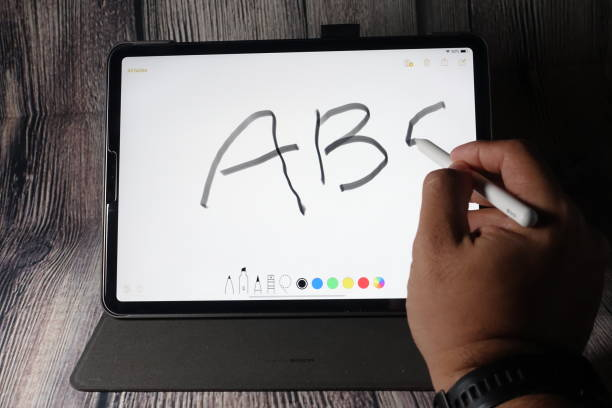
3.1 Freehand Drawing and Writing
The first and foremost thing you can do to annotate a PDF with Apple Pencil is to write and draw freehand. You can unleash your creativity with freehand drawing and writing on your iPad PDF with this Apple Pencil.
By using the Apple Pencil, you can perform the following tasks:
- You can draw, write,and doodle with precise strokes and varied line weights.
- You can also adjust the pen thickness to achieve the desired effect.
- You can also choose or pick from a wide range of colorsto match your writing and drawing style.
- You can also change the opacity to match your expected results.
The Apple Pencil's features make it feel like a natural extension of your hand, and it allows you to focus on your unique expression.
3.2 Highlighting and Underlining
Another annotating feature offered by Apple Pencil is underlining and highlighting the text in the PDF. You can use or move the Apple Pencil to highlight and underline important information in your PDF effortlessly.
Follow the given steps for highlighting the text in the PDF:
- First, select the highlighter tool.
- Then you must choose from a range of colours to categorize your notes.
- After that,kindly swipe the Apple Pencil over the text to highlight.
You can also Adjust the highlight thickness and opacity to suit your needs. By underlining, you can mark the key or essential phrases or sentences.
3.3 Adding Text Notes
Another feature offered by Apple Pencil is the ability to add notes to the PDF. You can add text notes in PDF format on an iPad with the help of an Apple Pencil.
With the Apple Pencil you can add supplementary text notes or small points to your PDF which help you in understanding the PDF.
Follow the given steps:
- In the first step,you must tap the Apple Pencil on the text tool in the toolbar.
- Then write your notes and comments directly on the PDF.
- After that,use the Apple Pencil to position notes strategically around the document.
- You can also adjust font sizes, colors, and styles to differentiate your notes from the original text.
- You can also move and resize notes as needed.
In this way, you can add details or reminders to your PDF for future ease.
3.4 Shapes and Arrows
Another annotating feature Apple Pencil offers is adding different shapes and arrows to your PDF. With the Apple Pencil, you can incorporate shapes, arrows, and callouts to visualize your ideas and emphasize important points in your PDF.
To perform this, the steps are:
- First, you must tap the Apple Pencil on the shape tool in the toolbar.
- Then draw shapes, arrows,and callouts directly on the PDF.
- After that, you must use the Apple Pencil to customize the size, color,and orientation of your annotations.
- You can also choose from various shapes,including:
- Circles
- Squares
- Triangles
- Arrows (straight, curved, and dotted)
- Callouts (speech bubbles, thought bubbles, and more)
In this way, you can add visual annotations to your PDF with the help of Apple Pencil.
3.5 Erasing and Editing
You can also erase or modify annotations with the help of Apple Pencil per your requirement.
With the Apple Pencil, you can erase and edit text by following the steps:
- In the first step, tapthe Apple Pencil on the eraser icon in the toolbar to switch to eraser mode.
- Then rub the Apple Pencil on the screen to erase annotations.
- After that,you must use the Apple Pencil to edit annotations by:
- Resizing shapes and arrows
- Repositioning annotations
- Changing colorsand opacity
You can also take advantage of undo and redo functions to correct mistakes or experiment with different approaches quickly.
Use the "Undo" and "Redo" buttons in the toolbar, or simply you can:
- Tap three fingers on the screen to undo the annotation.
- Tap four fingers on the screen to redo that annotation.
Thus, you can add text and shapes or highlight or underline the text in PDF with the help of the Apple Pencil on iPad, which provides many functions and features. You have learned about annotate PDF iPAD Apple Pencil and it is time to move forward.
Part 4. Organizing and Sharing Your Annotated PDFs
After getting the knowledge of annotate PDF iPad Apple pencil, it is necessary to organize multiple PDFs or single ones for ease in the future.
Moreover, sharing annotated PDFs is essential for collaboration, teamwork, and knowledge sharing.
Let's discuss both the steps separately:
4.1 Organize your Annotated PDF
To organize your annotated PDFs, create folders and tags to keep your documents well-structured and easily accessible. This feature will allow you to:
- Categorize your PDFs by project, topic, or date making it simple to locate specific documents.
- Search for specific annotations or text within your PDF library, saving you time and increasing productivity.
Thus, keeping your annotated PDFs organized lets you quickly find the information you need and focus on your work rather than wasting time searching through a cluttered library.
4.2 Share Your Annotated PDF
After learning about Apple Pencil annotate PDF and organizing PDFs, you can share your annotated PDFs with ease!
You can export your marked-up documents to share with others via email, messaging apps, or cloud storage. Additionally, it helps you:
- Collaborate in real-time by sharing your annotated PDF through cloud storage,allowing multiple users to access and annotate the same document simultaneously.
- Export your annotations as a summary creating a concise report of your notes and highlights that is perfect and ideal for sharing or exchanging with colleagues or classmates.
Now you have clear know-how of annotate PDF iPad Apple Pencil.
Part 5. The Bottom Line

Unlocking the full potential of PDF annotation on your iPad with the Apple Pencil can revolutionize your productivity, learning, and workflow.
With powerful annotation tools at your fingertips, you can transform how you interact with digital documents. Embrace the flexibility and precision of the Apple Pencil and discover a new level of efficiency. Ready to take your iPad productivity to the next level?
Start annotating PDFs like a pro with your Apple Pencil today after getting knowledge of annotate PDF iPad Apple Pencil. Don't delay. Take the first step and get it now!
If you want to annotate PDF files more efficiently with Apple Pencil, try Afirstsoft PDF. It is one of the best and most efficient tools and a good pairing tool for annotation. So don't miss the opportunity—try it now!