The first version of MS Word, formally known as Multi-Tool Word, was launched in 1983 by the Microsoft Corporation for Xenix and MS-DOS. However, the program became popular and gained commercial success in 1990 after the release of Windows 3.0. Today, MS Word has millions and millions of users around the world.
As for the WPS, the initial version of Super WPS (Super Word Processing System) was launched in 1988 by Kingsoft as a DOS-based Chinese language word processing system. However, it was not until 2001 that WPS Office was launched with a word processor, sheets, slides, and PDF.
As part of the WPS Office suite and Microsoft Office Suite, both Doc and Word have now become irreplaceable word-processing programs that are used to create and customize documents. These programs are also used for collaborations, standardization, boosting productivity, assisting in writing, enhancing work efficiency, and delivering exceptional results.
There is no denying that in the world of text and editing tools, both MS Word and WPS Doc is an undisputed king. However, there is another feature that Word and Doc are known for, and that is the annotation of documents. Whether you are a student, business professional, or an educator, mastering how to annotate in Word can significantly improve your workflow and boost productivity.
If you are here to learn how to annotate a Word document or WPS doc, we have you covered. In this step-by-step guide, we have mentioned how you can create helpful and accurate annotations in WPS Doc and Word. So, if you are interested, keep on reading.
Part 1. How to Annotate in Word?
Word annotations are one of the most prominent features that allows you to turn your simple documents into interactive and collaborative documents. You can add comments, edits, and notes to your documents and make it easier for you and others to understand. This lets you and your team collaborate and work together on a single document. Business professionals and students have been using Word for as long as they can remember.
However, when it comes to annotating documents, many still need to learn how to do that. To annotate document, Word offers a number of tools to add comments, highlight text, or track changes. Below, we will learn how to annotate documents using these tools.
Well, if you are wondering how to annotate on Word, all you need to do is follow the steps we have mentioned below:
Step 1: Launch WPS Office on Your Computer
The first step is to launch WPS Office on your laptop. If you have MS Word and are wondering how to annotate in Microsoft Word, you will follow similar steps.
To do so, you need to navigate to the Windows start menu with a window icon located at the bottom left corner of the screen.
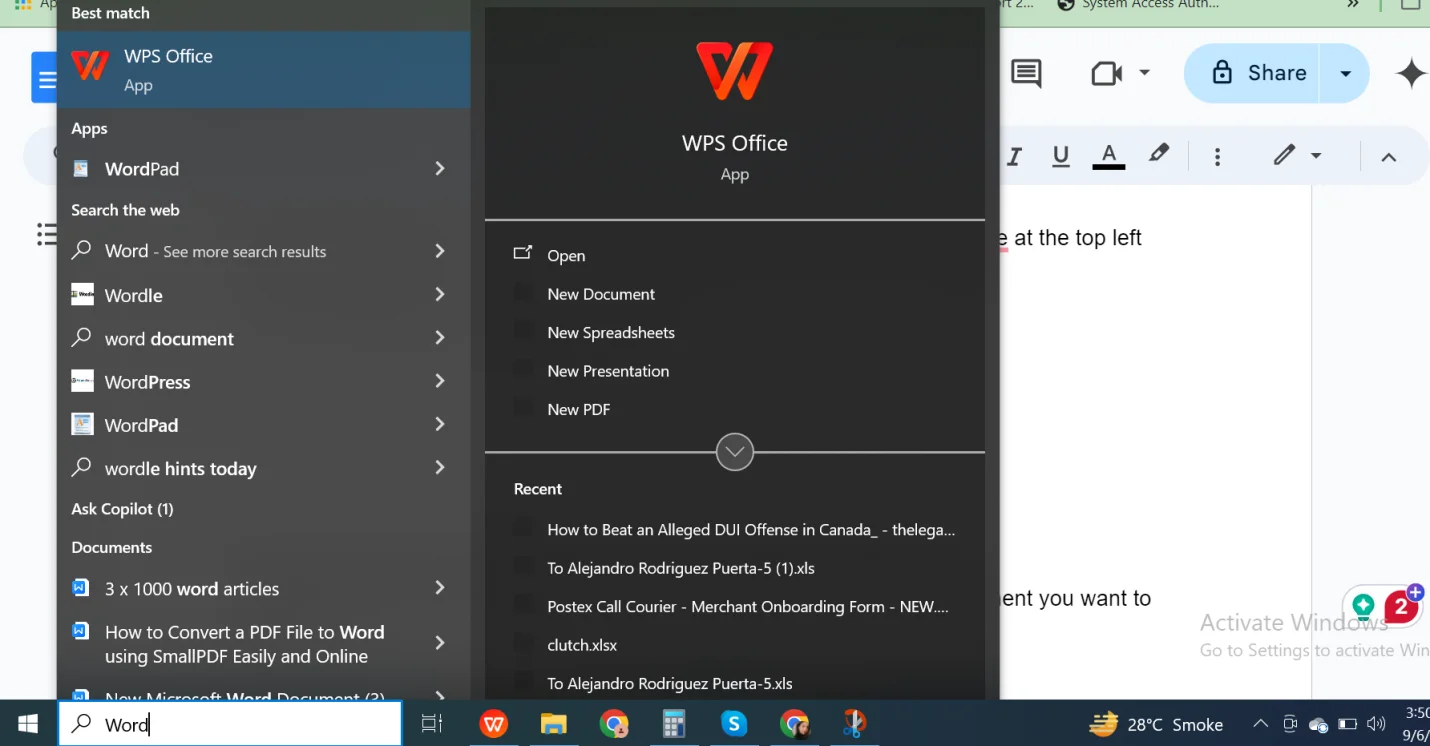
Tap on the button and type in “Word” to find the WPS office. From the office, make sure to select “New Document” to launch Word on your laptop.
Step 2: Open the Word Document you want to annotate
After launching WPS Doc or Word, you will be welcome on the program's home screen with all other services.
From the menu located on the left side of the screen, you need to select “Docs,” which basically indicates Word.
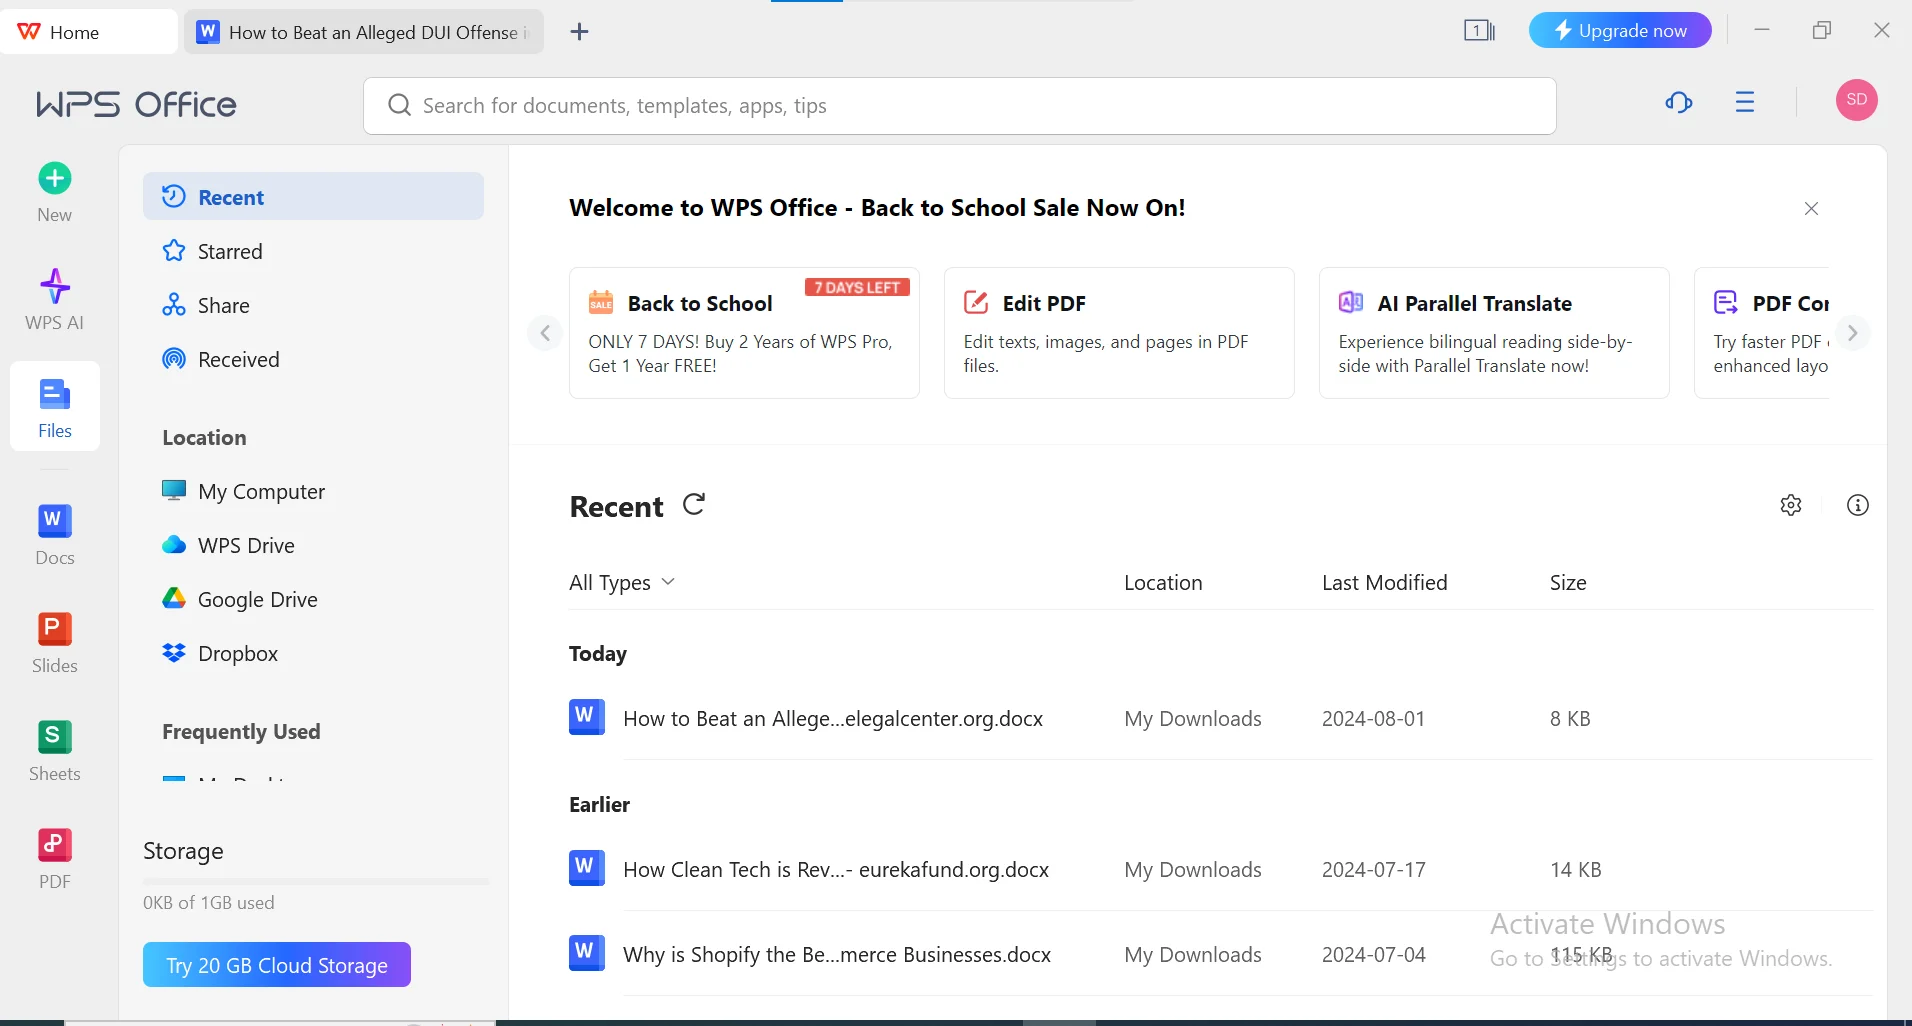
The next step is to open the document you want to work with. Whether it is in your “Recents,” “Starred,” or any other location, you will need to open the document that you will be working on in Word.
When it comes to selecting and opening the documents, you need to choose the location where your document is located.
Choose from My Computer, WPS Drive, Google Drive, and Dropbox.
Select the document and open it in Doc or Word.
Step 3: Begin Reviewing the Document
Now that the document is opened in Doc start reviewing it to see where you want to highlight the text, add comments, insert footnotes, insert endnotes, or track changes.
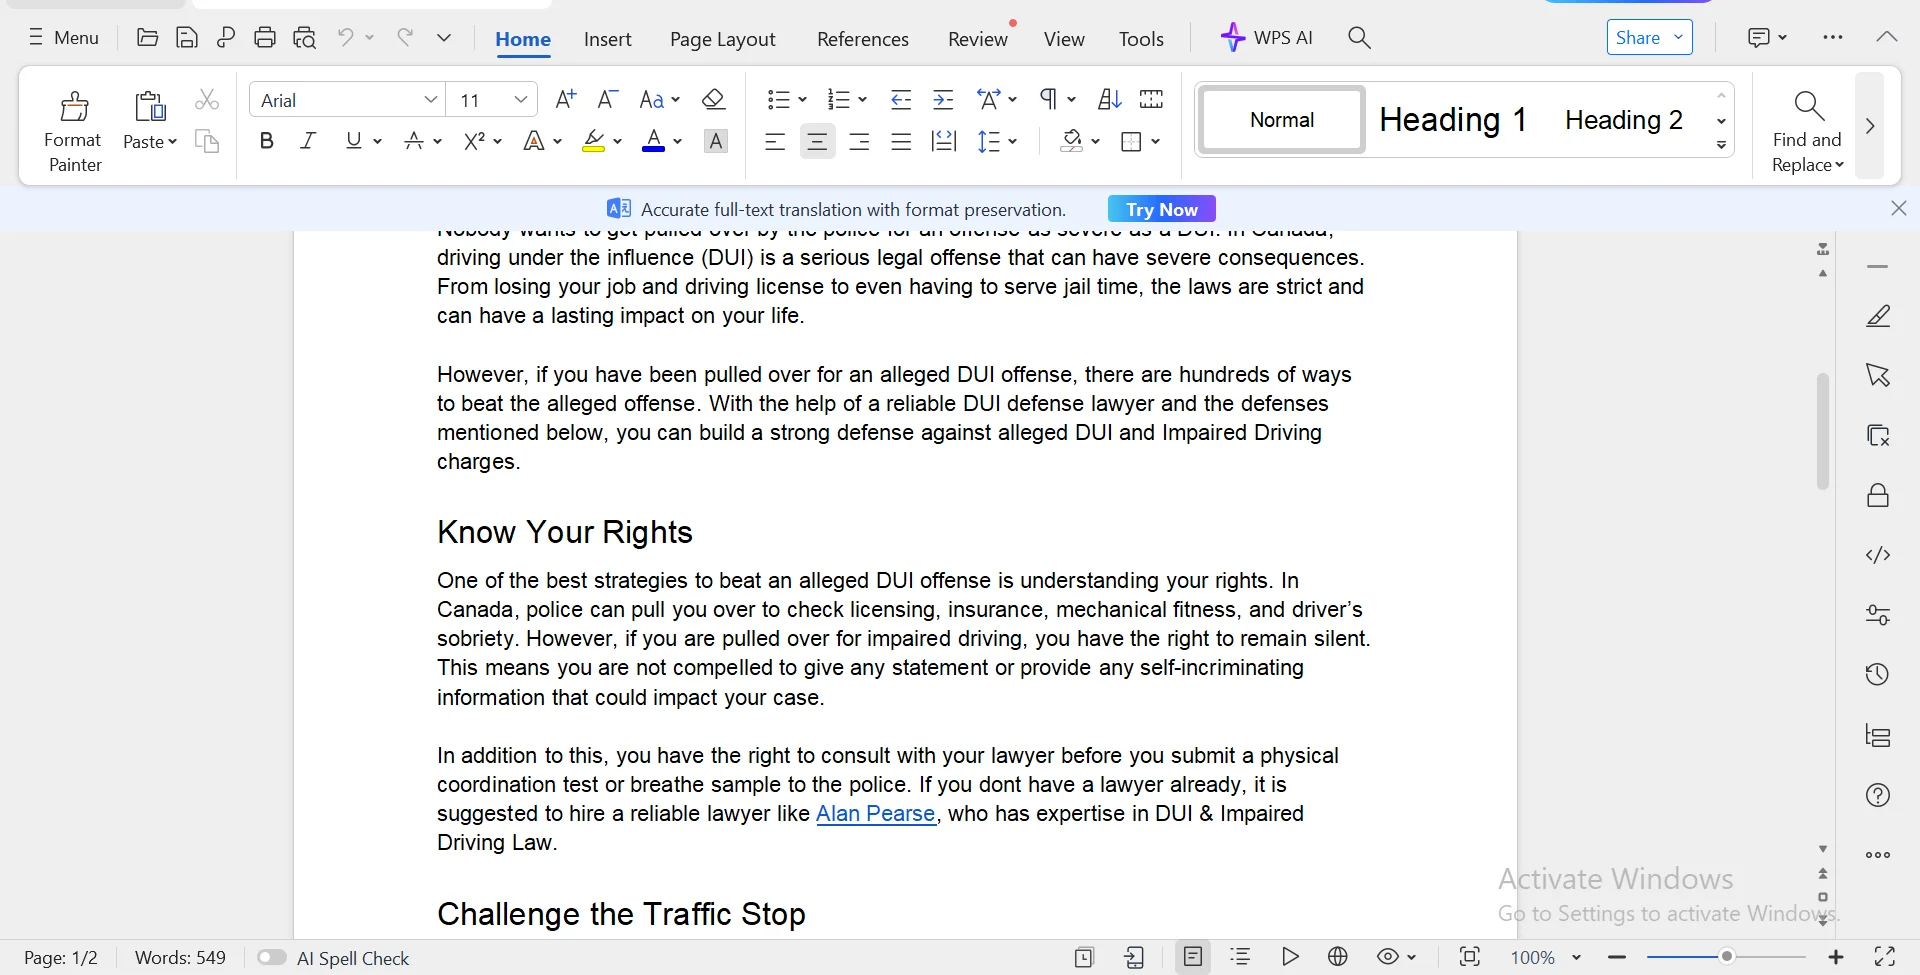
Once you have reviewed the document, you can start editing and annotating.
Step 4: Track Changes
The first step when annotating your document is turning on the “Track Changes” option.
As the name suggests, this option allows you to track and mark the changes in the document as you edit and annotate it.
This option will allow you to see what has been added, deleted, and modified in the document.
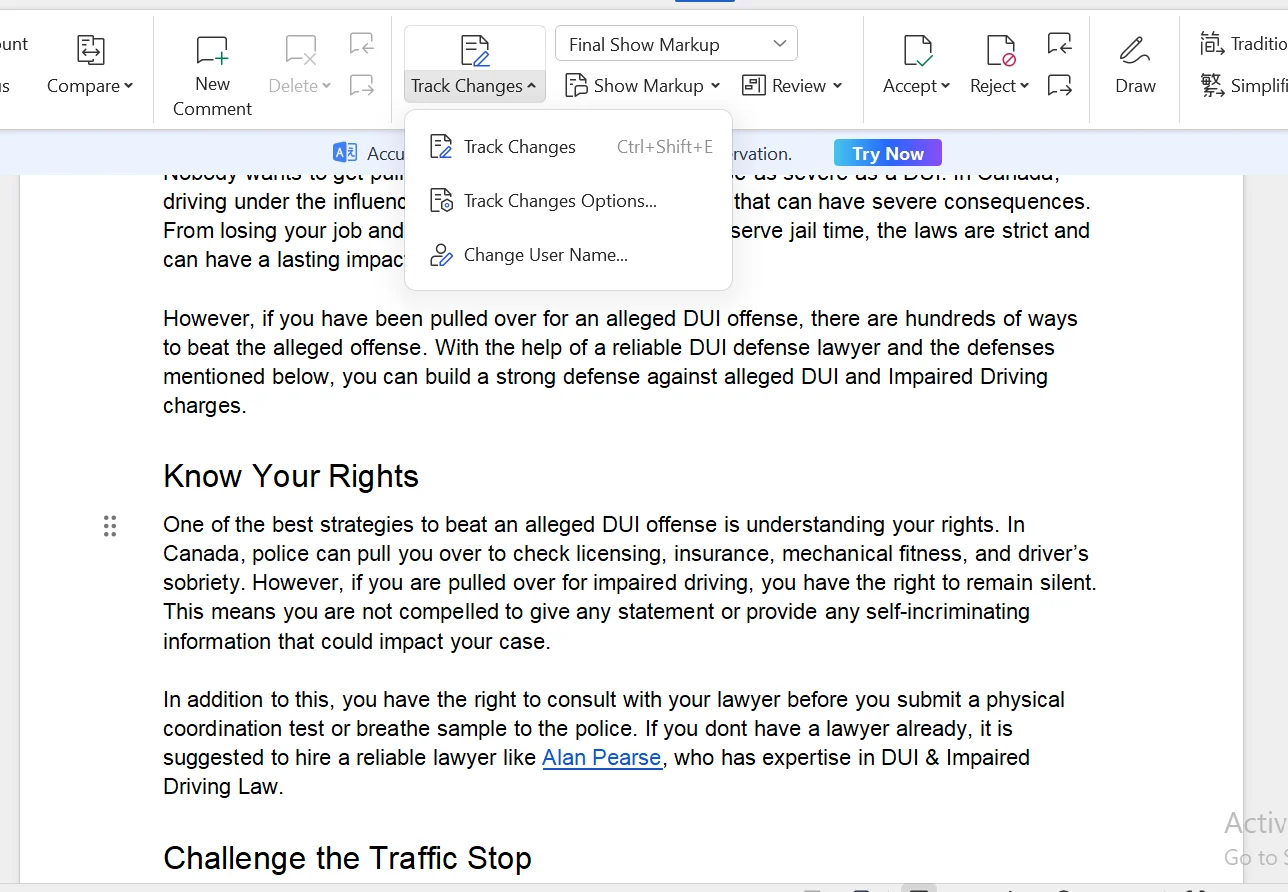
To turn the option on, navigate to the main menu and click on the “Review” tab.
When you click on the tab, you will see the “Track Changes” option right in front of you, which you need to click to turn on.
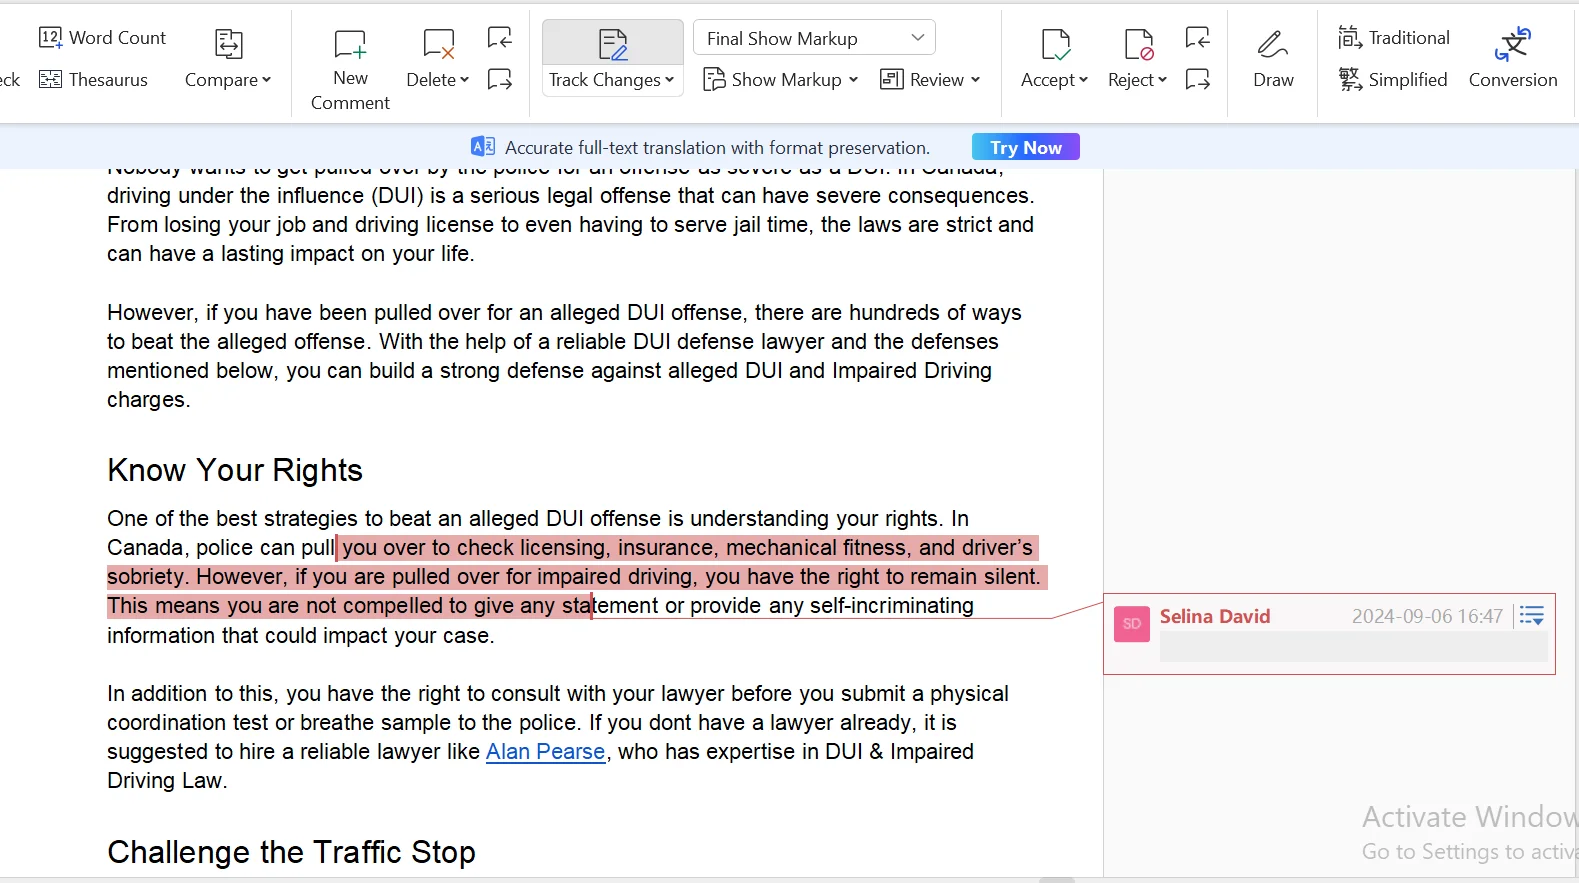
So, when you are tracking changes, you can also review, accept, or reject the changes from the corresponding options in the Review tab.
Step 5: Add Comments
You can also add comments to your documents by staying in the same tab.
To add the comment, select the area of the text where you want to add your comments or feedback.
After selecting the text, simply navigate to the upper toolbar and click on “New Comment.”
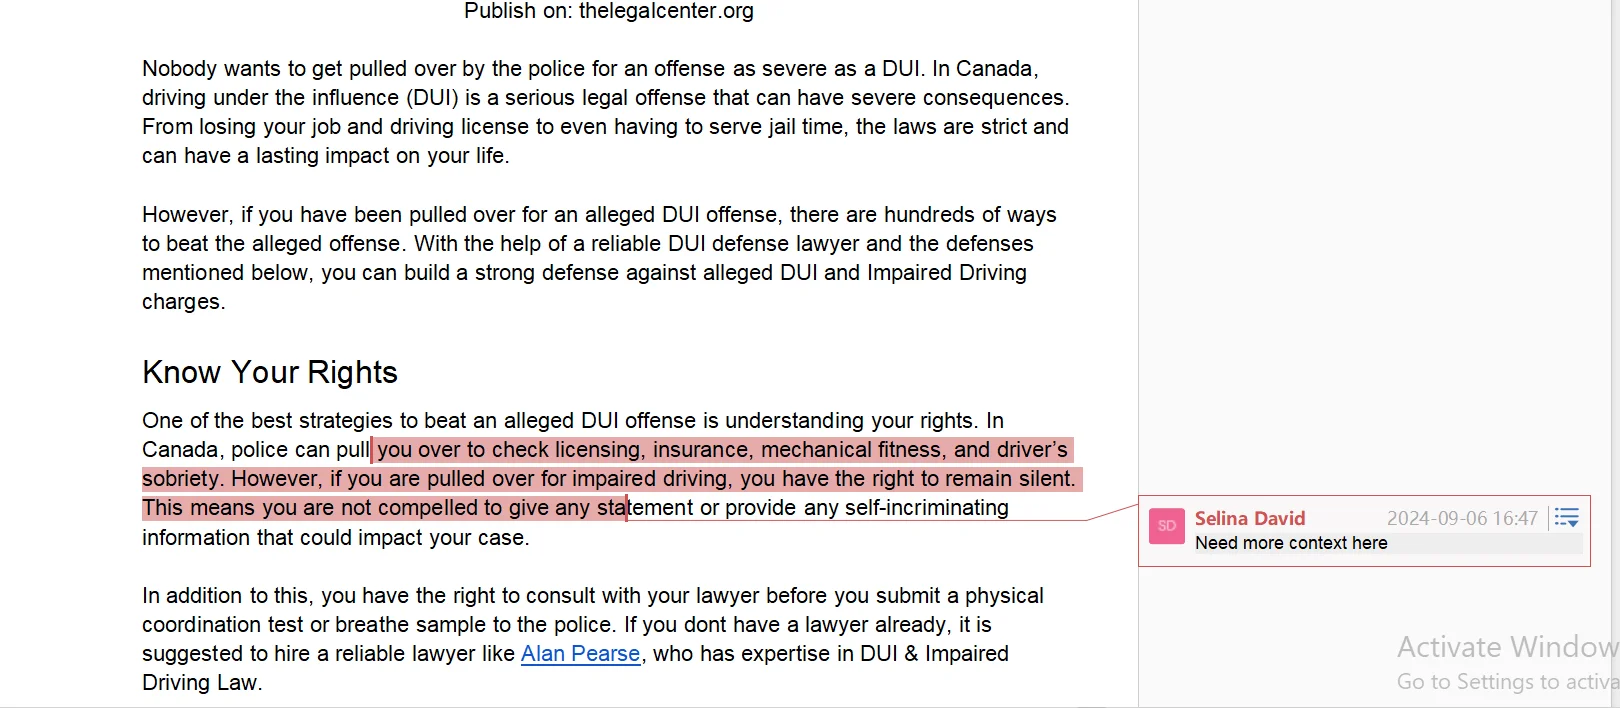
Now, a comment box will appear on the side of the document, where you can add any comments or feedback you may have regarding the text.
When you are done, you simply need to click outside the comment box, and you will not be bothered by the box on the screen.
Just like that, you can add comments throughout the document to suggest edits or give feedback to other team members so that they understand what changes need to be made in the text.
If you want to add comments in MS Word, you will follow the same steps as the Review tab > New Comment.
Step 6: Highlight Text
To highlight the text, you need to navigate to the “Home” Tab from the upper menu and click on it to see all the available options.
From the “Home” tab, click on the highlight option that is represented by a marker symbol.
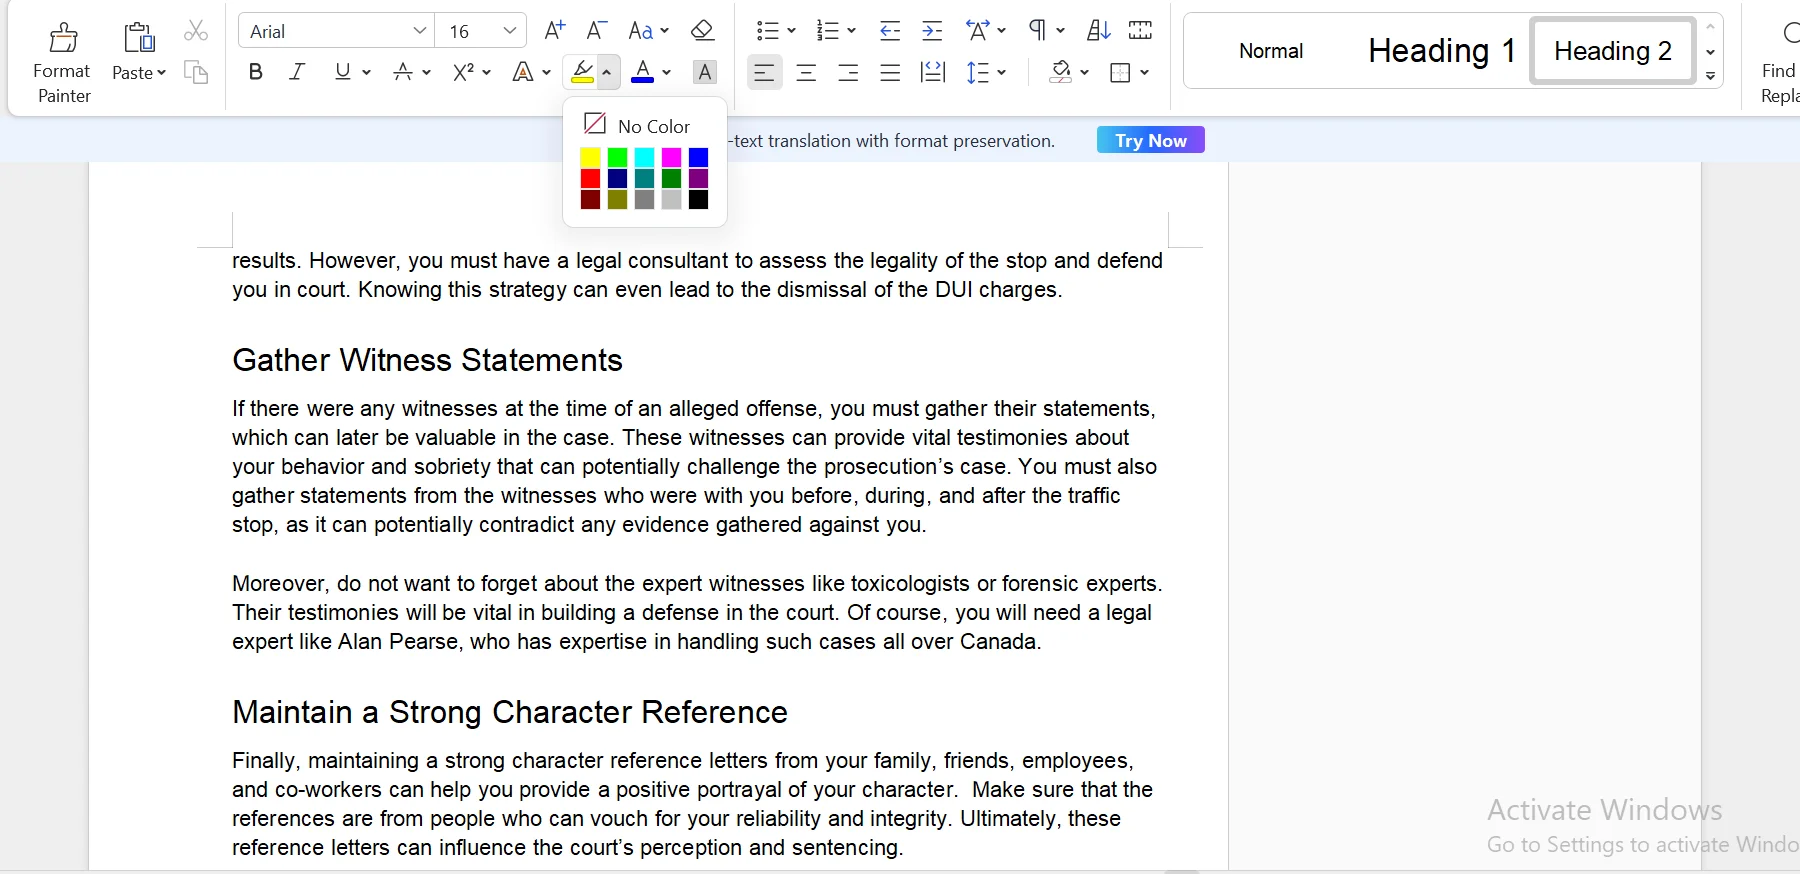
After you click on the “Text Highlight Color” option, a drop-down menu will appear on the screen, and you can choose from any highlight color you want.
Choose your preferred color and select the text to highlight it accordingly.
To highlight text in MS Word, you will follow the same steps. Home Tab > Highlight Text.
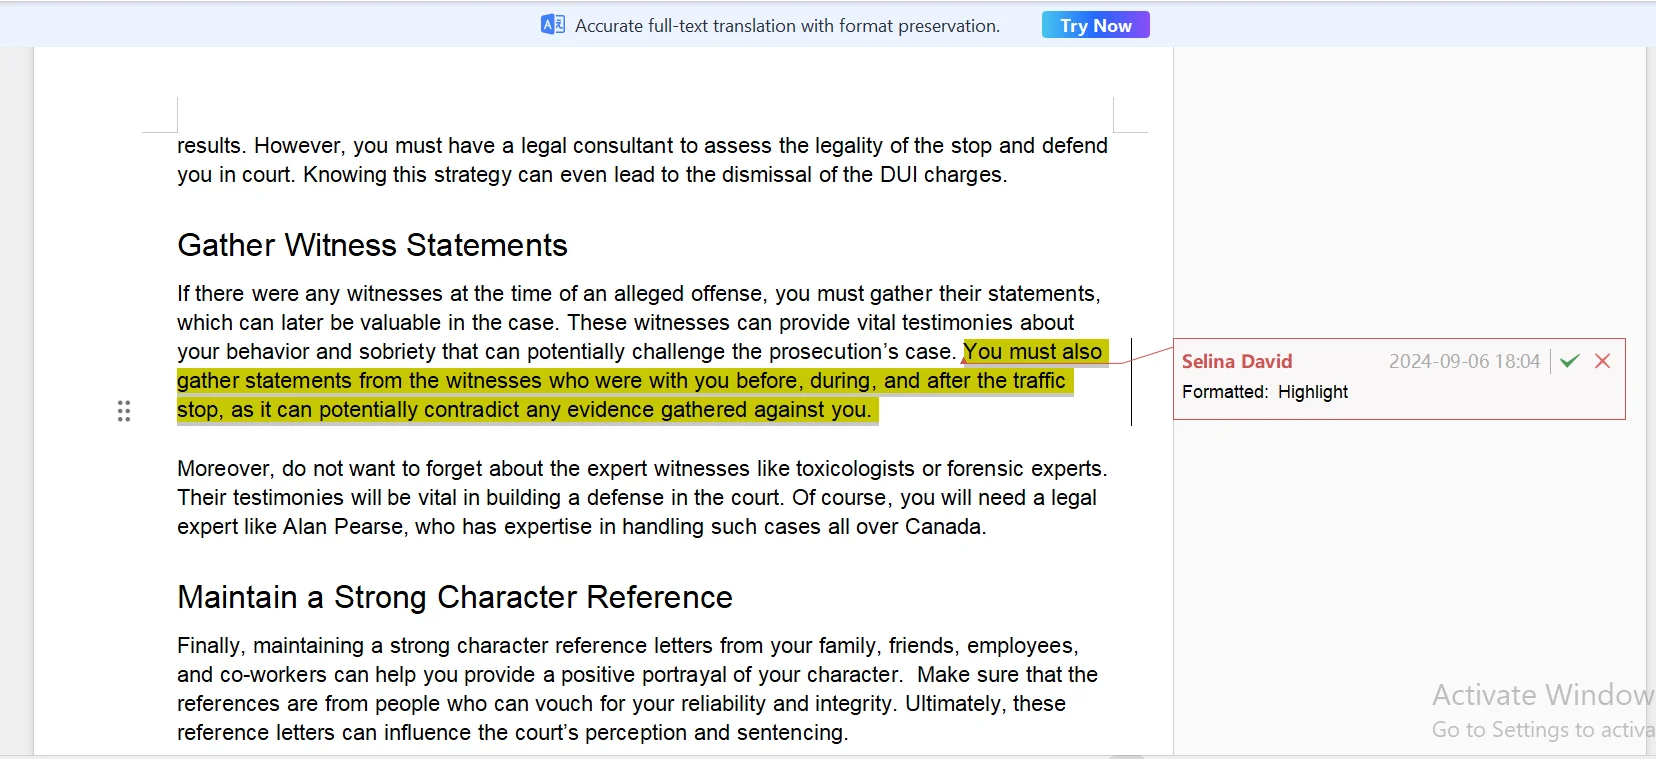
If you want to keep the changes you made or the text you highlighted, simply click on the “tick” icon in the text box that appears on the screen. If not, you can click on the “cross” icon in the same text box.
Just like that, you can highlight any part of the text from the document that is important or should be highlighted.
Step 7: Underline or Strikethrough Text
To underline or strikethrough text, the first step is to highlight the text to make it easier for you to understand where you are making the changes.
Once you have done that, navigate to the “Home” tab and click on the “Underline” option from the toolbar that is represented by the “U” with an underline. You can find this option from the left section of the toolbar.
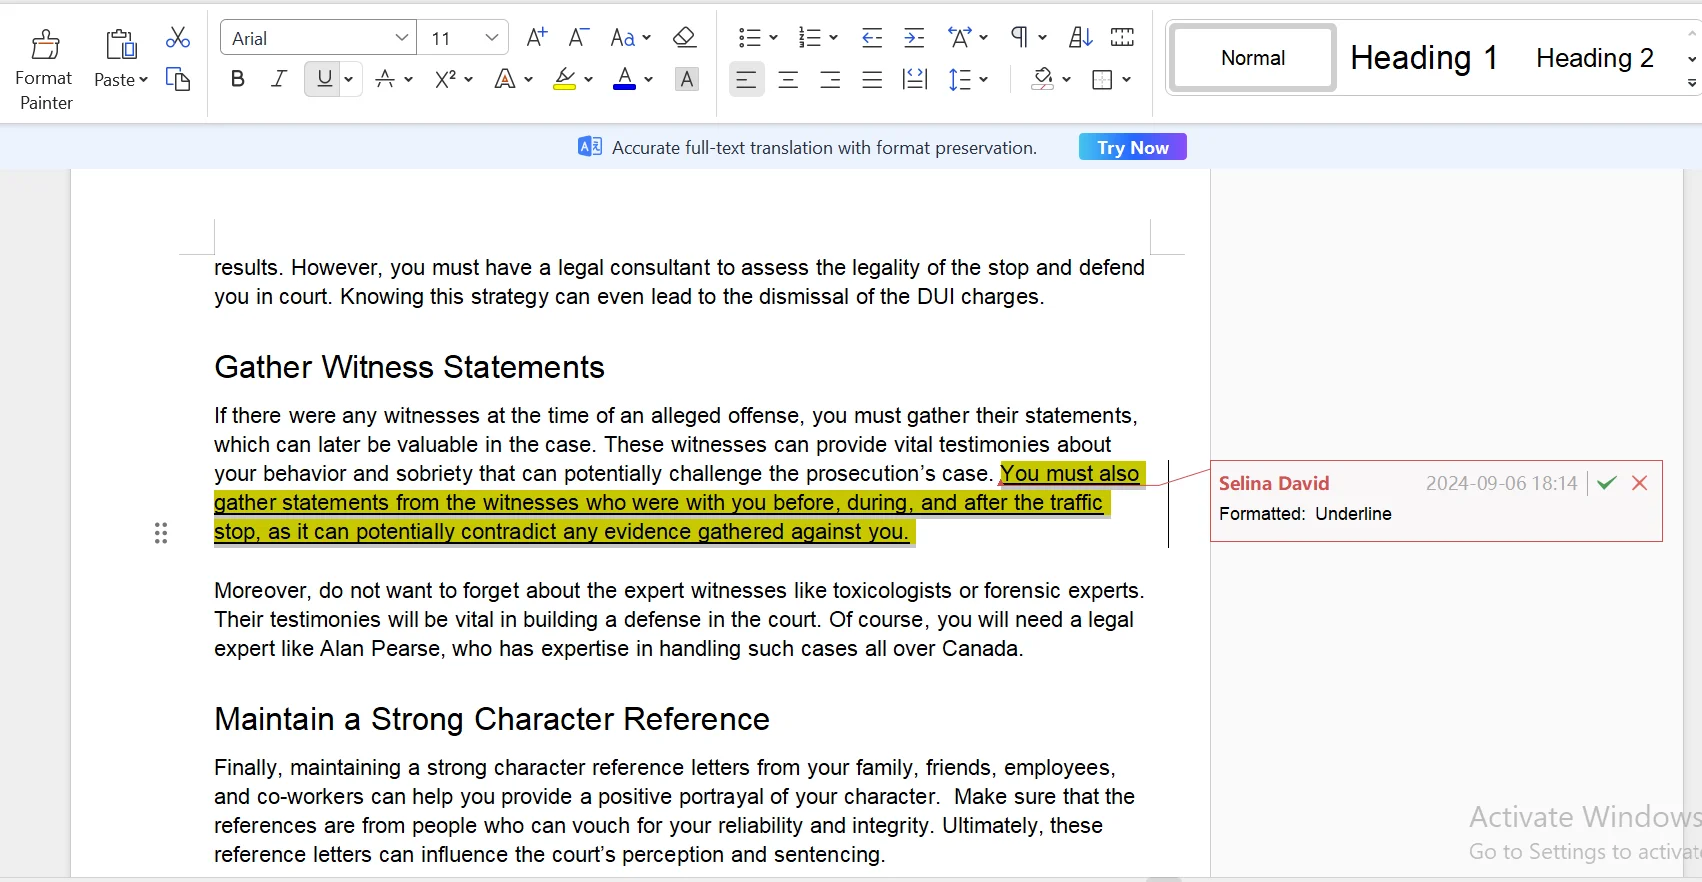
Once you have underlined the highlighted text, simply click on the “tick” icon to save the modification or click on the “cross” icon to undo it.
Or, if you want to strikethrough the text, you can simply click on the “Strikethrough” option, which is represented by “A” next to the Underline option.
Afte clicking on the option, the text will be struck through. This option is usually used to highlight the extra or unwanted information in the text.
Striking through the text means you can delete the extra text from the document.
Follow the same steps in MS Word to underline or strikethrough the text.
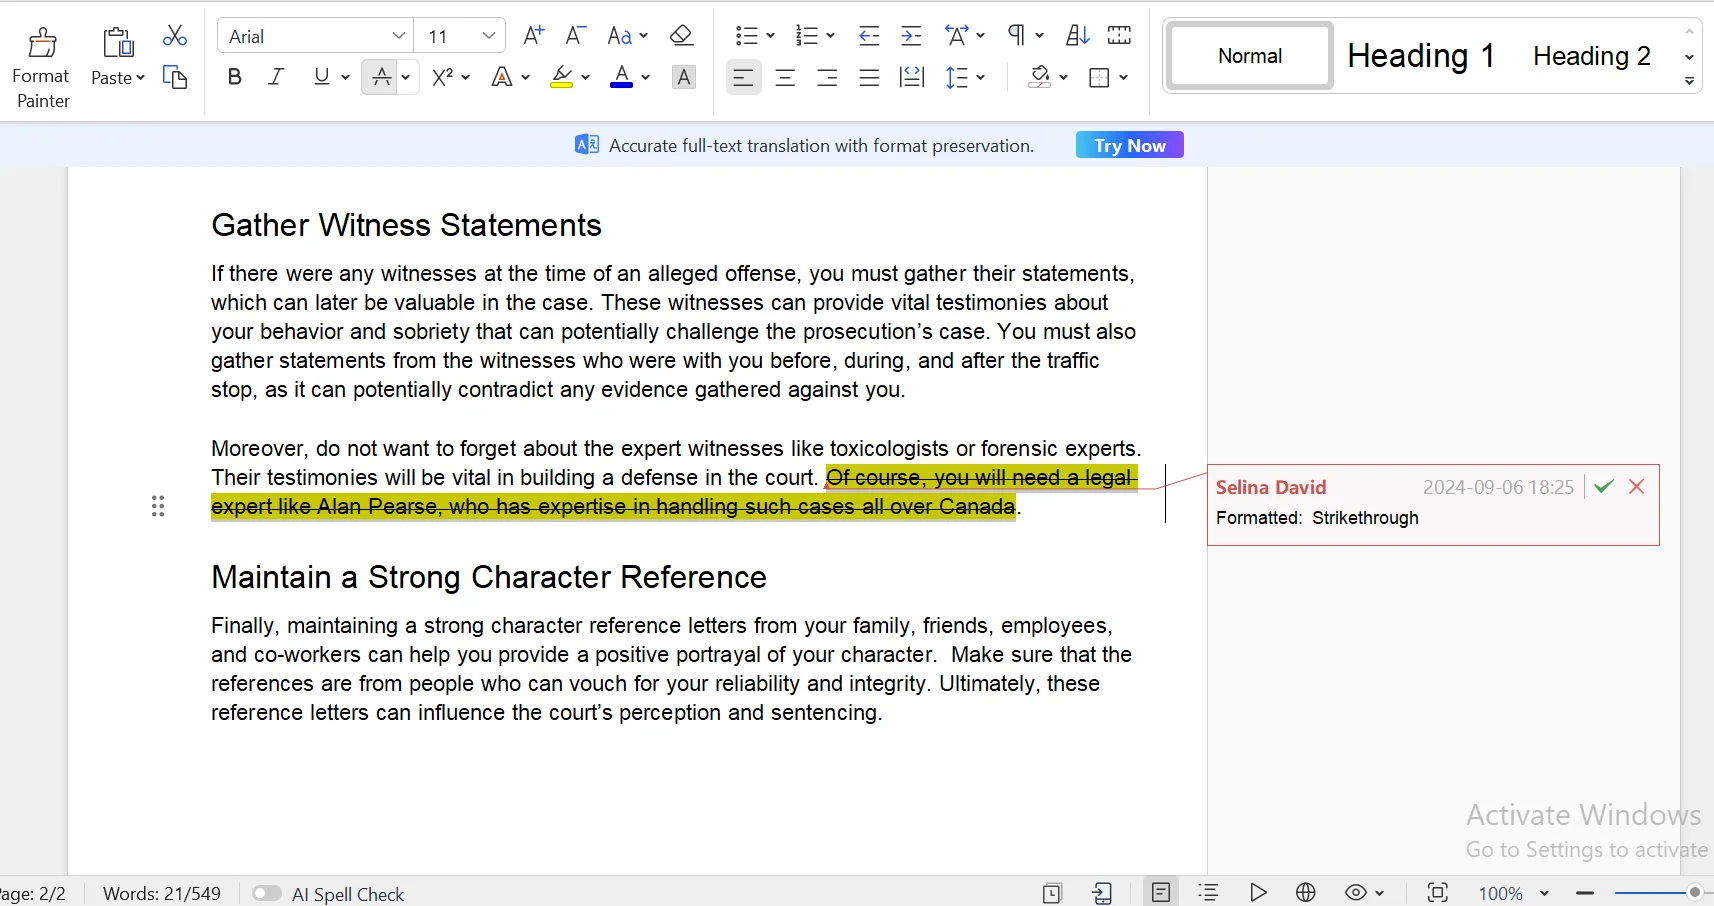
The text will either be struck through or underlined based on the option you choose.
Step 8: Insert Footnotes
If you want to add any extra information, citations, or comments, you can insert footnotes in the documents.
These are usually added at the bottom of the document to provide more information on something in the text.
So, first, you need to place your cursor where you want to insert the footnote.
Next, navigate to the “References” tab and click on “Insert Footnote.”
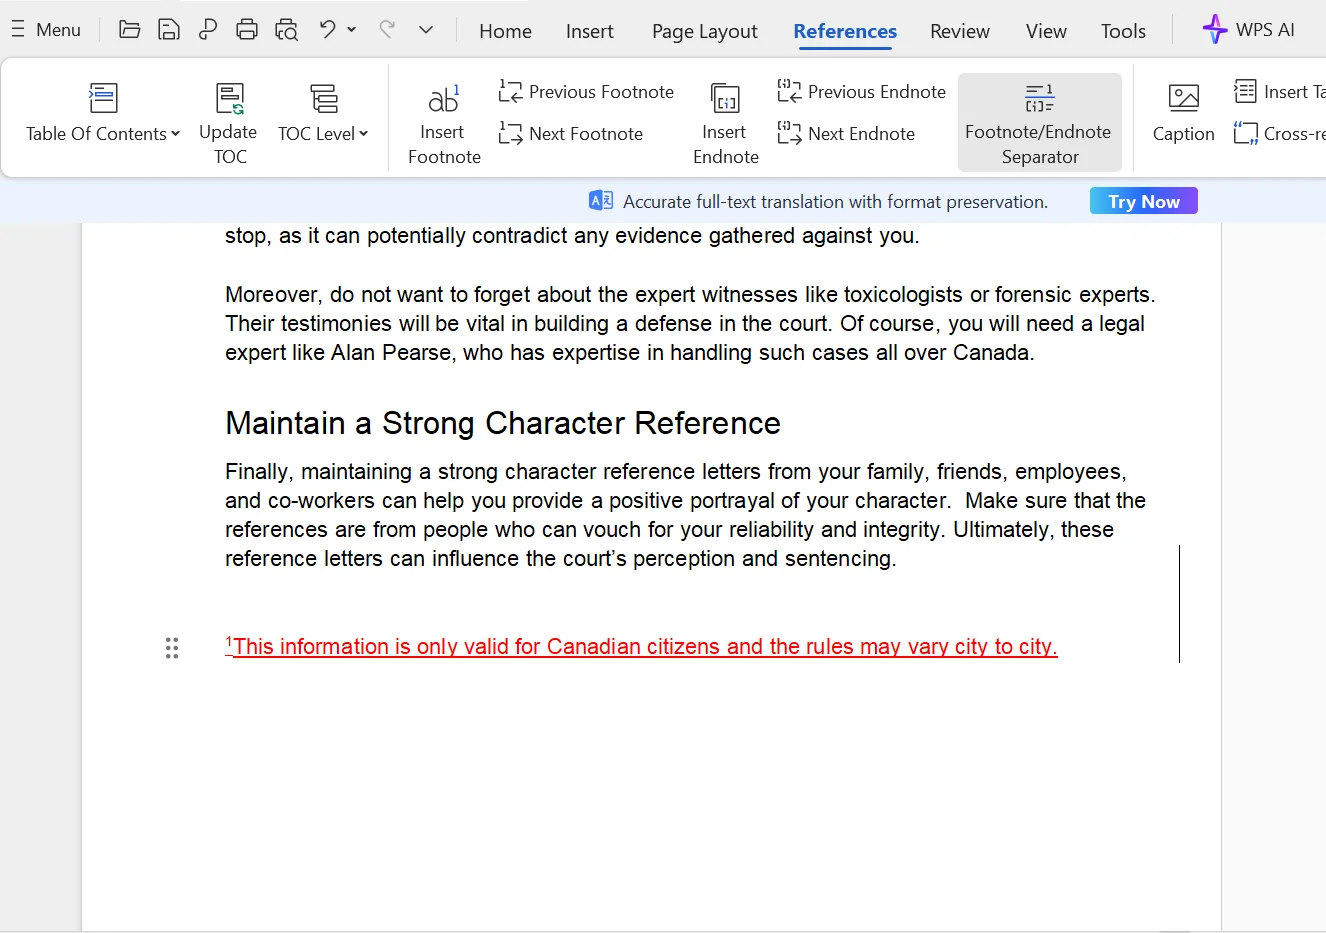
You can type your note, provide references, or give more information on the document. Once you have done that, the footnote will appear at the bottom of the page.
Step 9: Insert Endnote
Endnotes appear at the end of the document and are also used to add references and commentary on the document.
To insert it in your document, you need to select “Insert Endnote.”
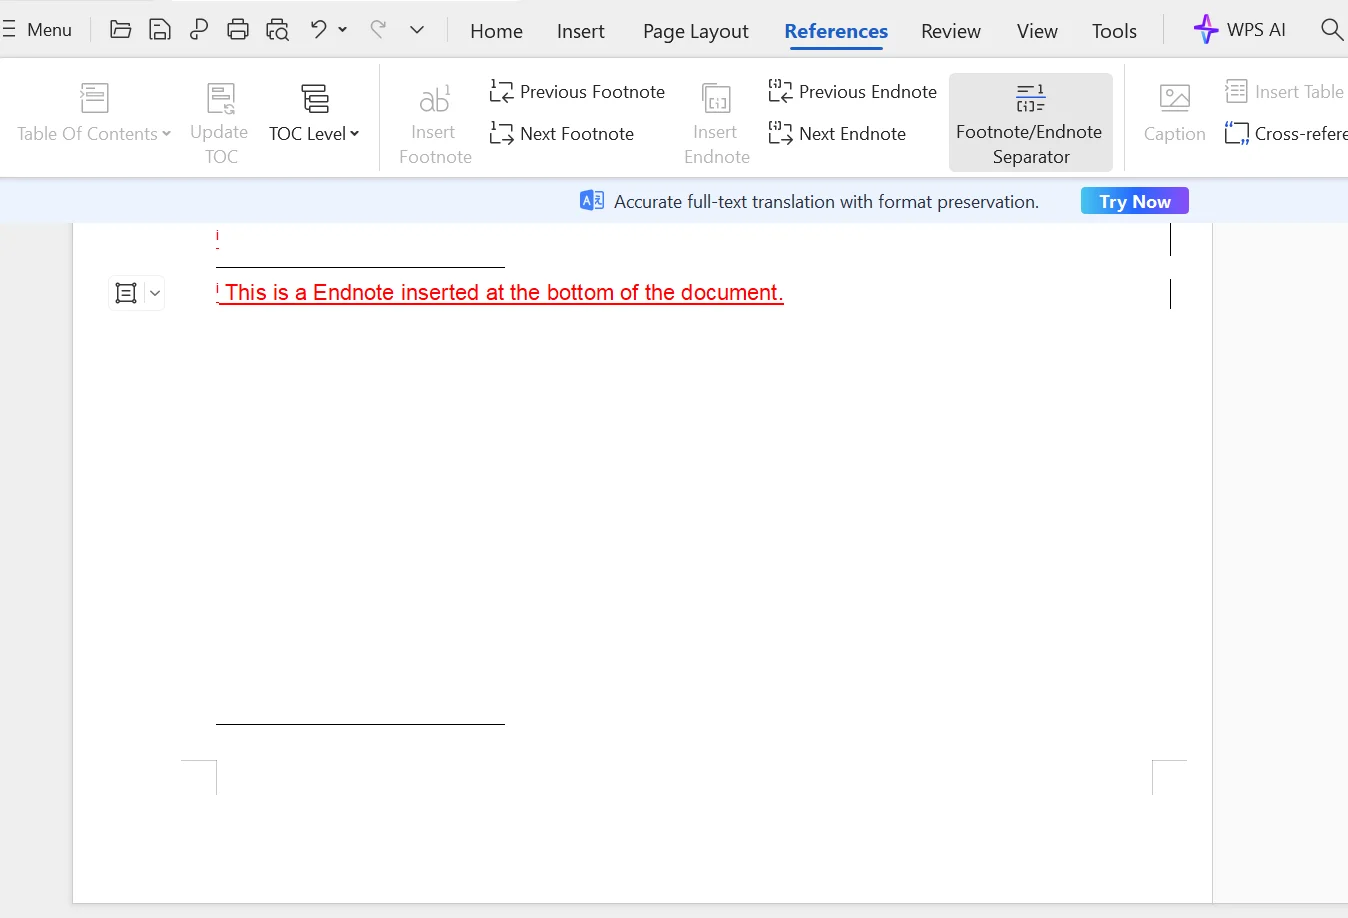
The endnote will be added at the bottom of the document. Now, you can add citations and references with Footnotes or Endnotes and use them in academic, business, or legal documents.
Step 10: Review and Save the Annotated Document
Once you have annotated your documents, make sure to review the document thoroughly and save it.
To do so, navigate to the top left corner of the screen and click on the “Menu” option.
Once you click on the option, a drop-down menu will appear on the screen, and you need to click on “Save as” or “Save” from the options to save your annotated document.
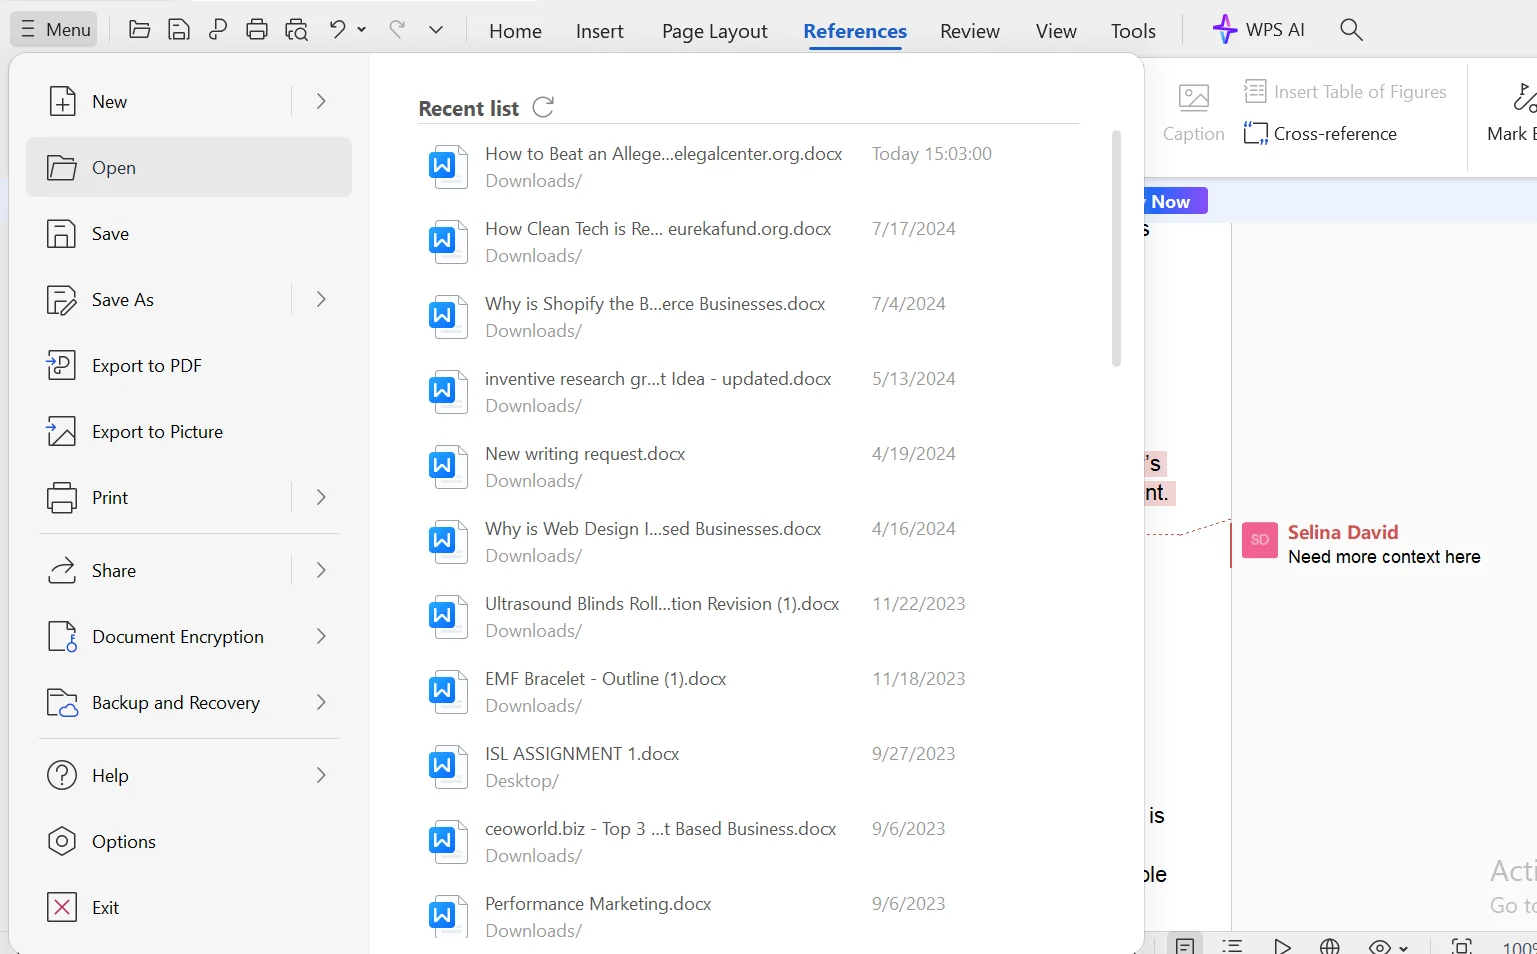
In MS Word, you simply need to move your cursor to the top left corner of the screen and click on File > Save or Save As to save your annotated file.
Voila! You have successfully annotated and saved the document in Doc and Word. If you are wondering how to annotate in microsoft word, follow the same steps both in MS Word and WPS Doc to annotate and save your digital document.
Part 2. Why Should You Annotate Word Documents?
Annotation in both Word and WPS Doc is a useful and valuable feature that allows you to review the documents, add comments, highlight important information, remove extra details, or add references. Using this feature, students and professionals can improve their workflow and boost productivity.
If you have already learned how to add annotations in word, here are a few advantages that come with Doc and Word annotations.
- Enhanced Collaborations:Whether you want to work on a class project or a business proposal, with Word annotations, multiple users can highlight important details, add comments, suggest feedback, and remove extra information within the same document. This improves collaborations and makes communication easier, saving you extra time to send emails and text messages.
- Track Changes: With the “Track Changes” tool in both MS Word and WPS Doc, you can see all the changes and revisions made by multiple people within the document. This feature allows you to keep track of all the changes, making it easier to maintain the accuracy of the document.
- Improved Organization:Annotating documents helps you to organize your thoughts more efficiently so that you remember everything. By adding comments, suggesting changes, and highlighting text, you are streamlining the process of editing the documents.
- Better Reviewing and Approval Process:When it comes to reviewing and approving documents, having the ability to highlight texts, remove extra details, and add feedback makes the job that much easier. Plus, you dont need to send the document back and forth. Annotations allow you to review and approve documents quickly and efficiently while tracking all the changes.
Part 3. Conclusion
In summary, document annotations have become an essential tool in our day-to-day life. Whether you are a student or a business owner, annotations allow you to improve collaborations, give clarity and feedback, review and revise, and track changes in the document.
Using this feature, you can not only organize your thoughts more efficiently but also improve the quality of the document. So, if you want to learn how to annotate Word or Doc, you simply need to follow this step-by-step guide mentioned above.
This guide will teach you how to add comments, highlight text, underline text, strikethrough text, and insert footnote or endnote while tracking all the changes. So, whether you are an MS Word user or a WPS Doc user, this guide is all you need to annotate your documents successfully.

