Drawing on documents requires firm skills and a user-friendly platform to mark the files with ease. Adding a horizontal line to a Word document can be done through formatting tools of the MS Word.
However, inserting a vertical line in the file can be a little trickier or tougher, especially in moulding the shape, colour, style, angle, thickness, and alignment. To perform this task easily, you need to learn how to draw a line in Word documents and PDF files using MS Word, Afirstsoft PDF , and other available apps.
Make sure to follow the steps outlined below in a logical order to place the arrow exactly on the target to save your time and resources. Let’s explore different methods that can be used for drawing on documents for free.
Part 1. Why Do You Need to Draw a Line on a Document?
There can be several reasons behind drawing a line on the MS Word document from indicating an important sentence to enhancing the readability of the text. The purpose may vary according to your requirements but the process remains same.
Whether you want to highlight something important in the content or to divert the reader's attention towards a paragraph that needs to be explained more briefly or changed. As discussed above, the purpose may vary from user to user.
Part 2. Different Methods to Use for Drawing a Line in a Word Document Using MS Word Software
MS Word itself offers a bunch of options to its readers for helping them make drawings on their documents. You can make horizontal, vertical, or line of any shape or size according to your preferences using this platform.
Part 2.1: Drawing Using Shapes Menu
Follow the steps mentioned below to draw on Word documents using the Shaoes menu of the platform.
Part 2.1.1:
Open MS Word on your device and select the file you want to edit.
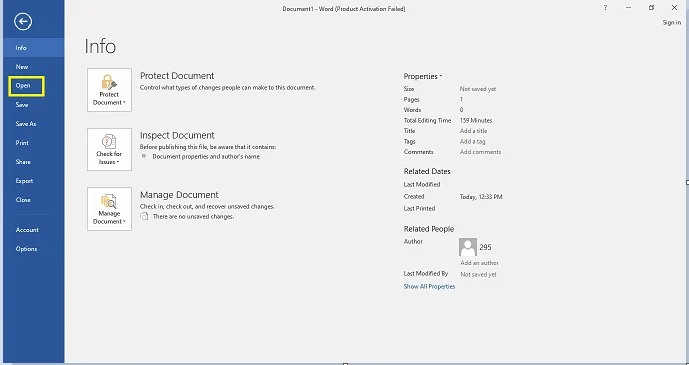
Part 2.1.2:
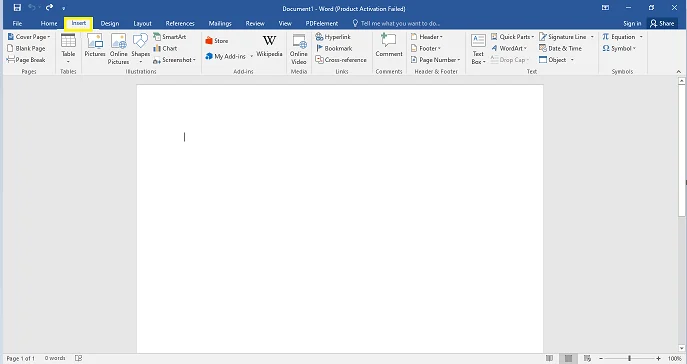
Now look out for the “Insert” tab placed in the top bar menu of the interface to add lines to your document.
Part 2.1.3:
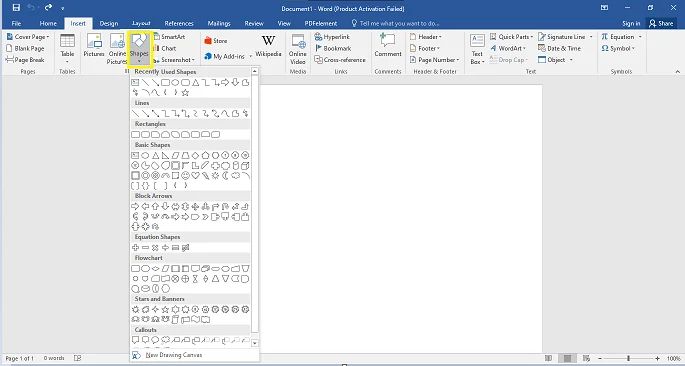
After clicking on the “Insert” tab, find the “Shapes” option, click on it, and a drop-down menu will appear.
Part 2.1.4:
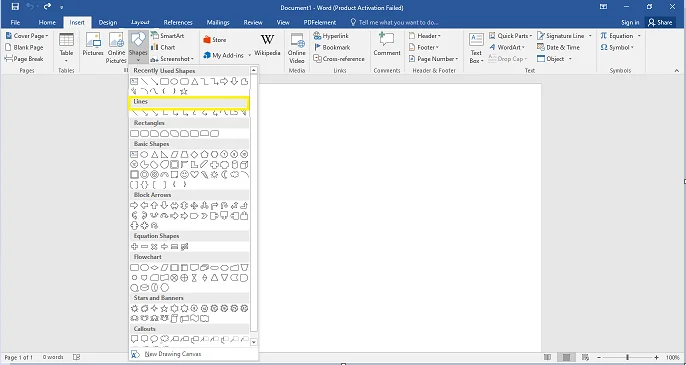
Select the shapes from the “Lines” tab and start editing your document.
Part 2.1.5:
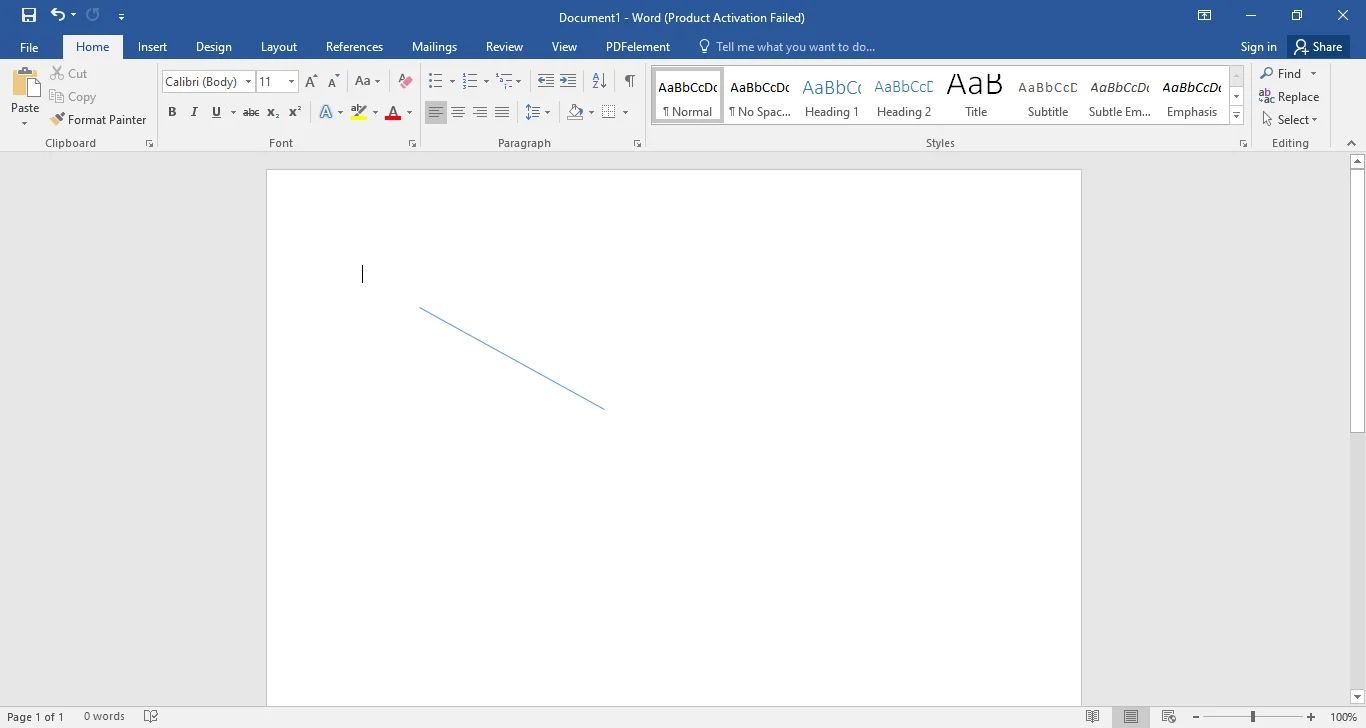
Choose the shape of the line you want to insert in the document and drag over the page to fit the size according to your requirements.
Part 2.1.2: Creating a Vertical Line
Part 2.1.2.1:
To create a vertical line in your document, put the cursor at the point where you want to draw the line and then drag it into the area where you want the line to end.
You can also use the “Shift” key to draw the line by pressing the key for so long that you can get an absolute vertical or horizontal line.
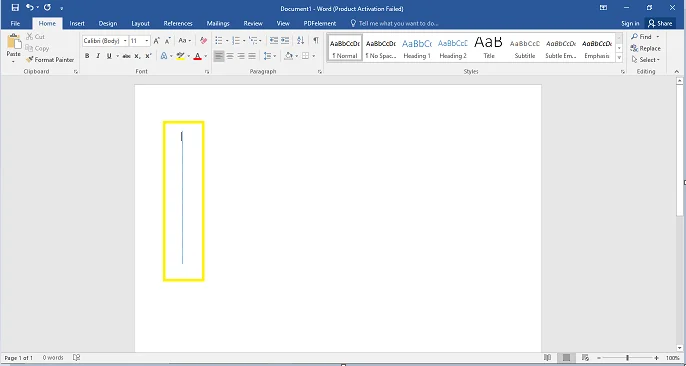
Part 2.1.3: Changing the Style of the Line
Part 2.1.3.1:
You can also modify the shape or style of the line by clicking on the “Format” tab, and you can change the style, colour, style, or effects of the line using this feature.
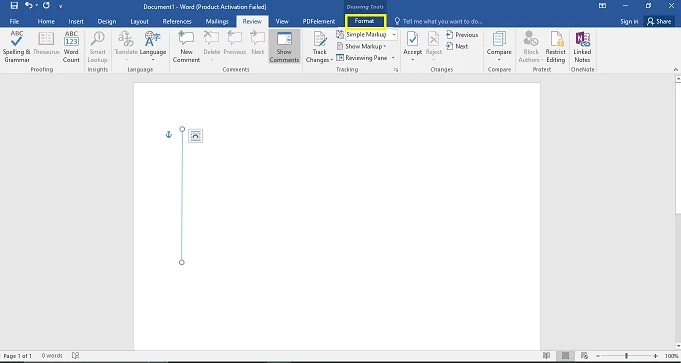
Part 2.1.4: Drawing Using the Horizontal Line Tab
Another method of drawing a line in the Word document would be through the use of the “Horizontal Line” tab already present in the software.
Part 2.1.4.1:
Open your document and reach out to the “Home” tab of the interface. After clicking on it you will see a lot of options available in line on top bar menu of the interface.
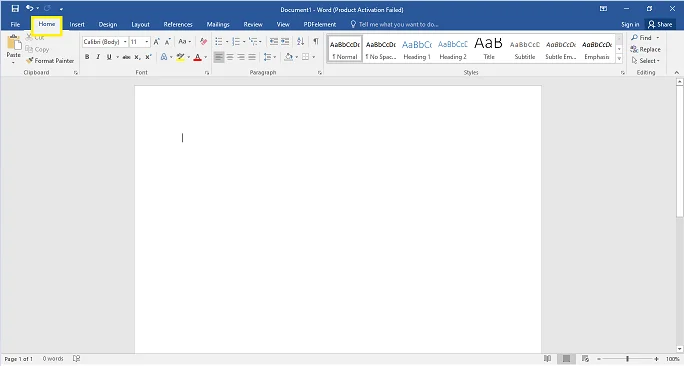
Part 2.1.4.2:
Now, reach out to the paragraph grouping or managing section of the interface and click on the Border, and you will see a drop-down menu. There, you will see a lot of options, and select the “Horizontal Line” to draw the line on the page.
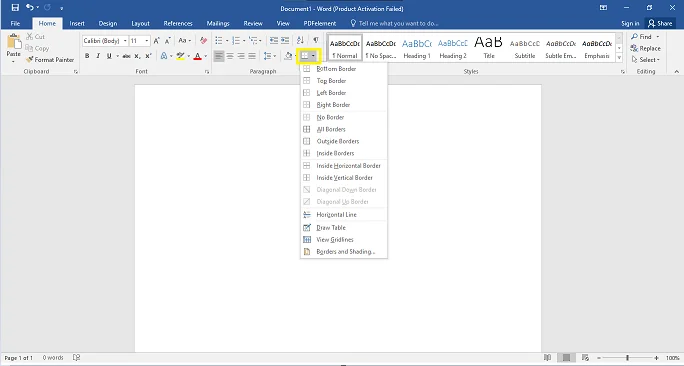
You can change the style or length of the line being drawn according to your preferences.
Part 3. How to Use Keyboard Keys to Create a Line in the Word Document?
The easiest way to draw a line in the Word document is by using your keyboard keys. You can use the following keys discussed below to draw on your documents.
Part 3.1: Hyphen Key
To add a line to your document, you need to add three-time hyphens in the file and then click on the “Enter” tab of your keyboard. Then, you will see a line being drawn on the page.
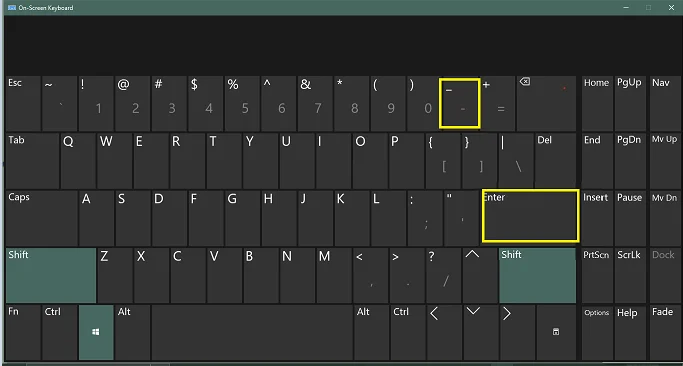
Part 3.2: Underscore Key
The underscore key can also be a beneficial tactic for drawing a straight line on the page. You just need to add underscore three times and then press “Enter”, as you have learnt in the above section, and you will see the magic happening in front of your eyes.
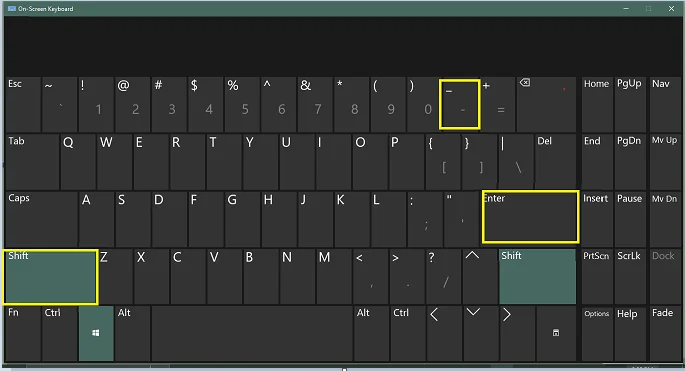
Note: Make sure to press the “Shift” and “Underscore” keys simultaneously for the right results.
Part 3.3: Equal To Key
You can also use the “Equal To” key of the keyboard to add the line to your document. To make a double line, just press the “Enter” key again.
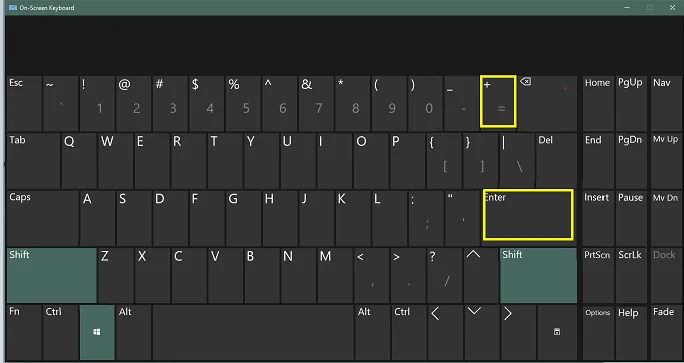
Part 3.4: Hashtag Key
As outlined above, you just have to press the “Hashtag” key three times and then the “Enter” button to create a triple or thicker line in the file.
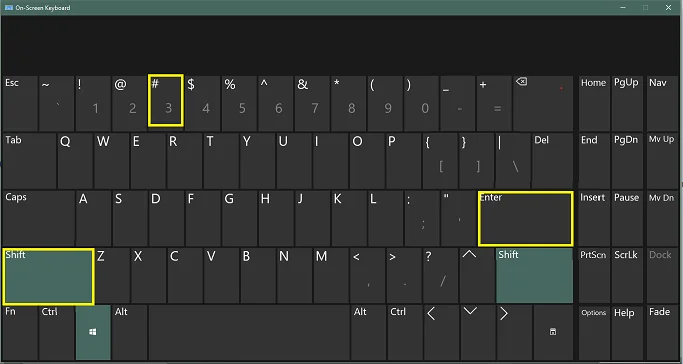
Part 3.5: Asterisk Key
To create a straight line in the document, you can also use the “Asterisk” key on your keyboard. Just press the key three times along with the Enter key and you will get a broken or dotted line created in the document.
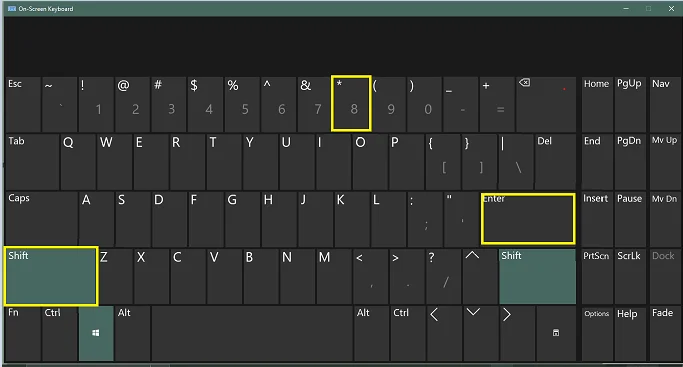
Part 3.6: Tildes Key
Repeat the process that you learnt above just by adding the tildes three times and then pressing the “Shift” and “Enter” keys simultaneously to create a wavy line in the document.
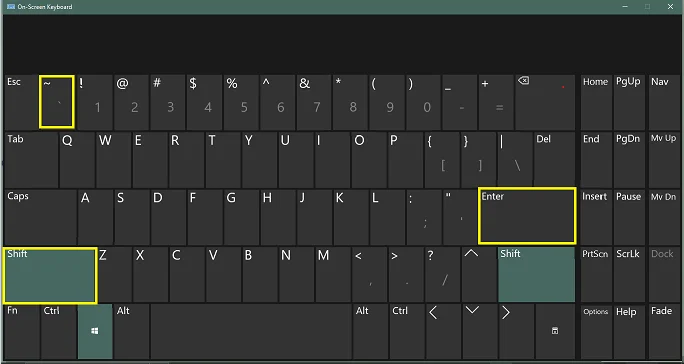
Note: Remember to press the “Shift” key every time you use any of the above keys mentioned above to get instant results.
Part 4. Is PDF Format a Best Format to Draw on Documents?
Yes, Portable Document Format (PDF) is the best document format to be used for drawing on the documents. There are numerous reasons explaining why it is the most suitable file format, which will be discussed sperately in the sections below.
Make sure to read each one carefully and relate to your situation to better understand the difference between the practicality of both PDF and Word file format documents.
Part 4.1: PDFs are Easy to Edit
No doubt PDF documents are easy to edit as compared to the Word files because they can be edited using any PDF reading and editing software like Afirstsoft PDF, Adobe Acrobat, Wondershare, Xodo, Foxit Reader, Phantom, Xodo, Annotate, GoodNotes, Onenote, and so on.
For example, you have received a PDF from your instructor being prepared on Adobe. You don’t need to install the same software for reading and editing this document, you can do it using advanced apps like Afirtsoft PDF without paying a penny to them.
Part 4.2: PDFs are Cross-Platform Friendly
The standout feature of PDF documents is their cross-compatibility, which makes them the first choice for users to read and edit important files. You can read and edit PDFs on Smartphones, Laptops, Tablets, Kindles, Smartwatches, etc.
This is not possible in the case of Word files because they can only be treated using a Smartphone and a Laptop device. For example, you are working on a document while on the institutional library’s computer, and suddenly, you have to rush home by leaving the document unfinished.
You can start working where you have left by using your smartphone or any device of your choice. The only requirement is to use the same PDF reading and editing software.
Part 4.3: PDFs are Easy to Share
Another standout feature of PDF documents is that they are easy to share with others using a lot of options available in the app, like through WhatsApp, Email, Drive, Skype, etc, to anyone across the seas.
On the other hand, MS Word files can only be shared through Emails in the same form or in the form of downloaded files as well. For example, you are preparing the notes for the coming exams, and you want to share them with your whole batch, but Microsoft Word is asking for emails of the people you want to share the file with.
Which is not available to you right now resulting in delay in sharing documents, you can share the same document in the PDF format using a PDF reading and editing app with a single click on the WhatsApp group of your class.
Part 4.4: Drawing in PDFs is Easier than Word Files
Drawing in PDF reading and editing software is way easier than doing in MS Word software because it is not too user-friendly to draw a line in a Word document for the not too familiar with the platform users.
On the other hand, whether you are using a PDF reading and editing platform for the first time or the 100th time, it is equally easy to use in both cases by providing ease in drawing a line of the PDFs with as many functionalities as possible.
You need to choose only an intuitive and user-friendly platform like Afirstsoft PDF, which is available for every kind of smart device and free to access with premium features setting the bar high in the industry.
Part 5. Afirstsoft PDF, the Best App for Drawing on PDF Documents for Free
Afirstsoft PDF is undobtedly the best premium app available in the digital spaces for drawing on PDF documents for free. It is available on different platforms like Mac or Windows laptops and smartphones to provide the opportunity to get hands on this amazing app to every kind of user.
Let’s have a closer look at the practical steps to draw on your PDF documents with ease.
Part 5.1:
Install the Afirstsoft PDF app on your device. If you are struggling to find the link, you can click on this link and get the app installed on your device.

Part 5.2:
Open the PDF document in the app on which you want to draw a line or other shapes and place them on the content.
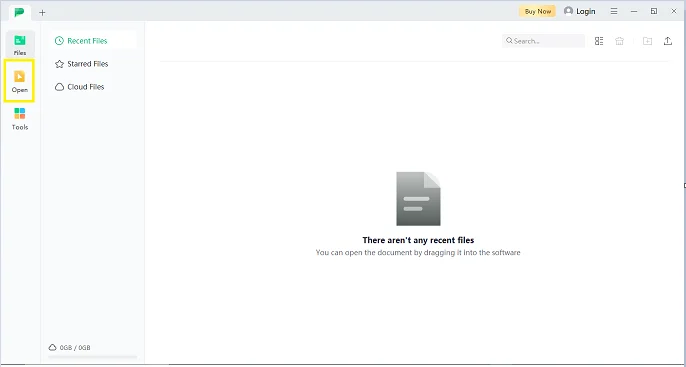
Part 5.3:
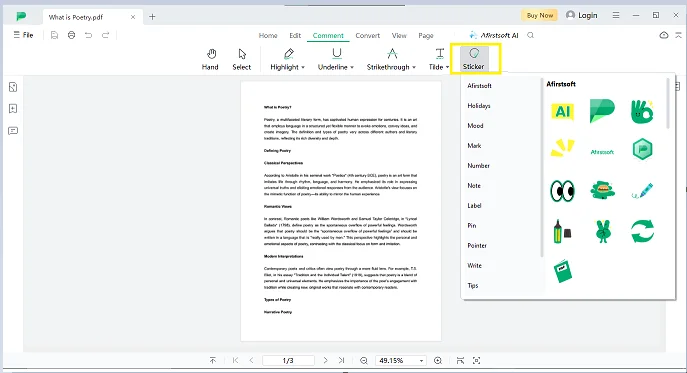
Now, reach out to the “Comment” tab and start making drawings on the document.
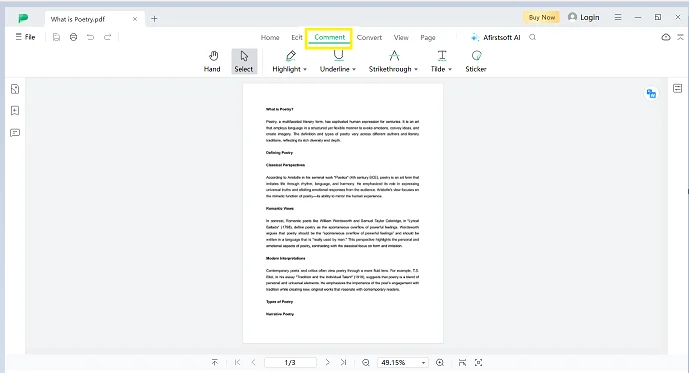
Part 5.4:
Make sure to use the “stickers” tab to add a line and select from 100+ objects available in the app to do maximum customisations on your PDF document.
Part 5.5:
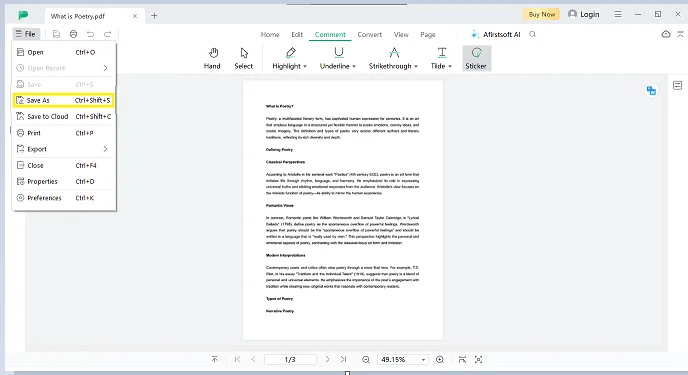
Make sure to save the progress after making changes on the document by clicking on the “Save As” tab and then select your preferred storage location in the device or cloud to next time work on the edited document.
Part 6. Frequently Asked Questions
Part 6.1: Q1. How do I draw a line in a Word document?
You can follow the steps outlined above to draw a line in the Word document using the MS Word software on your device.
Part 6.2: Q2. Can I make vertical lines in a Word document?
Yes, you can make a vertical line in a Word document by following the procedure presented in the above sections.
Part 6.3: Q3. Is drawing on PDFs easier than Word documents?
Drawing on PDF documents is very easy and convenient as compared to Word documents, which can only be treated in MS Word software.
Part 7. Conclusion
After reading the whole blog and following the steps outlined above for different methods in MS Word or Afirstsoft PDF annotation software, you will surely learn how to draw a line in Word and other documents with ease.
Remember to follow the process in the sequence to not mess out things while working on your documents. Drawing on documents requires maximum customisations and access to premium features which are only available in the Afirstsoft PDF app.
So, while choosing the software, consider this premium platform to work on your documents, as it is loaded with all the features required to work for absolutely free.


