Managing and reviewing PDFs can sometimes be a little challenging, especially when you have to mark out information, highlight texts, and suggest feedback for revision. For this, you need a reliable PDF editing tool that comes with essential annotation tools, specifically the strikethrough feature, to manage your documents effectively.
This feature has made highlighting errors, mistakes, and any unwanted details from the text much easier. Now, you do not have to write and send those hundred emails suggesting changes and revisions in the document. This annotation feature allows you to do that within the document without altering the original text. The best part? All the changes will be saved for others to review.
While there are several PDF editors in the market, both paid and free versions, OneNote is a great choice if you are looking for basic PDF editing features. OneNote is known as one of the best note-taking tools, and it also features standard PDF editing tools and a manual strikethrough feature. Using this tool, you can highlight text, add comments, underline text, and strikethrough text in your notes.
Moreover, you can import your PDFs into OneNote and make changes to them using the same annotation tools. In this guide below, we will teach you how to strike out in PDF with OneNote. So, let’s get to business.
Part 1. OneNote Strikethrough in PDF for Desktop Version
OneNote Strikethrough formatting is one of the most useful tools for organizing notes and PDFs. This feature allows you to visually cross out unwanted details, old information, completed tasks, or anything you no longer need in your PDFs.
This lets you only keep the information you want in your notes or PDFs and get rid of anything that is not relevant anymore. While OneNote does not have a direct feature to strikethrough text in the PDF, there is a trick that you can use.
Let’s delve into this step-by-step guide that discusses two ways you can use OneNote strikethrough, one with PDF and ther other with notes.
Step 1: Visit the OneNote Website Page
Before you use the OneNote desktop version, you first need to visit the OneNote website.
To do so, you need to open your browser and type in OneNote in the search bar, or you can click on www.onenote.com to land directly on the home page.
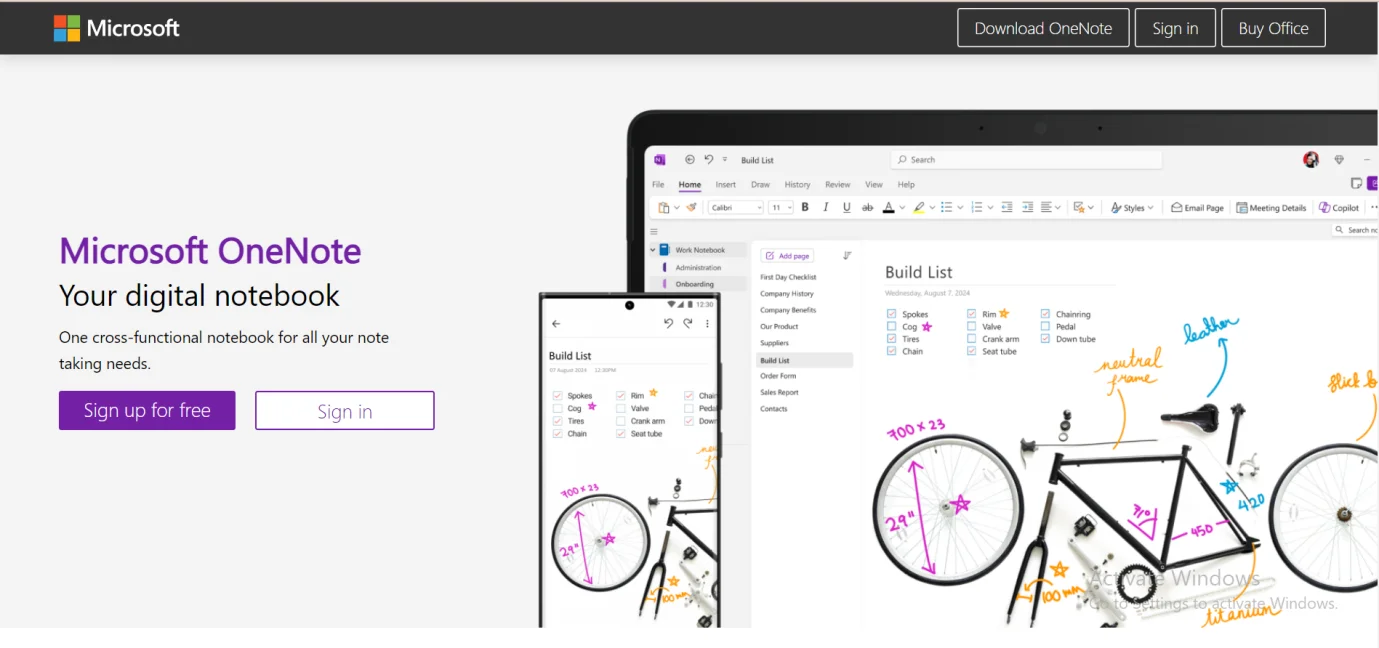
After clicking on the links, you will land directly on the home page, where you have a few options to choose from.
You can either download OneNote on your laptop if you want to use the application. You can also sign up for free if you don't have a Microsoft account.
Step 2: Create a Microsoft Account
If you don’t already have a Microsoft account, the next step you want to do is to create one.
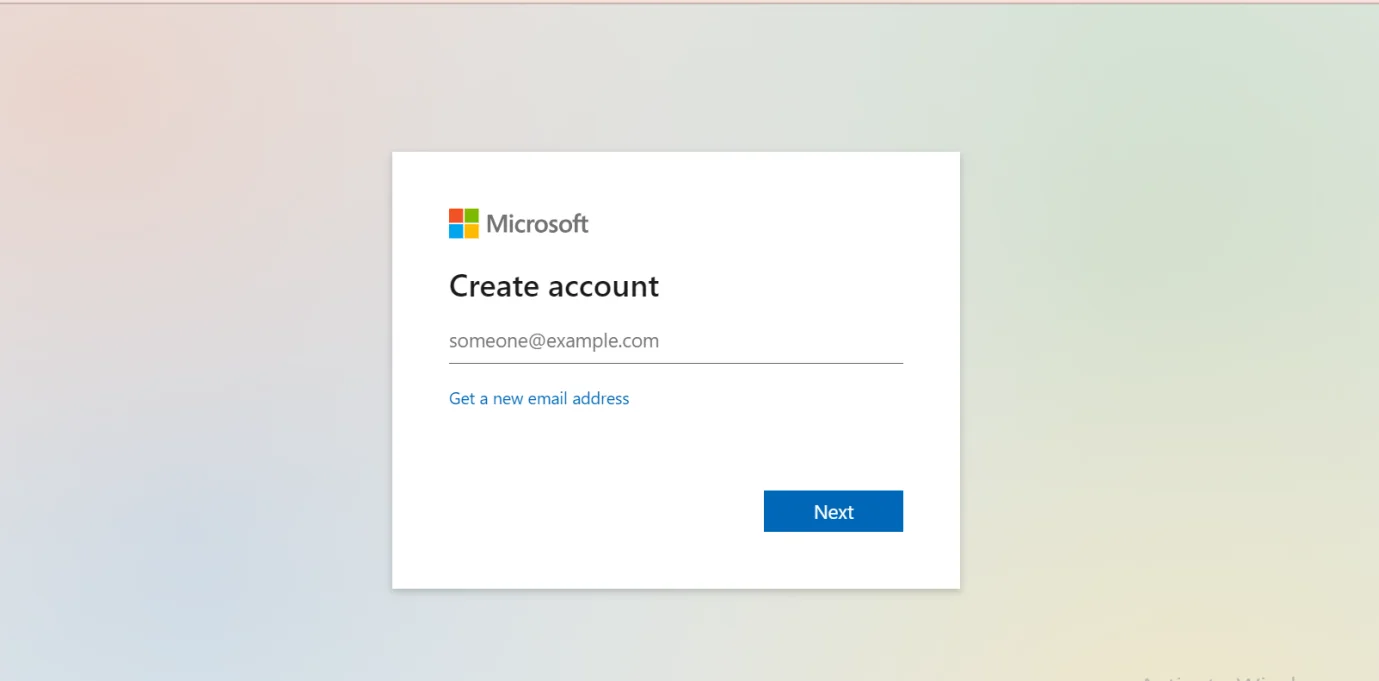
To create an account, enter your email address and click on the “Next” button.
After clicking on the Next button, a new window will open, and a code will be sent to your email address, which you are required to add here.
After adding the code, add other details such as your first name, last name, date of birth, and more to finalize creating your account.
Step 3: Launch the OneNote desktop App
Once the account is created, you will be welcomed on the home screen of your OneNote desktop app.
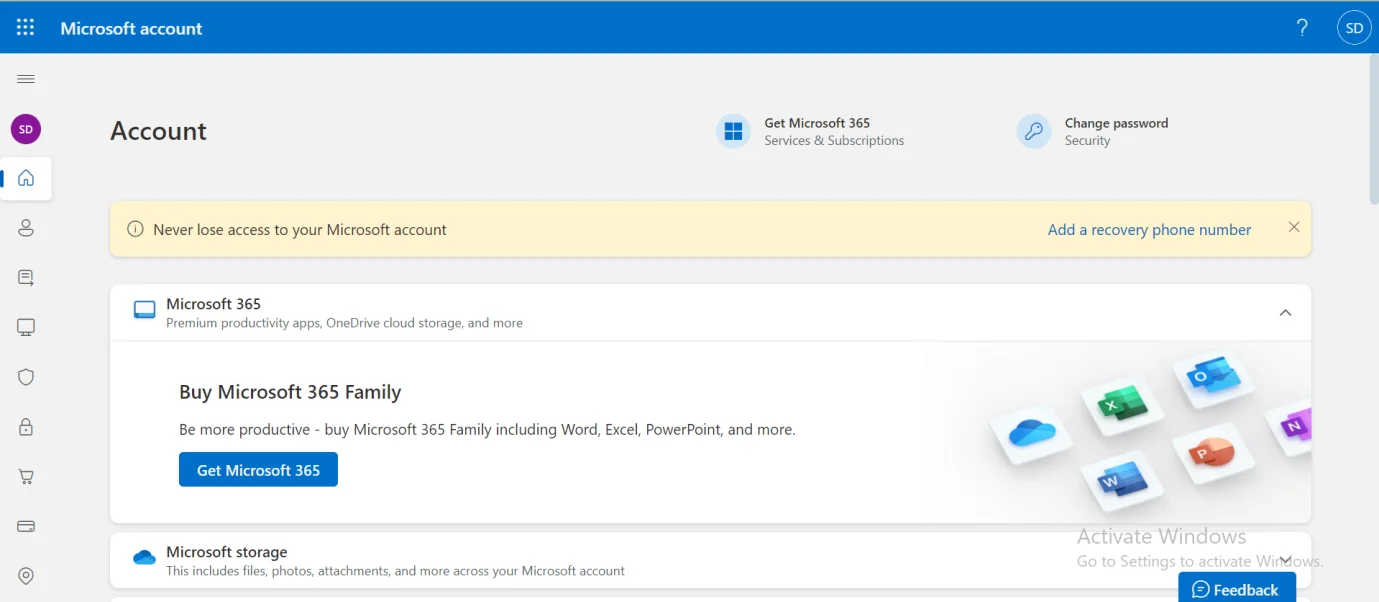
Here, you have the main menu on the left side of the screen that contains all the options and Microsoft services you could need.
Step 4: Open Notebook
From the home screen, navigate to the top left corner of the screen and click on the menu, which is represented by nine dotted lines located right next to the Microsoft account.
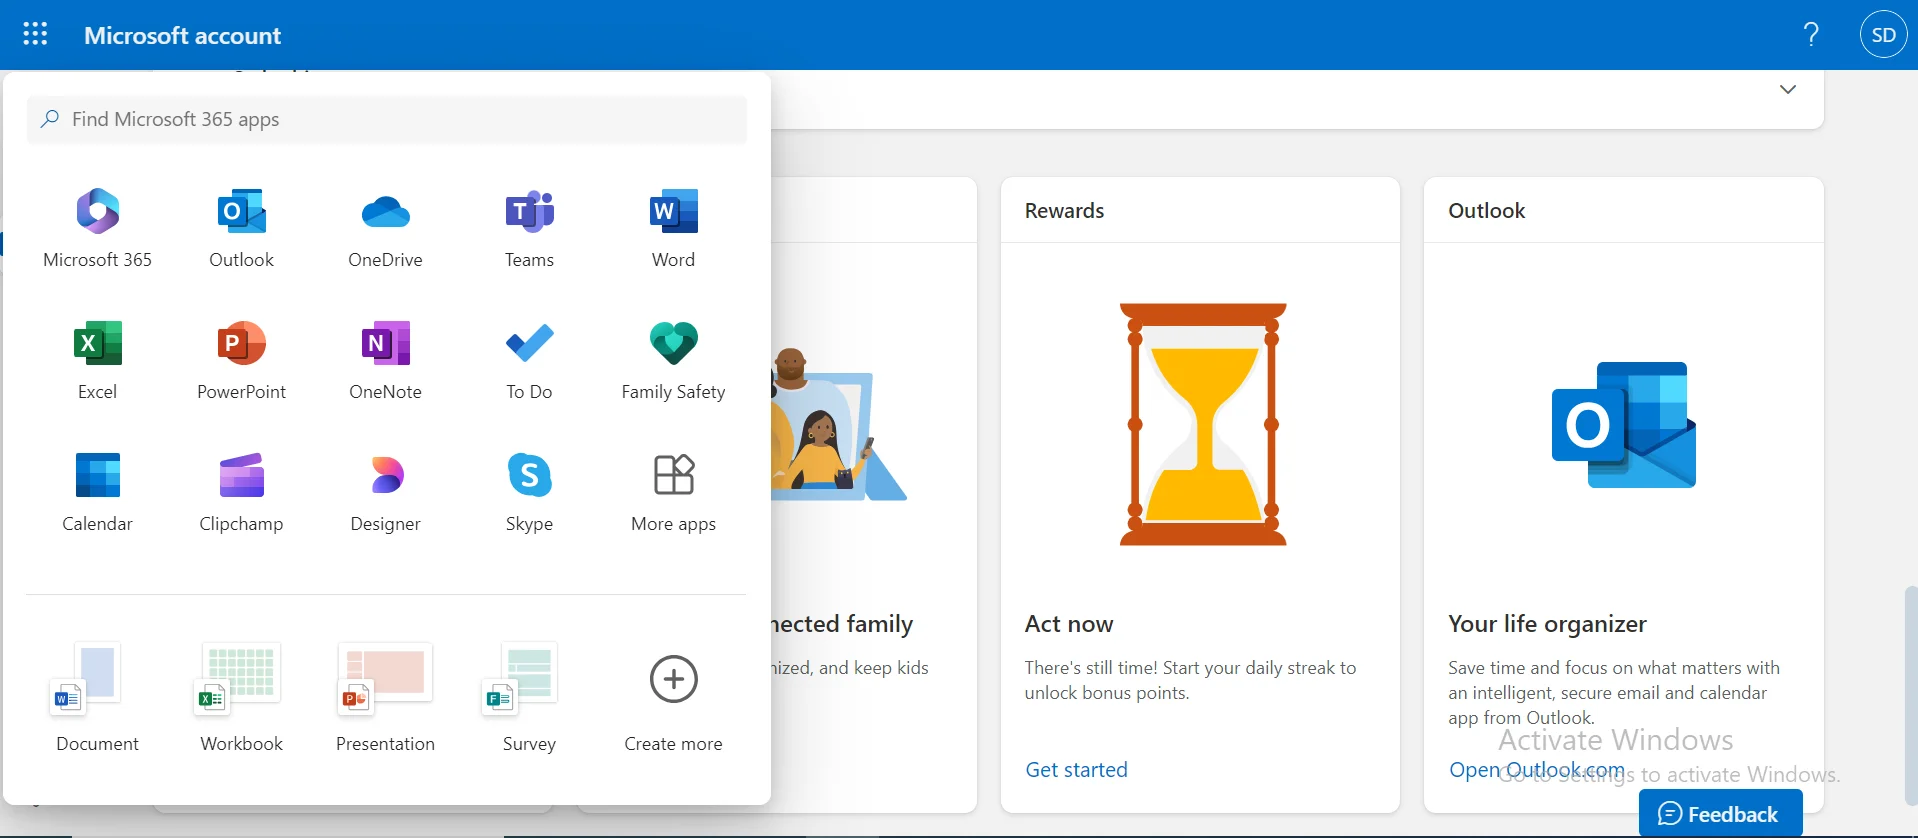
Click on these dotted lines, and all the Microsoft services will appear on the screen, including Outlook, Microsoft 365, OneDrive, Word, Excel, PowerPoint, OneNote, and more.
From the services, click on OneNote.
After clicking on “OneNote,” Notebook will open in a new tab where you can start your editing and annotations.
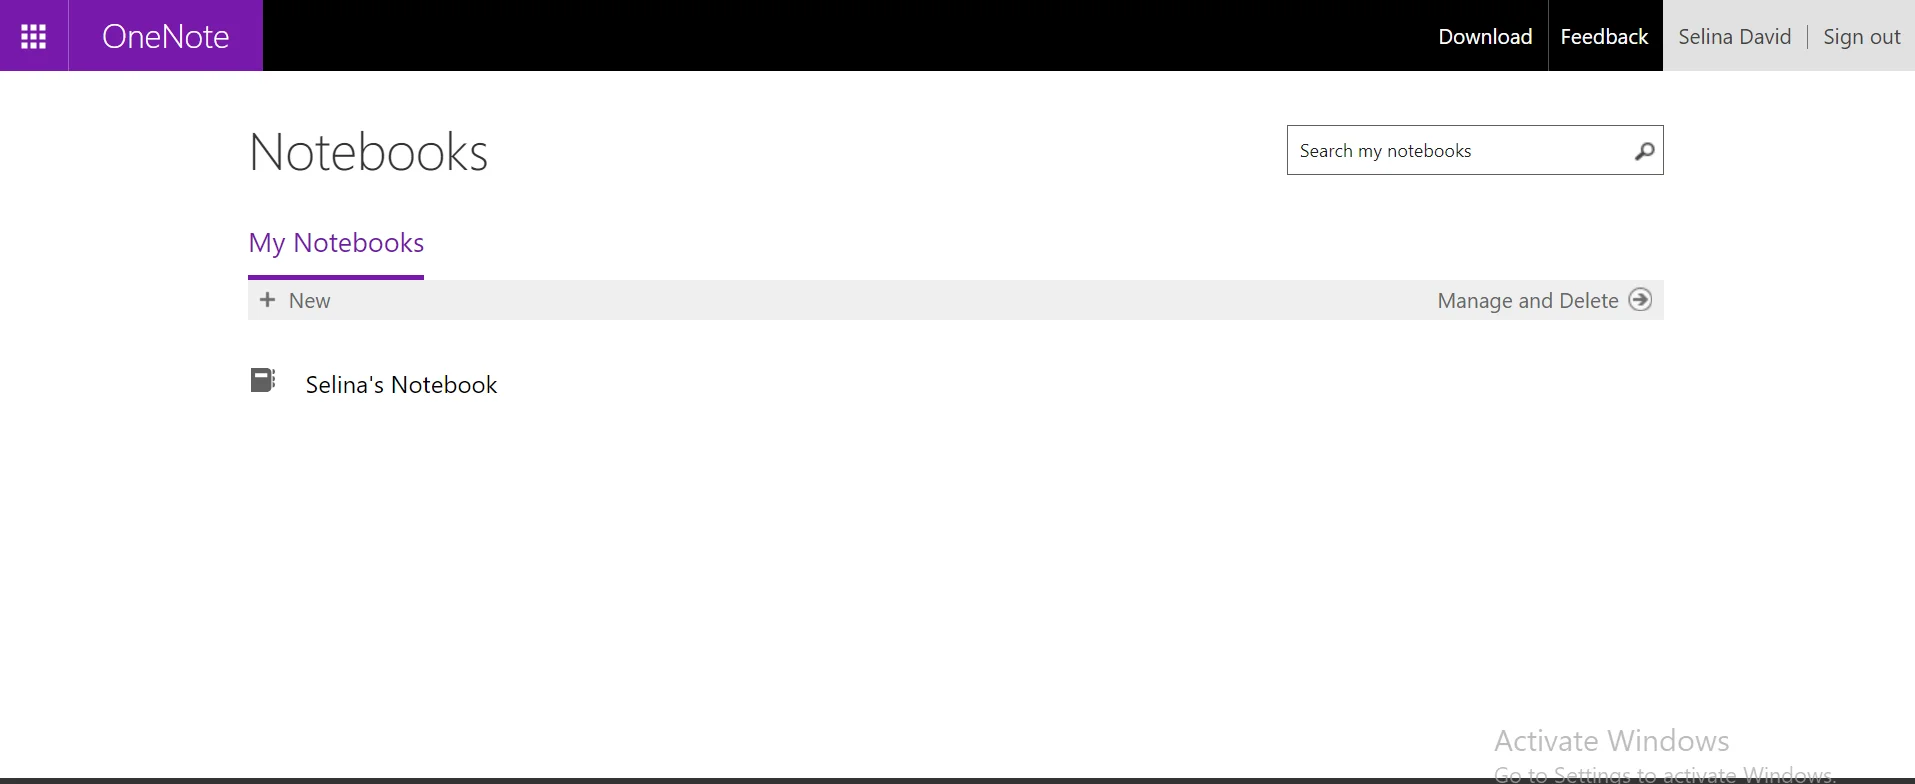
Step 5: Create a New Notebook
After the Notebook is opened, click on “+ New” to create a new Notebook.
After clicking on New, you will need to name the notebook so that you know which note you are working with.
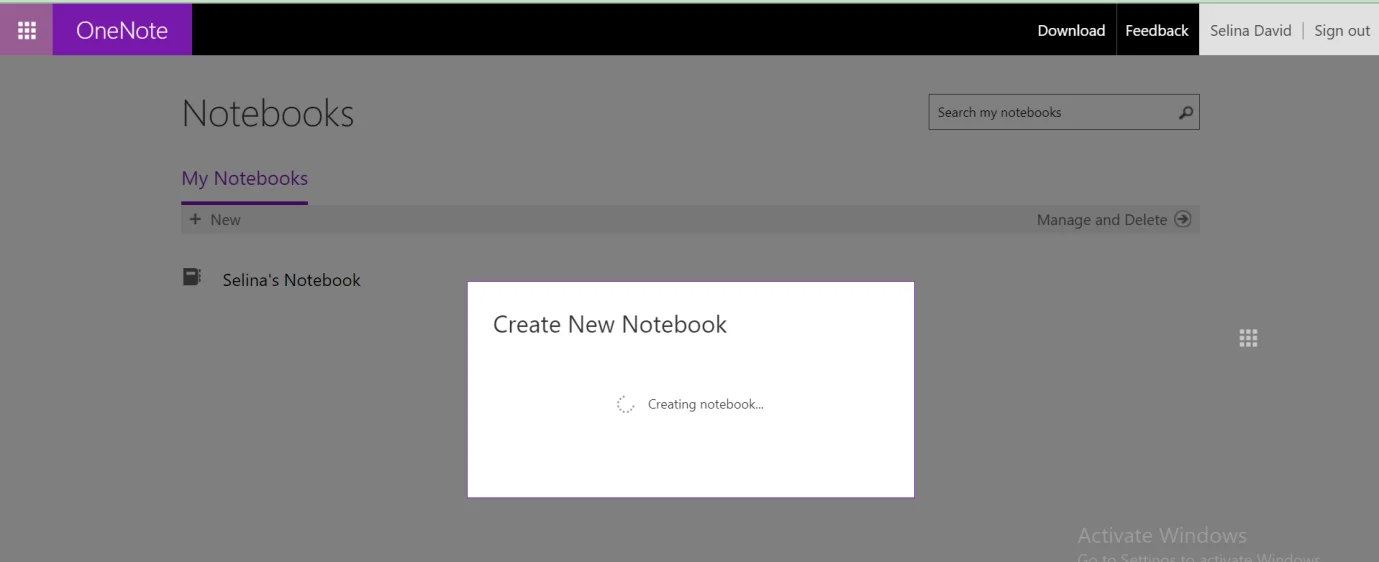
After naming the notebook, a new notebook will be created, and you are all set to select the content you want to strikethrough pdf.
Step 6: Import the PDF into OneNote
Before opening the content to strikethrough, make sure the PDF is already saved on your device so you can select and import it into OneNote.
Now, to import the PDF, navigate to the top left menu and click on the “Insert” tab in the toolbar.
Next, you want to click on “File” and then “Insert File Printout.”
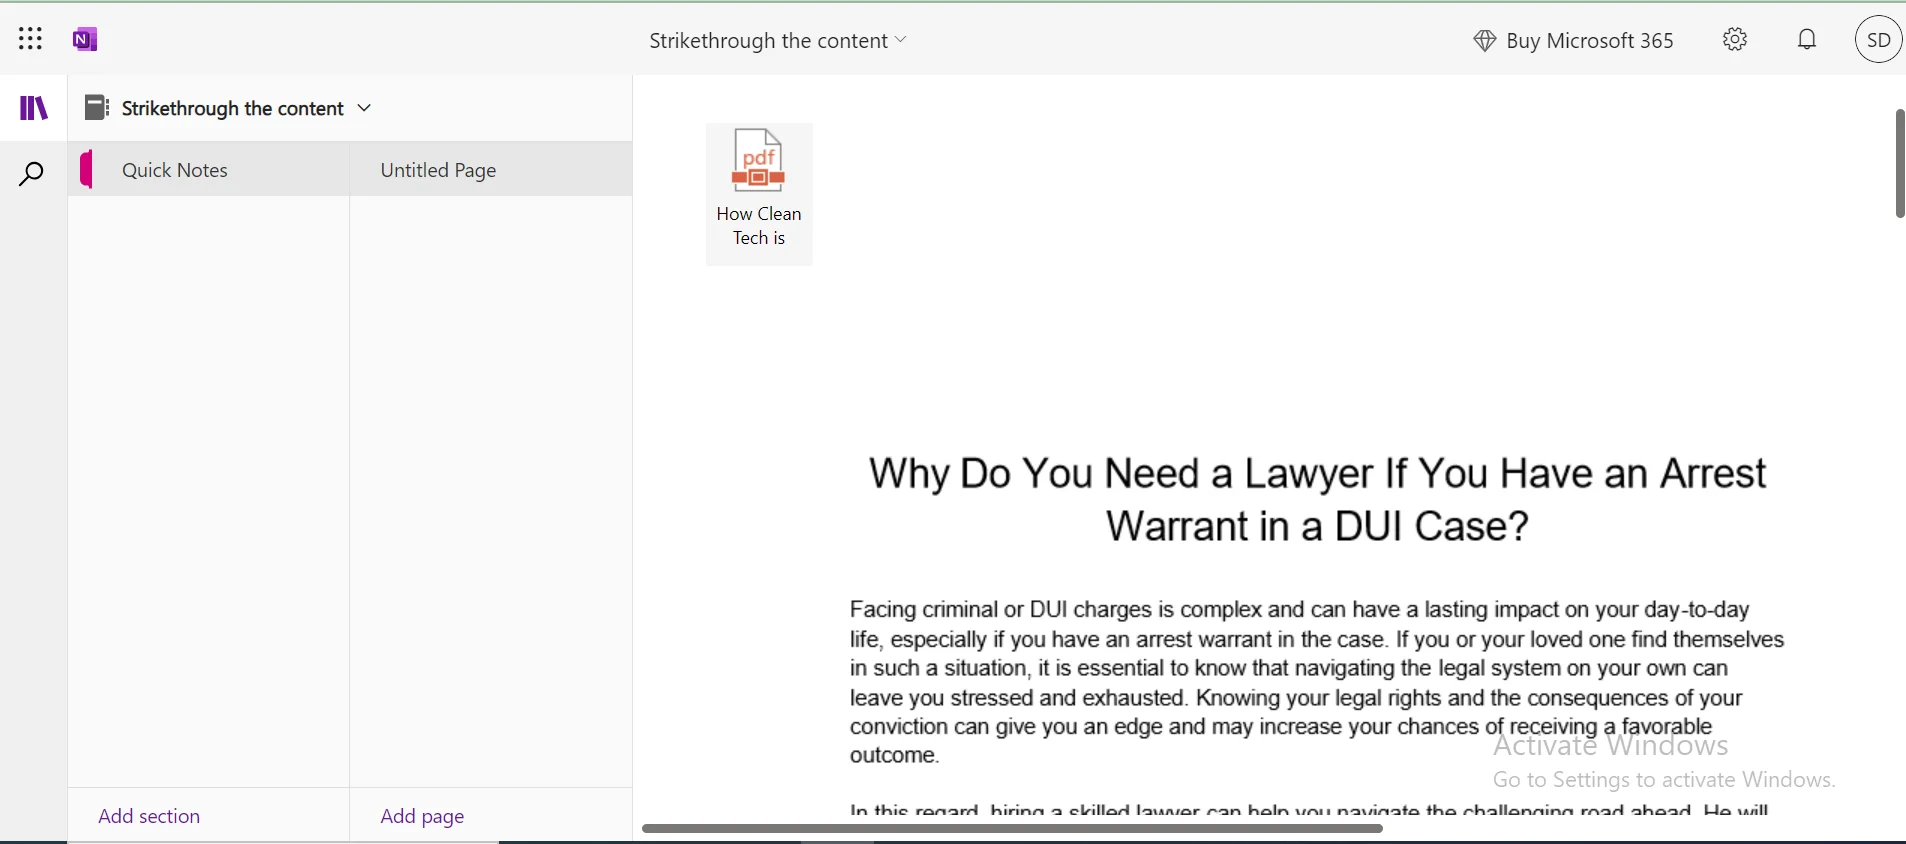
Select the PDF file you want to insert in OneNote as an image. After doing so, the PDF will be opened as an image and appear on the screen.
Step 7: Select the Draw Tool for Strikethrough
Once your PDF is opened in OneNote, navigate to the top menu and select the “Draw” tab from the toolbar.
From the available options, you can choose “Pen,” “Highlighter,” or “Draw with touch.”
Using your mouse, stylus, or touchpad, you can manually draw the line through the text you want to strikethrough.
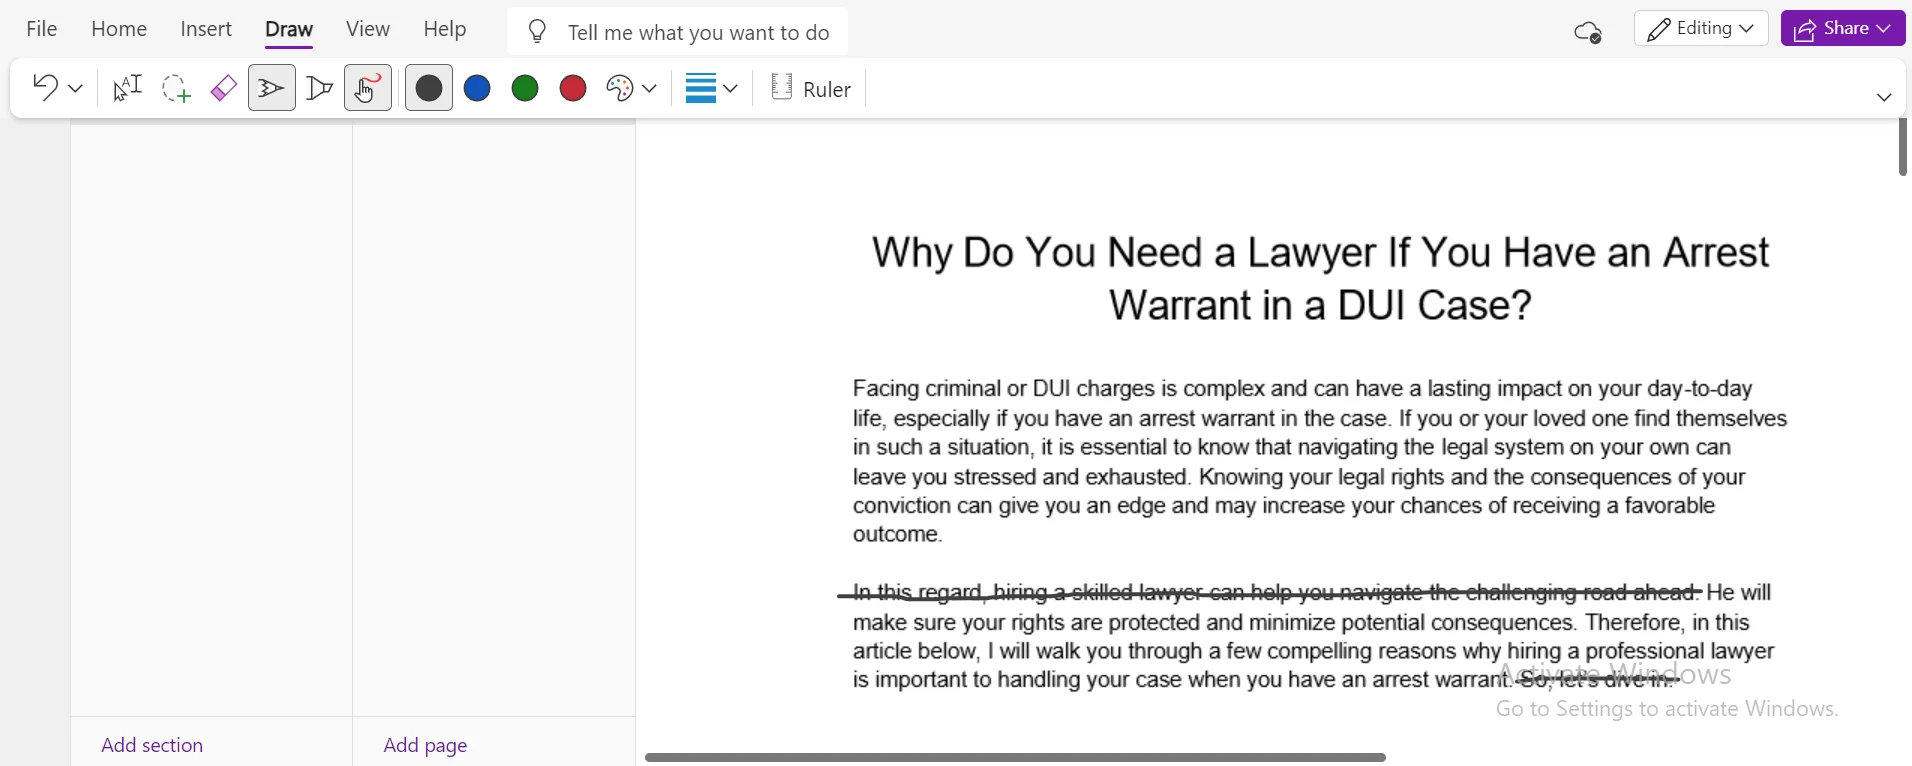
Whether you choose a highlighter or a pen, you can select the color and thickness to adjust the settings based on your requirements.
It is important to know that manually drawing a line through the text may not look visually pleasing and will likely look rough.
If you are wondering how to strike out in pdf, OneNote does not offer a direct tool to strikethrough the text on imported PDF documents.
However, you can quickly achieve this by using a drawing tool to draw and strike through the text from the PDF manually.
Step 8: Text Strikethrough for Text Notes (Optional)
If you are working with a text note, you can strikethrough the text using a strikethrough tool.
To do this, navigate to the top menu again and click on the “Home” tab from the toolbar.
Next, you want to select the highlighter that is represented by the brush icon.
Customize the color of the highlight and highlight text you want to strikethrough.
Next, you want to move your cursor to a little right and click on “Font,” which is represented by “...” three dots.
After clicking on three dots, a little drop-down menu will appear, and you will need to select the “strikethrough” icon from the menu.
Just like that, by following these steps, you have successfully learned to master onenote strikethrough in PDF.
Part 2. Alternative Tools to Strikethrough in PDF
If you want to avoid marking out text in the document manually and are looking for more professional and reliable options, we have you covered. Here are a few popular and powerful tools that do a lot more than taking and managing notes.
Afirstsoft PDF
Afirstsoft PDF Editor is a powerful, valuable, and sound PDF editor that comes with a comprehensive range of AI-powered editing tools. With its advanced and easy-to-use tools, you can mark up your documents, making them more interactive and readable. However, one feature that makes Afirstsoft PDF the perfect alternative to OneNote is its full annotation suite.
With its strikethrough PDF feature, you can actually highlight deletions, revisions, or any part of the document that is not relevant anymore. Unlike OneNote, which only lets you manually strikethrough the text, Afirstsoft PDF gives you more control over edits and annotations.
In addition, Afirstsoft PDF provides you with an editing environment that lets you highlight text, underline text, add comments, add notes, and whatnot. If compared to OneNote, which is primarily a note-taking app, Afirstsoft PDF is the better choice as it offers a complete set of advanced annotation tools.
Adobe Acrobat Reader DC (Free Version)
While OneNote is a popular note-taking app, it lacks PDF editing tools. Adobe Acrobat Reader stands out as the next best option for seamless PDF editing, professional-level annotations, an intuitive interface, and better PDF compatibility. Since the tool is specifically designed for managing PDF documents, it provides users with a smooth and interactive user experience.
If you are wondering how to strikethrough in Adobe, the tool comes with enhanced PDF annotation capabilities that allow you to annotate your documents quickly and efficiently. Starting with adobe strikethrough, you can mark up information that is no longer needed in the document. Whether you want to make edit notes, underline text, highlight text, or add stamps, you can create detailed feedback within the document with these annotation tools.
Additionally, OneNote does not offer you ideal PDF compatibility as it was primarily designed to take and manage notes. Whereas even the free version of Adobe Acrobat Reader ensures full compatibility with PDF formats, making it easier for you to view, edit, and manage complex documents.
Adobe Acrobat Pro DC (Paid Version)
While the free version of Adobe Acrobat Reader offers excellent PDF compatibility and seamless PDF editing experience, you will need to upgrade to the Pro version that comes with advanced PDF editing tools. The free version gives you access to basic PDF editing and annotation tools, but with the paid version, you can go beyond viewing and editing documents. You can modify text, images, and even layout all within the PDF document. You can also add new pages, delete unwanted pages, and rearrange them, which you cannot do in the free version.
Moreover, if you are looking for a tool that lets you mark out text, strikethrough Adobe Acrobat is an excellent feature. With its full suite of annotation tools, you can highlight, underline, and comment on the text in the document. This allows you to review your PDFs in detail and give thorough feedback as you go, making the adobe acrobat strikethrough option a more professional alternative to the basic OneNote strikethrough.
However, what makes Adobe Acrobat Pro DC a better option than OneNote is its superior document handling and management. OneNote’s basic PDF editing tools cannot match its advanced editing tools, comprehensive annotation options, and high-quality document preparation. Whether you are in business, finance, healthcare, or any other sector, handling and managing your professional documents is more efficient with Adobe Acrobat Pro DC.
Part 3. Why Should You Use PDF Strikethrough
Many may think “PDF Strikethrough” is just another PDF editing tool, so why bother spending time learning how to use it? However, people who review and manage documents regularly know how important it is to have this feature in their tools. Wondering why? Here are a few reasons:
- Revise Documents with Clarity:Strikethrough features allow you to revise your documents with clarity. Since you can mark out unwanted and unnecessary details from the PDFs, you can review what changes have been made without changing the original content.
- Proofread Effectively:When you are proofreading any document, the main feature that helps you highlight errors is strikethrough. With this useful annotation feature, you can mark details and highlight mistakes that need to be revised, edited, or deleted. This allows you to maintain document clarity and enables other reviewers to view corrections within the document.
- Maintain Document Integrity:In academic, legal, or professional documents, you cannot really remove the information you find irrelevant from the document. So, strikethrough pdf features allow you to mark out any unwanted details from the PDF without altering the original text, maintaining document integrity and originality.
- Keep Track of Changes: One of the main advantages of using strikethrough is keeping a record of the changes that have been made to the document. It is important to track changes, especially in the professional setting, where all the modifications must be reviewed and documented.
Part 4. Final Words
OneNote is an excellent note-taking app that is known for its useful and valuable features. So, if you are looking for a tool that lets you take notes, manage your thoughts, and edit PDFs, this might be the best option. The above guide teaches you how to strike out text in PDF using OneNote. However, if you need advanced editing tools, we have mentioned a few popular alternatives as well for you to check out.

