When it comes to compressing PDF files on Mac, you will find it difficult. The reason is Mac operating system restricts you from installing various applications. So, it becomes hard to understand how to compress a PDF on Mac.
For those who are struggling with the understanding of the steps to learn how to compress a PDF file on Mac, we have written this guide. It will help you learn the methods to follow using different tools on your Mac device.
- 100% secure
- 100% secure
- 100% secure
Part 1. How to Compress a PDF on Mac with Afirstsoft Online PDF Compressor?
One of the best picks to learn how to compress PDF on Mac is via online PDF compressor by Afirstsoft PDF. Undoubtedly, Afirstsoft PDF is a new addition to the list of light PDF readers. But it has gained much popularity in no time because of its extraordinary performance.
This online PDF compressor has been designed with a simple interface that won’t ask you to search “How can I compress a PDF file on Mac”. You can easily use this tool directly from your browser. Moreover, it will not ask you to get any subscription or membership for downloading your files.
Unlike other online PDF compressors, it allows you to upload a file having any size or number of pages. While compressing, it will protect the content quality of your document. It means that it will not damage the image quality or graphics that are available within your document.
Abide by this discussion, you can easily understand how to compress a PDF on Mac using this. Its simple interface will ask you to upload the file and get the compressed one within a few seconds. Due to its fast algorithm and effective performance, we suggest you access this online tool and use it now.
Part 2. How to Compress a PDF File on Mac via Adobe Acrobat?
It might be possible that you are using Adobe Acrobat to read PDF files on your Mac. The reason is this particular software is used widely for dealing with various tasks related to PDF files. If you have installed this software, you shouldn’t look for an additional resource to learn how to compress a PDF on Mac.
The process of compressing PDF files using this software is pretty simple. You only have to be familiar with its interface a bit that you must be while reading files using it. If you don’t know how to do this, follow these simple steps to get the compressed file of your PDF document.
Step 1. Launch Adobe Acrobat on your Mac device.
Step 2. Open your file and look for “Compress a PDF” from the left menu bar.
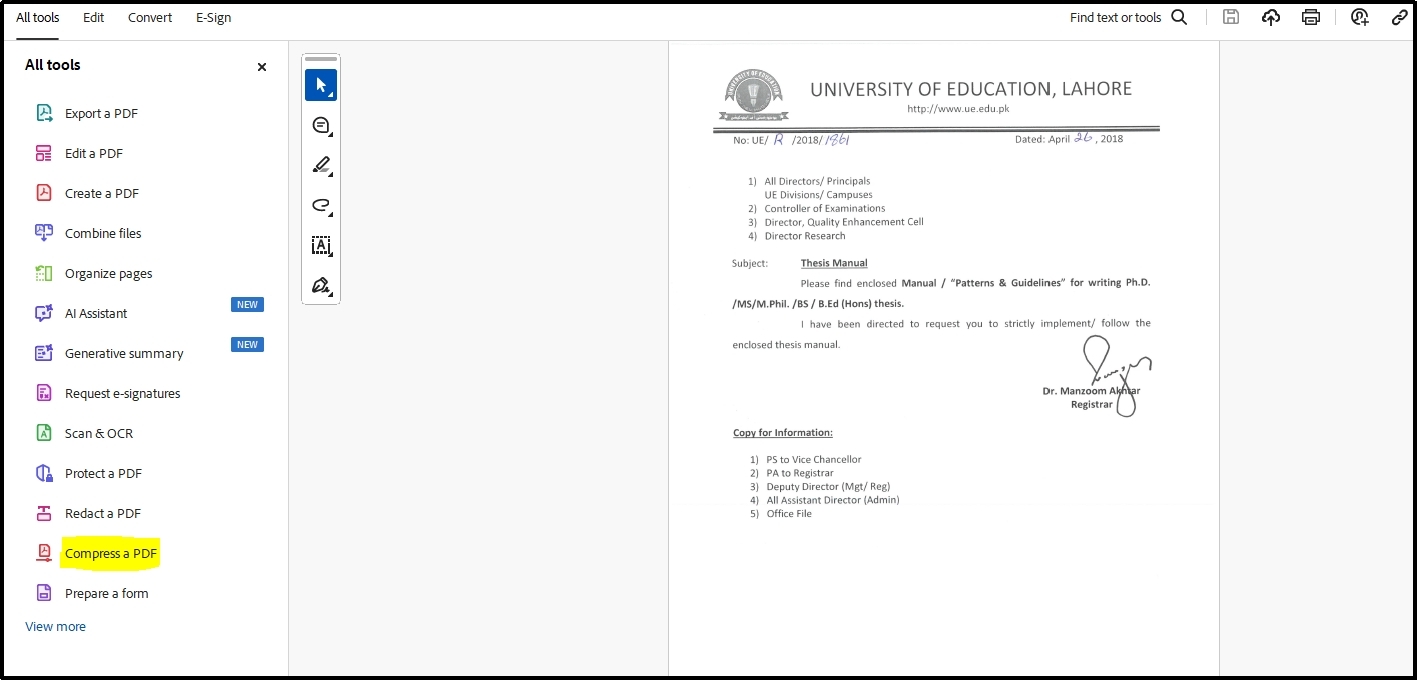
Step 3. By clicking on it, you will get a box with settings that you have to do as per your needs.
Step 4. Use the “OK” button to start the processing of your file.
Keep in mind that this software keeps the original file too and allows you to download the new file as a copy.
So, if you are looking to save storage from your device, you have to remove the original file manually. In this way, you will be done with the steps you have to follow to learn how to compress a PDF on Mac.
Part 3. How to Compress PDF on Mac in Preview?
On your Mac, you must have an application named Preview that can help you learn how to compress a PDF file on Mac. This built-in application enables you to quickly reduce the size of your file and get it downloaded on your device.
Using the same application, you can also share your files with other Apple devices. It means that Preview enables you to share your files directly after compressing them. So, you don’t have to explore the storage of your device and find the required file for sharing.
In addition to a simple way of learning how to compress PDF on Mac, you will also find its other tools pretty simple. Whether you are looking to modify your file or read it in different orientations, you will find almost every necessary tool in its toolkit.
Abide by this discussion, let us show you how to compress PDF in MacBook using this built-in application.
Step 1. Open your PDF file with Preview on your Mac device.
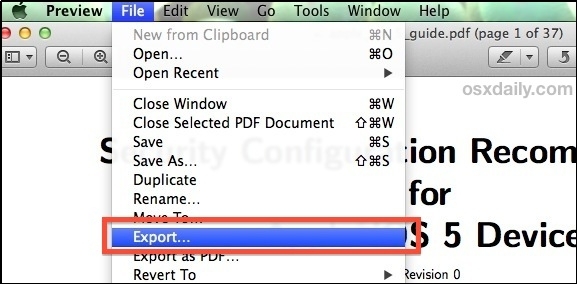
Step 2. From the dropdown menu from “File”, click on the “Export” option.
Step 3. In the pop-up box, you will see the “Format” option, make sure to set it as “PDF”.
Step 4. Also, choose “Reduce File Size” from the dropdown menu given besides “Quartz Filter”.
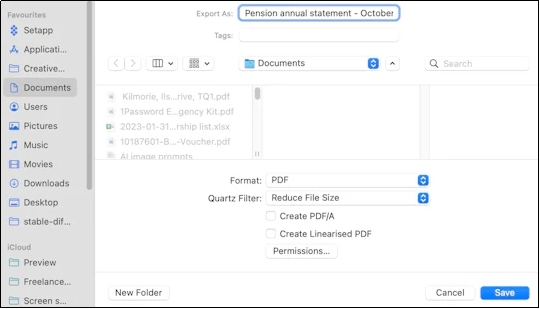
Step 5. Hit the “Save” button to get the file with a reduced size.
The entire process of saving your files will not take more than a few seconds. You can open your new files to check the quality of content after compressing. Undoubtedly, this process can be done using the built-in application of the Mac.
However, the process of learning how to compress a PDF on Mac is a little complex. You may not be able to understand it unless you have tried it several times. That’s why we have discussed it lower in our list of best methods to compress files on Mac.
Part 4. How to Compress a PDF on a Mac Using Online Tools?
Sometimes, you may be interested in using online tools to understand how to compress a PDF on Mac and save space. Many users want to access such tools from there they can download the compressed files and delete the original ones.
If you are one of those users and looking for the right approach to do this, you have come to the right section. Here, you can read 3 best tools that you can access online to compress your PDF files.
Xodo PDF (https://xodo.com/compress-pdf)
On the top of the list of online tools, we have ranked Xodo PDF because of its multiple functions. It offers multiple online tools for various tasks related to PDF files. You can either choose to delete PDF pages, compress files, or change the orientation of your file’s pages using its online resources.
Abide by its other features, it also enables you to upload your files from various storage spaces. Whether you have saved your file in the G-drive or local storage, it enables you to upload the files directly from that section.
This multiple file uploading option makes it a good Sejda alternative that is considered a good PDF reader and editor with online access. Moreover, the interface of this online tool has been kept simple to allow every user to understand how to compress a PDF on Mac using this tool.
For your assistance, we still have discussed the right steps to follow to compress your files using it.
Step 1. Browse the “Compress PDF” tool by Xodo in your browser.
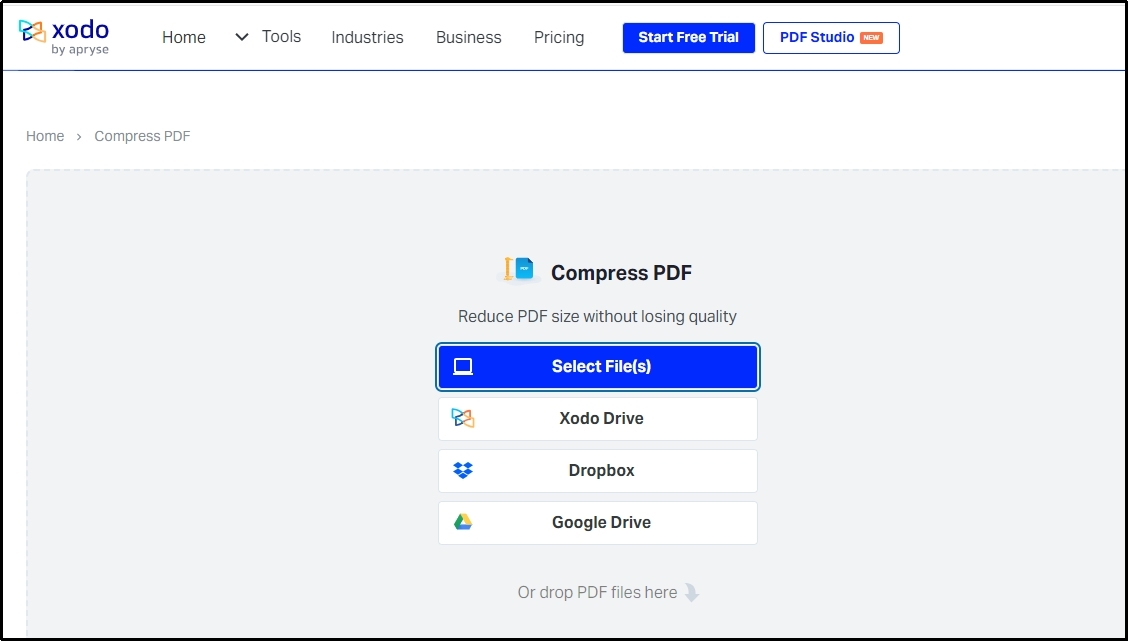
Step 2. Choose from “Low” or “High” compressing levels from the right menu bar.
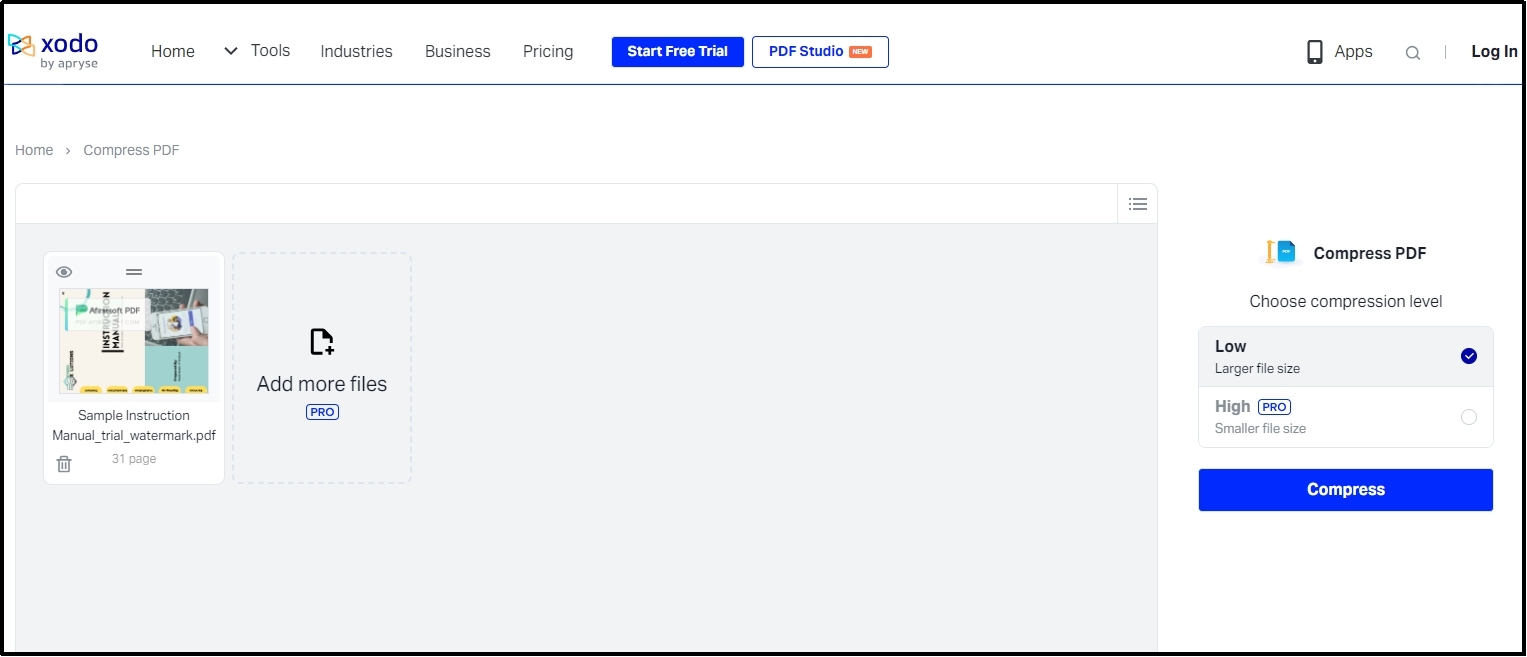
Step 3. Hit the “Compress” button to start the process and download the file with a reduced size.
It is pretty simple to understand the workings of this online tool. However, its advertisement display working mode may irritate you while using this online tool.
Small PDF (https://smallpdf.com/compress-pdf)
Another good online tool to compress PDF files is offered by Small PDF. This online tool is much faster than other online compressors. Moreover, it won’t damage the quality of the content and reduce its size by up to 90%.
This online tool is a good pick for everyone because of its unlimited file uploading size. You can upload a file of any size to this online tool and it will reduce its size nicely.
In its premium version, it can compress the file up to 99% of the original size. But, it can drastically change the resolution of the images and graphics available within your document.
Abide by this discussion, let us help you understand how to compress a PDF on Mac using this online tool.
Step 1. Browse this online tool and open your file by clicking on the button.
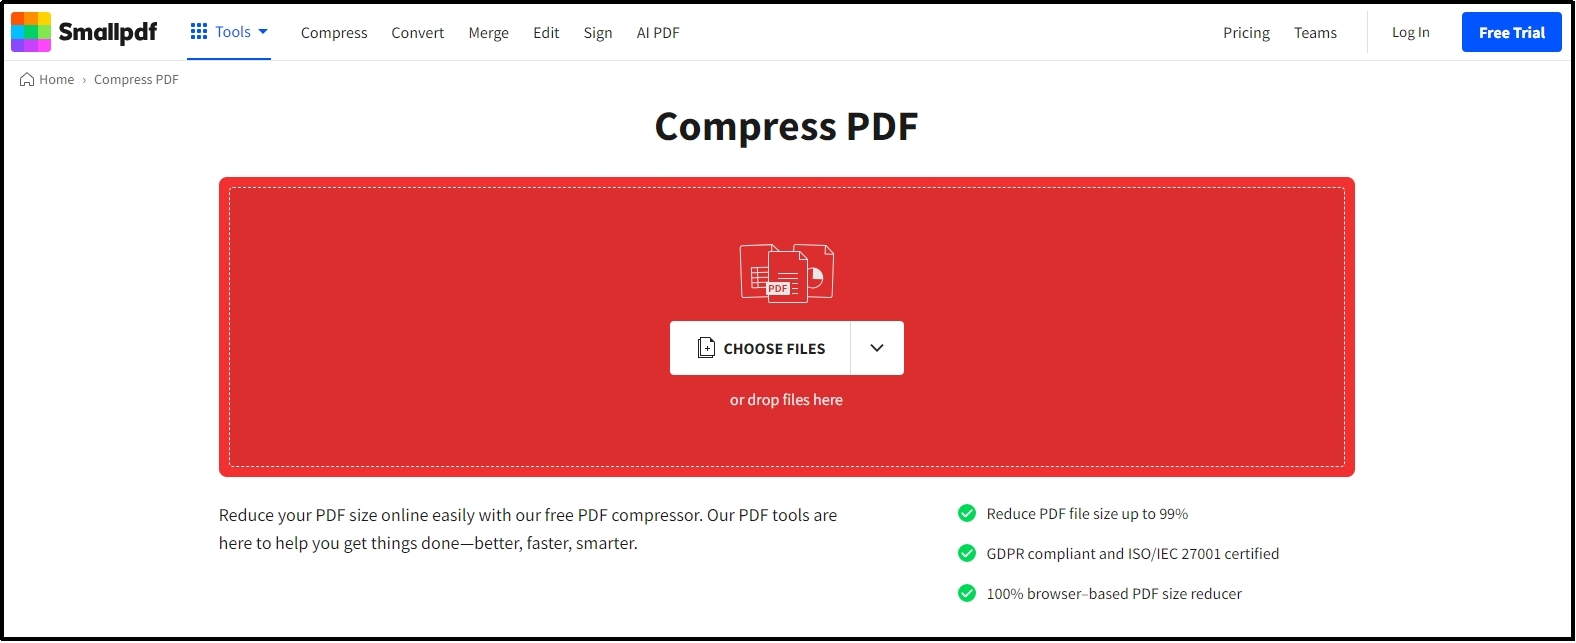
Step 2. Choose the compressing level by clicking on the circle given beside the name of the level.
Step 3. Hit the “Compress” button to start the processing.
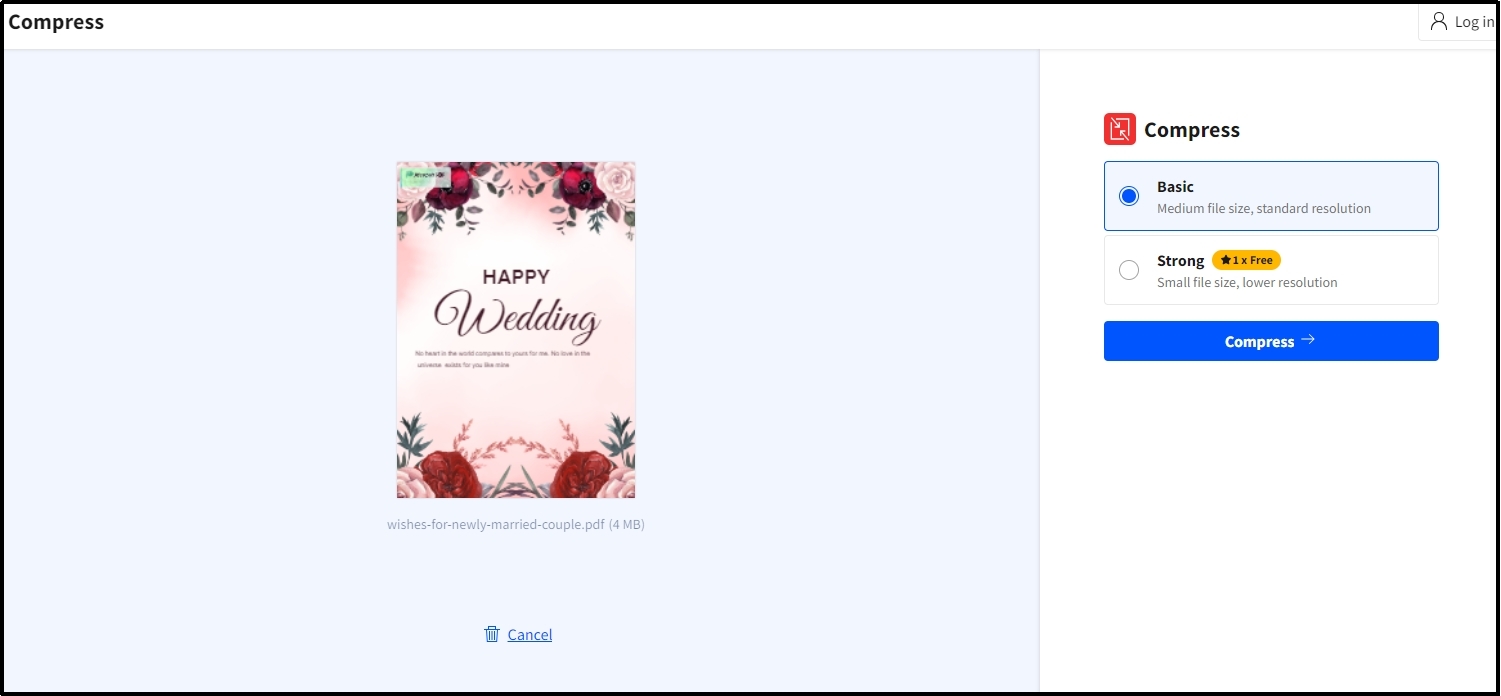
Step 4. Click on the “Download” button to get the file with reduced size on your device.
While compressing, it may take a few minutes the upload and compress. So, you may have to wait for a few minutes to download the file with a reduced size.
Free PDF Convert (https://www.freepdfconvert.com/compress-pdf)
For those looking for an instant solution, Free PDF Convert can be a good choice. Its online PDF compressor will help you understand how to compress a PDF on Mac quickly. Using this, you won’t have to wait for a few minutes to upload the file or compress it.
Moreover, it enables you to upload your files from different cloud storage spaces like G-drive and Dropbox. Abide by this, you can also upload the file using its direct link from the internet. It will help you download the file with a reduced size instead of the original file with a heavy size.
Its interface has been kept simple to let you understand how to compress PDF file in MacBook to save storage space. Here are the steps that you have to follow while using this online compressor.
Step 1. Browse this tool in your browser and upload your file.
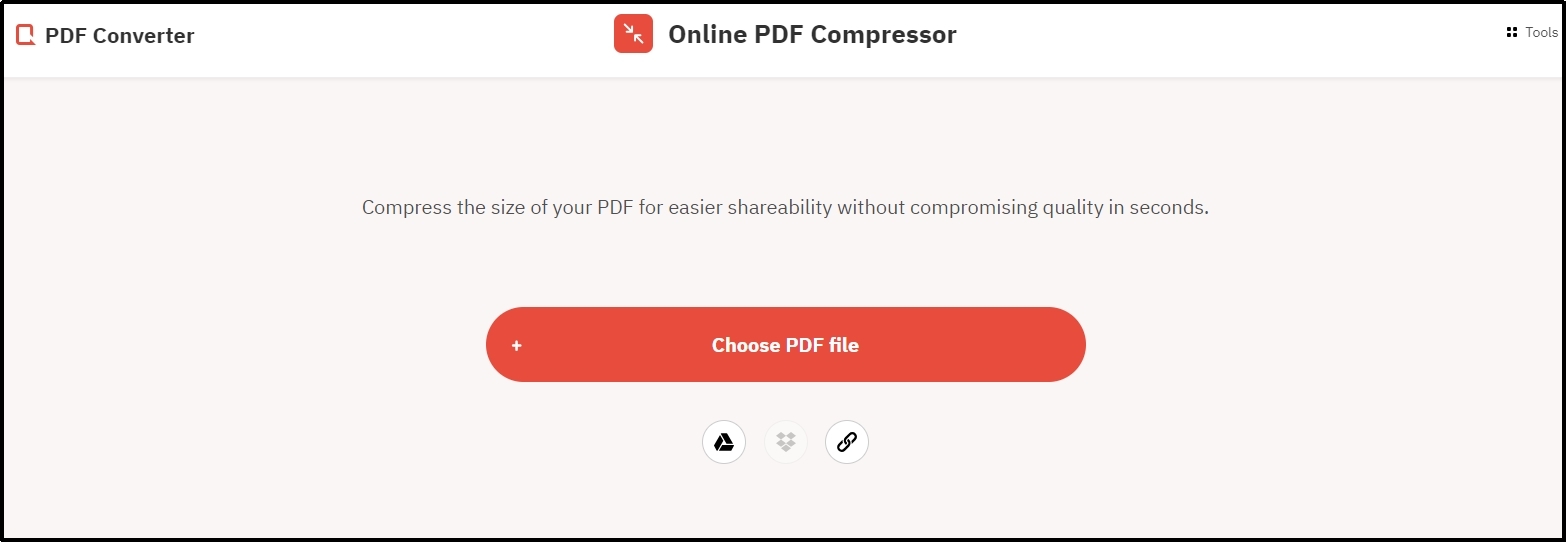
Step 2. Choose the compressing level and hit the “Compress” button.
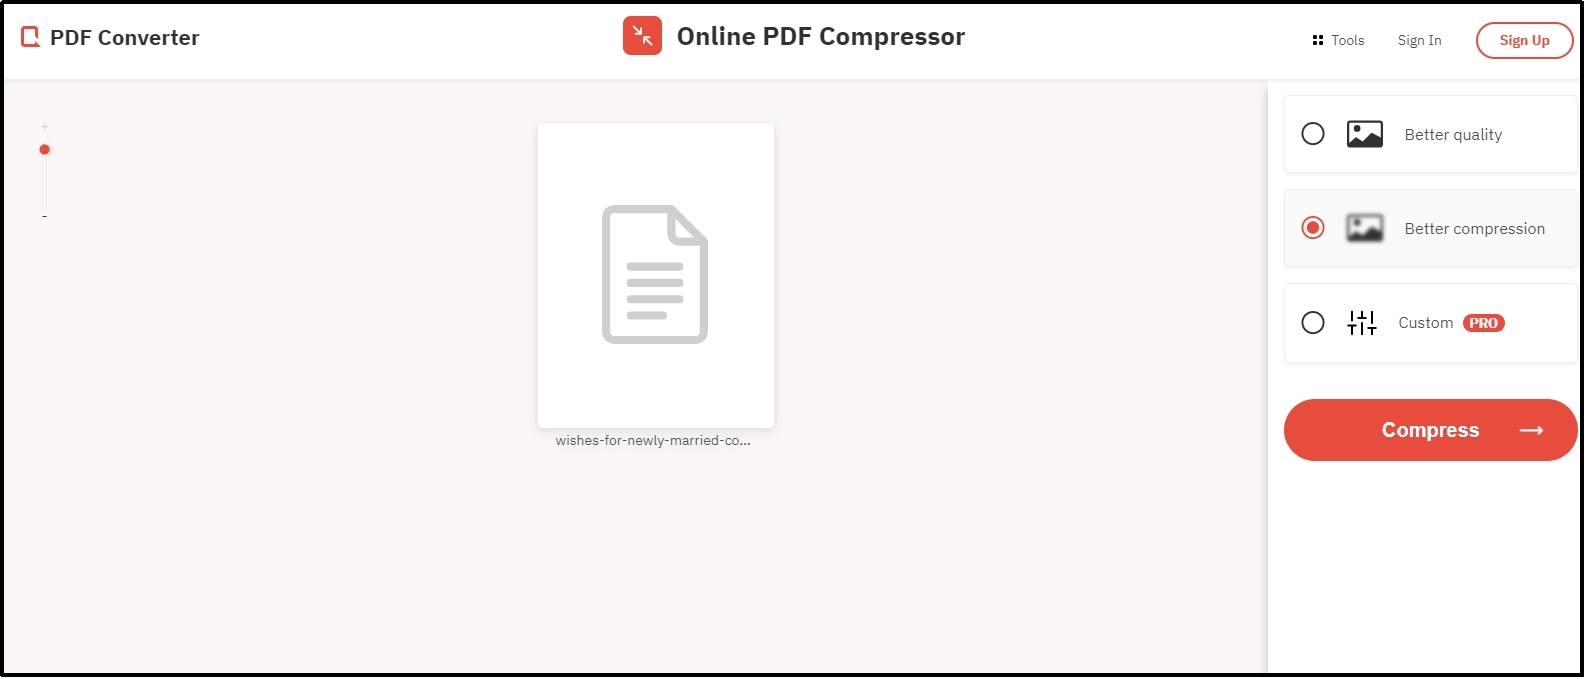
Step 3. Download the compressed file by clicking on the button shown on the screen.
These steps will help you download compressed files on your device instead of downloading large PDF files. The only drawback of this online tool is its file acceptance. You will experience failed uploading because of the heavy file sizes in this tool.
- 100% secure
- 100% secure
- 100% secure
Part 5. Summary
We hope you don’t need to search “How can I compress a PDF file on Mac” after reading this blog. You can easily learn the right steps to follow while compressing your files and getting new files with reduced sizes.
Undoubtedly, you can use any tool that we have discussed above to guide you on how to compress a PDF on Mac. But Afirstsoft PDF has the best online solution because of its quality protection facility. Your document’s quality will not be impacted a lot while using this online resource.


