User Guide of Afirstsoft PDF
Get detailed information about Afirstsoft PDF step by step.
Sign up/Login
To better use our Afirstsoft PDF, you can log in with a valid email address, an Apple ID or a Google account. Only by signing in with an account, you can be able to access the free features of Afirstsoft PDF:
- Cloud: 2GB storage for uploading files, with a single file size limit of 5MB.
- Convert: Convert your files twice a day for free.
- Batch Convert: Convert multiple files at a time.
- AI Feature: Use AI assistant to summarize and ask questions about PDFs
(Note: if you want to save files without a watermark or perform unlimited conversions with Afirstsoft PDF, you can click "Buy Now" to upgrade to a subscriber.)
Here are the detailed steps to log in to Afirstsoft PDF:
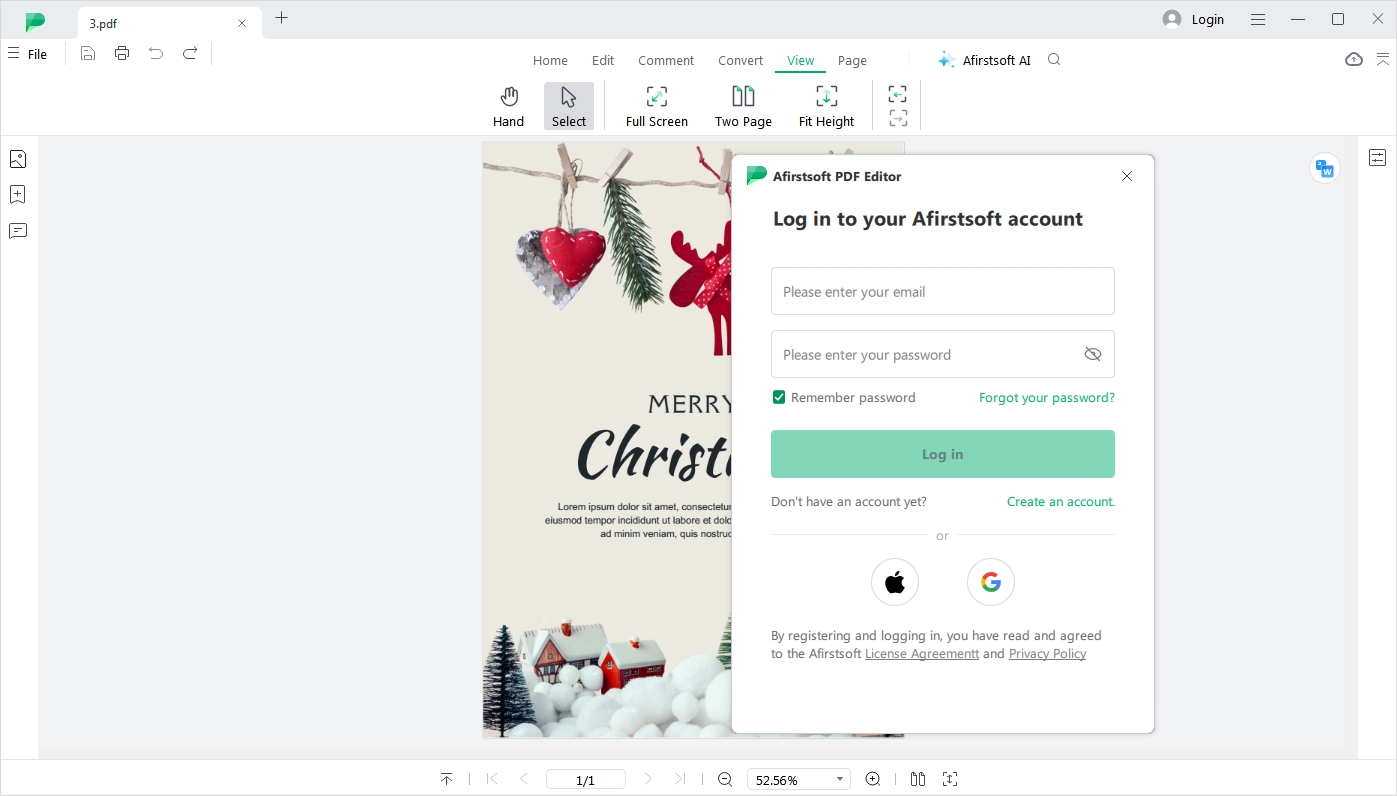
First, open Afirstsoft PDF. Click the "Login" button in the upper right corner to open the login window.

1. Login via email address
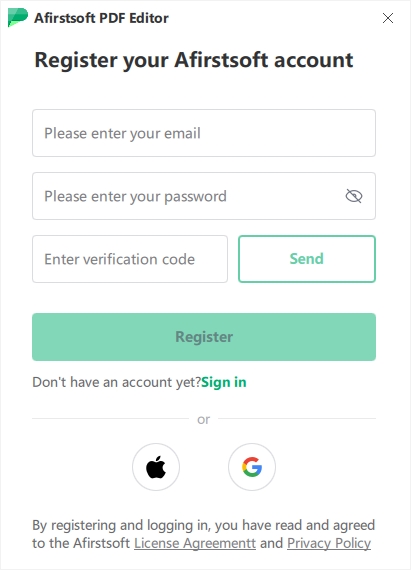
If you are logging into Afirstsoft PDF for the first time, click "Create an Account" to register. Use a valid email address to set up your account, create a password, and enter the verification code sent to your email to complete the registration process.

After completing the account registration, you can log in to Afirstsoft PDF using your email and password.
If you forget your password, click "Forgot your password?" to reset it.
2. Login via Apple ID
Click the Apple icon, link your Apple ID on the opened page, and complete the authorization to successfully log in to Afirstsoft PDF using your Apple ID.
3. Login via Google account
Click the Google icon, link your Google account on the opened page, and complete the authorization to successfully log in to Afirstsoft PDF using your Google account.
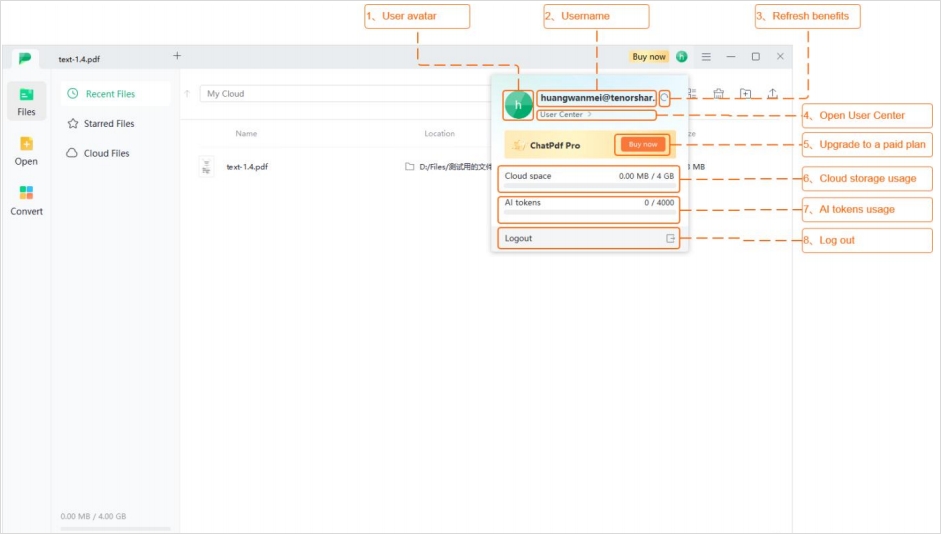
After logging in, you can click on the account avatar in the upper right corner to access your personal information, including your username, cloud storage, AI tokens, and more.
Feature Explanation:

2. Username: By default, the username is the part of the email address before the "@" symbol (e.g., if the email is username@test.com, the username is "username"). Version 1.0 currently does not support changing the username.
3. Refresh User Benefits: Clicking this option can refresh the user's account benefits. For instance, after upgrading to a paid plan, if the benefits information here is not updated, users can click here to refresh the current status.
4. User Center: Clicking this option can redirect to the web version of the user center page.
5. Upgrade to Paid Plan:
a. For free users, this button displays an upgrade option. Clicking it will open the page for upgrading to a paid plan.
b. For paid users, this button displays the expiration date of their current plan.
6. Cloud Storage Usage: Displays the available cloud storage space for the user's account and shows the current usage.
7. AI Tokens Usage: Displays the available AI token count for the user's account and shows the current usage.
8. Log Out: By clicking this option, you can log out the current account.

